Automating an AI Newsletter with n8n: Step-by-Step Guide

Automating an AI Newsletter with n8n: A Story From Chaos to Clarity

On a rainy Tuesday night, Mia stared at the blinking cursor in her newsletter editor. She was the content lead at a fast-growing AI startup, and her weekly AI newsletter had quietly become a core part of the brand. Thousands of subscribers. High expectations. Zero time.

Her problem was not finding AI news. It was drowning in it.

Slack channels full of links, markdown notes in storage buckets, tweet threads bookmarked “for later” that never came. Each edition took hours of manual curation, copy-pasting, summarizing, and formatting. The structure had to stay consistent, the sources had to be traceable, and nothing could slip through the cracks.

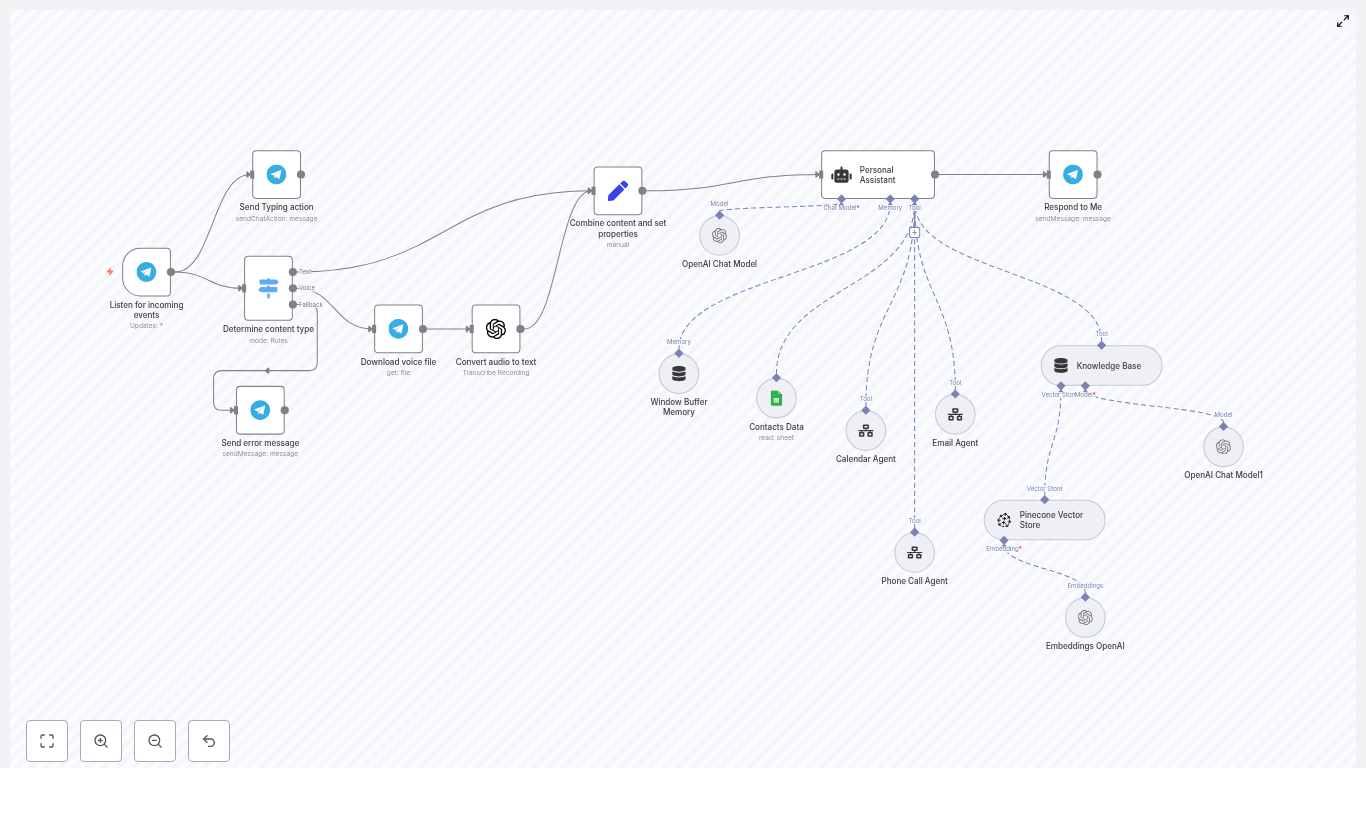
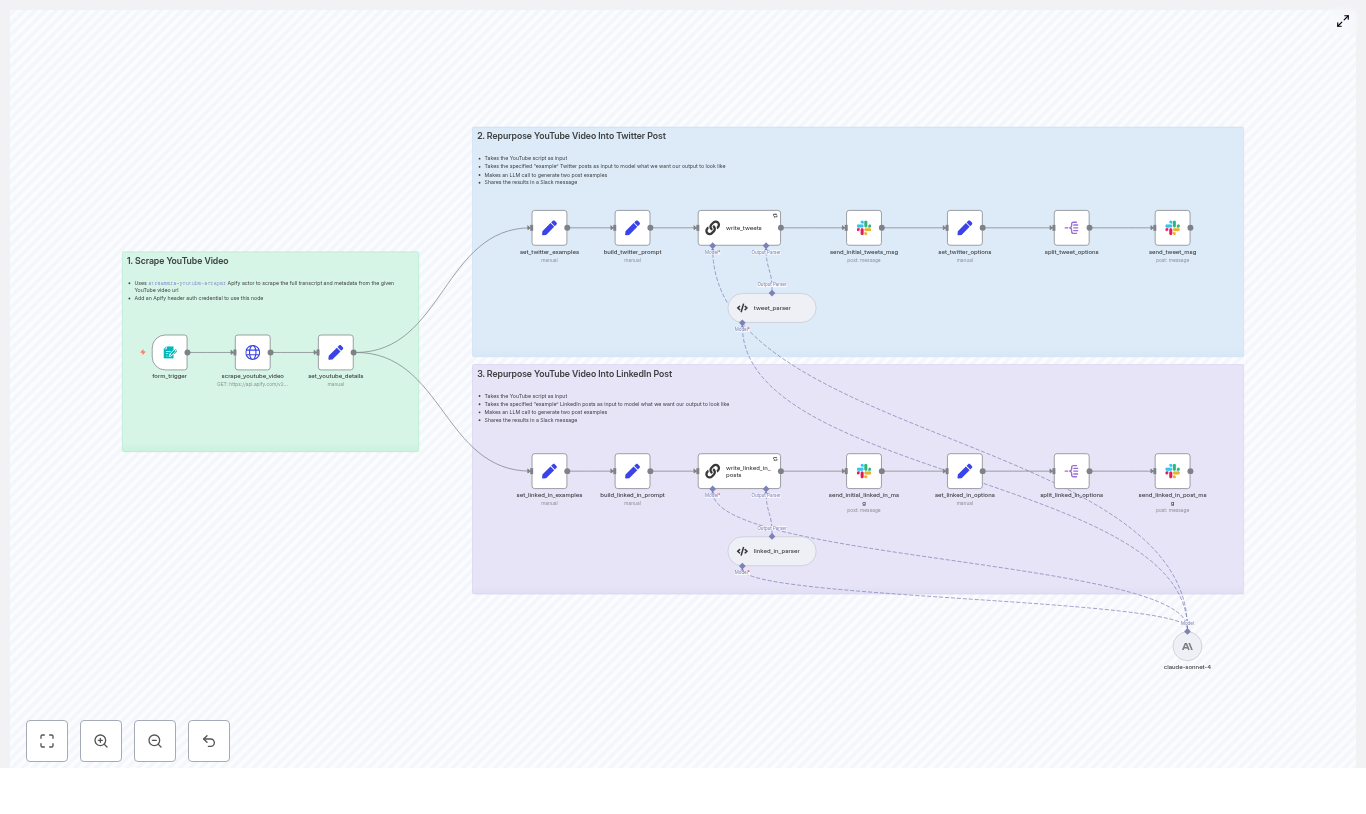
After another 3-hour editing session, Mia realized this was not sustainable. She needed a pipeline, not a patchwork of tabs. That is when she discovered an n8n workflow template called “Content – Newsletter Agent”, built specifically to automate AI newsletter production while keeping humans in the loop.


The Pain: Why Mia Needed Newsletter Automation

Mia’s weekly process looked like this:

  • Dig through markdown files and tweets to find recent AI news
  • Manually filter out old content and previous newsletter items
  • Summarize each story in a consistent Axios-style format
  • Send drafts to Slack, collect feedback, and rewrite subject lines
  • Assemble everything into a single markdown file for publishing

Every edition meant hours of repetitive work. She worried about:

  • Time: Curating timely AI news consumed entire afternoons
  • Consistency: The structure and tone varied when she was rushed
  • Traceability: Tracking identifiers and external links was messy

She did not want a fully “hands-off” AI newsletter. She wanted a reliable workflow that handled the grunt work while keeping her editorial judgment at the center. That balance of automation and human oversight is exactly what the n8n “Content – Newsletter Agent” template promised.


The Discovery: A Newsletter Agent Built on n8n

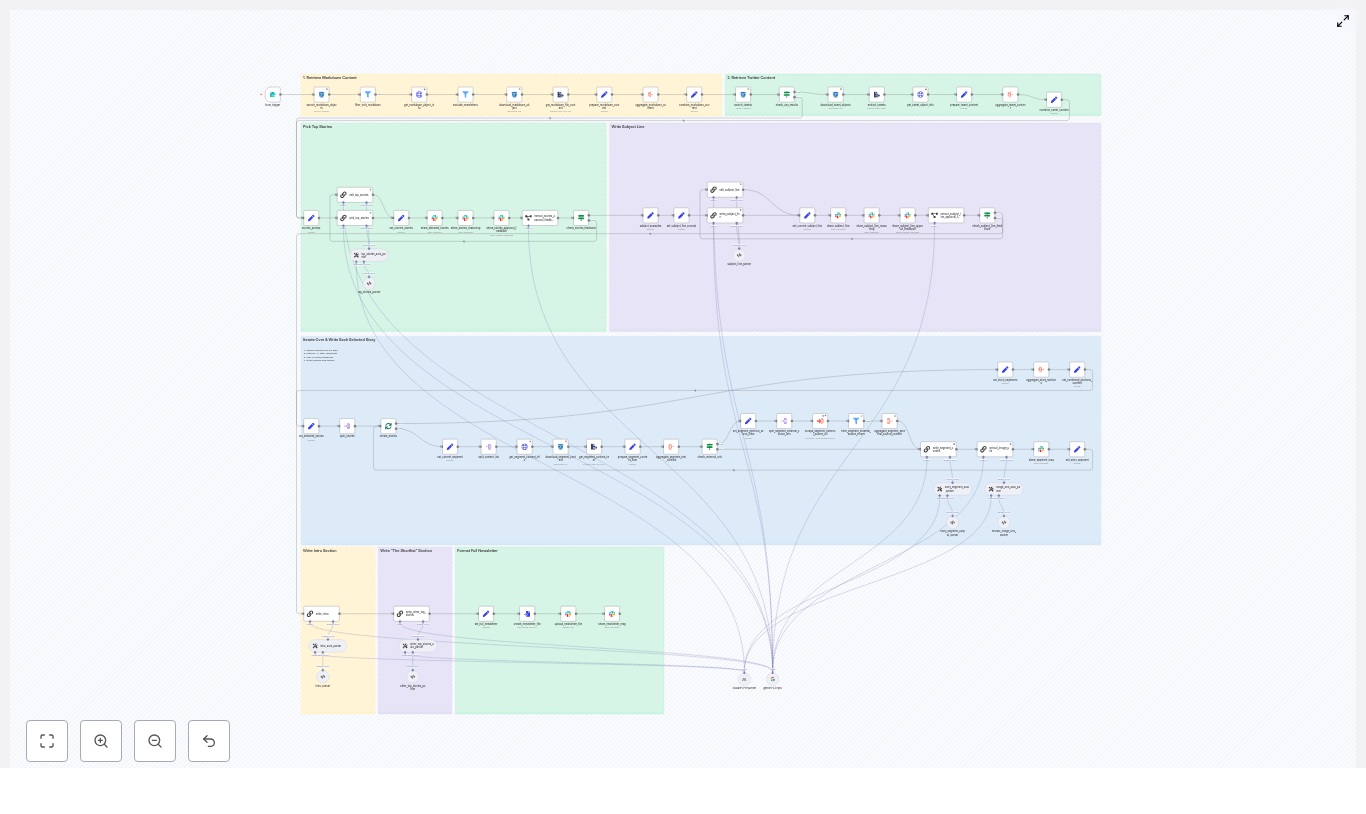
Mia opened the template overview and immediately noticed how the workflow was structured into clear layers. It was not just a chain of random nodes. It was an architecture designed for repeatable content production:

  • Content ingestion: Locate markdown files and tweets in R2/S3 for a chosen date
  • Filtering and enrichment: Remove irrelevant or prior newsletter content, fetch metadata, and extract text
  • Story selection: Use a LangChain-driven node to pick four top stories
  • Segment writing: Generate Axios-style sections for each selected story
  • Editorial loop and assets: Coordinate approvals in Slack and export a ready-to-send markdown file

For the first time, Mia could see her chaotic manual process reflected as a structured automation pipeline. So she decided to test it on her next issue.


Rising Action: Mia’s First Run With the Template

Starting the Workflow: The Form Trigger

The morning of her next edition, Mia opened n8n and triggered the workflow with a simple form. It asked for:

  • The newsletter date, which would define the scope of content
  • Optional previous newsletter text, so the system could avoid repeating stories

Behind the scenes, that date parameter told the workflow where to look in the data-ingestion bucket in R2/S3. Nodes performed a prefix search to list all files for that day, then filtered them to keep only markdown objects. The process that used to mean endless folder browsing now happened in seconds.

Metadata, Tweets, and the Hidden Details

Next, Mia watched the logs as the workflow handled each markdown artifact:

  • It called an internal admin API to fetch file metadata like type, authors, and external-source-urls
  • It downloaded each file and extracted the raw text for analysis

At the same time, a parallel path kicked in for tweets. The workflow searched for tweet objects, downloaded them, and mapped them into canonical tweet URL formats. All of Mia’s scattered tweet references were suddenly normalized and ready for curation.

Keeping the Past in the Past: Dedupe Logic

Mia had always worried about accidentally repeating a story she had covered before. The template addressed that too.

A filter node checked each incoming item’s metadata to:

  • Exclude files already marked as newsletter-type content
  • Compare against the “Previous Newsletter Content” she had supplied to avoid duplicate coverage

Her fear of “Did I already write about this?” disappeared. The workflow handled it automatically.


The Turning Point: Letting an LLM Pick the Top Stories

Handing Curation to a LangChain Node

Then came the moment Mia was most skeptical about: letting an LLM help choose the top stories.

The workflow used a LangChain-driven node that received a combined batch of markdown and tweet content. Instead of returning a messy blob of text, the node was primed with a long, strict prompt that defined:

  • The audience and editorial style
  • Selection constraints, such as picking exactly four top stories
  • An exact JSON schema for the output

The result was a structured response containing:

  • Story titles
  • Summaries
  • Identifiers
  • External links

Instead of spending an hour deciding which pieces to feature, Mia reviewed a clean, machine-curated shortlist that already respected her editorial rules.

Deep Dive Per Story: Aggregation and Context

Once the four stories were selected, the workflow split them into batches and processed each one in turn. For every story, n8n:

  • Resolved identifiers and fetched each referenced content piece via API or S3
  • Aggregated text from all sources, plus any external URLs using a scrape workflow when needed
  • Produced a single consolidated content blob that included metadata, source links, and raw text

Mia used to manually open each source, skim, summarize, and cross-check links. Now the workflow delivered a rich, structured input for writing.


Resolution Begins: From Aggregated Data to Editorial-Ready Sections

Writing Axios-Style Sections Automatically

The next step felt like magic to Mia.

A specialized LangChain prompt took each aggregated story blob and generated a complete newsletter segment in a style she recognized: Axios or Rundown-like formatting. Each section included:

  • The Recap – a concise summary of the story
  • Unpacked – three bullets that explored context or implications
  • Bottom line – a clear takeaway

The node enforced strict writing constraints so the output was consistent and ready to use:

  • Proper markdown formatting
  • Bullet rules
  • Link limits

Her newsletter no longer depended on how tired she felt that day. The structure was steady, the tone stayed on-brand, and she still had room to tweak wording where needed.

Images and Visual Assets, Without the Guesswork

Visuals had always been an afterthought for Mia. She often scrambled at the last minute to find a hero image.

The workflow changed that by running an image extraction step. A node scanned the aggregated content for direct image URLs in formats like jpg, png, and webp. It then:

  • De-duplicated image URLs
  • Returned a clean list that editors could use to pick hero images per section

Instead of hunting for visuals, Mia had a curated list ready for her design or editorial team.


The Editorial Loop: Slack, Subject Lines, and Human Control

Composing the Intro and Shortlist

With the main sections written, the workflow shifted into full newsletter mode. It automatically:

  • Generated an intro section to set the tone of the edition
  • Created a “Shortlist” of other notable stories that did not make the main four

Then it turned to one of Mia’s most debated tasks: subject lines.

Subject Line Candidates and Slack Approval

The template used another focused prompt to craft subject line candidates, along with reasoning behind each option. Instead of Mia staring at a blank subject line field, she reviewed several on-brand options.

At this point, the n8n workflow moved the process into Slack, where Mia and her team already lived. It:

  • Shared the top stories and subject line options to a specific Slack channel
  • Waited for an approve or feedback response using sendAndWait
  • Parsed responses and either continued or triggered focused edit flows

This kept a human-in-the-loop at critical decision points. Mia could still veto a subject line, adjust a summary, or refine the intro, but she no longer had to build everything from scratch.


The Final Output: From Workflow to Publish-Ready Markdown

Once Mia approved the content in Slack, the workflow moved into its final stage:

  • Combined all sections, intro, and shortlist into a single markdown document
  • Converted it into a file
  • Uploaded it to Slack, or pushed it to another publishing destination

Throughout the process, the pipeline preserved identifiers and external-source-urls so every story was traceable back to its origin. This gave Mia confidence in her sourcing and simplified audits later.

What used to be a half-day ordeal now felt like a guided review process. She still owned the editorial decisions, but the mechanics were handled for her.


Behind the Scenes: How Mia Kept the Workflow Reliable

As Mia grew more comfortable with the template, she started tuning it for reliability and performance. A few practical choices made a big difference:

  • Strict, schema-driven prompts: She kept the LLM prompts tightly defined and required a specific JSON schema. That reduced parsing errors and kept downstream nodes deterministic.
  • Rate-limiting external scrapes: For external URLs, she configured retries and backoff to avoid timeouts during story aggregation.
  • Metadata caching: By adding a small cache layer for metadata lookups, she sped up repeated executions.
  • Granular error handling: She used n8n’s continue-on-error only where it made sense, and bubbled critical failures directly to her editorial Slack channel.
  • Diverse input testing: She tested the workflow with large, small, and malformed markdowns and tweets to validate LLM prompts and extraction logic.
  • Mandatory human review: She kept the Slack approval step required for both subject lines and top-story confirmation to maintain editorial standards.

The result was a workflow that behaved predictably, even when the inputs were messy.


Security, Governance, and Editorial Trust

Because the newsletter touched internal systems and external platforms, Mia also had to think about security and governance.

Within n8n, she:

  • Stored API keys and S3 credentials in n8n credentials storage instead of hardcoding them
  • Restricted who could trigger the form that kicked off the workflow
  • Granted Slack access tokens only to the CI or editor account used for publishing

For auditability, she ensured that every generated section embedded its identifiers and external-source-urls. That meant anyone on the team could trace a summary back to its raw source if needed.


How Mia Extended the Template for Her Team

After a few successful editions, Mia started thinking beyond “just get this week out the door.” The template made it easy to extend the workflow with new capabilities, such as:

  • Automated A/B subject line testing: Send different subject line variants to a subset of the list and pick the best performer for the full send.
  • Multi-language editions: Run the generated stories through a translator and adapt prompts for local audiences in different regions.
  • Personalized sections: Combine newsletter content with subscriber metadata to generate tailored intros or CTAs for specific segments.

The same foundation that saved her hours each week also became a platform for experimentation.


What Changed For Mia

Within a month, Mia’s relationship with the newsletter had changed completely. The “Content – Newsletter Agent” template turned a stressful manual ritual into a repeatable, traceable, and collaborative pipeline.

She gained:

  • Faster production cycles: Most of the heavy lifting, from ingestion to drafting, happened automatically.
  • Consistent voice and structure: LLM prompts and formatting rules kept every issue on-brand.
  • Trusted sources: Identifiers and external links were preserved at every step.

Most importantly, her team could focus on editorial judgment rather than mechanical tasks. Automation did not replace their expertise. It amplified it.


Try the Same n8n Newsletter Workflow

If Mia’s story feels familiar, you can follow the same path. The n8n “Content – Newsletter Agent” template is ready to plug into your stack.

To get started:

  • Clone the n8n template
  • Connect your R2/S3 storage and Slack credentials
  • Swap in your own LangChain model keys or provider

If you want help tailoring prompts, governance rules, or approval flows to your editorial process, you can work with a team that has implemented this pipeline before.

Call to action: Download the workflow or request a customization consultation to adapt this newsletter automation pipeline to your own content operation.

Automate Email Workflows with n8n & OpenAI

Automate Email Workflows with n8n & OpenAI

If you spend way too much time reading, searching, and writing emails, this n8n Email Agent template might feel a bit like magic. It connects OpenAI (via LangChain) with Gmail so you can hand off routine email work to an automated agent. In this guide, we will walk through what the template actually does, when you would want to use it, and how to set it up in n8n without stress.

Think of it as your own AI-powered email assistant that understands natural language, looks up messages, drafts replies, and sends emails for you, all inside a single n8n workflow.

Why use this n8n Email Agent template?

Let’s start with the big picture. This template is perfect if you want to:

  • Automate repetitive email tasks like follow-ups, summaries, or quick replies.
  • Use natural language prompts instead of building complex logic for every scenario.
  • Combine OpenAI’s language skills with Gmail’s search and sending features.
  • Keep control with clear rules, validation, and retry logic.

In other words, it helps you delegate email busywork to an AI agent while you stay in charge of the important decisions.

What this template actually does

At its core, the Email Agent template orchestrates a small “team” of n8n nodes that work together to manage email tasks. Once it is running, the workflow can:

  • Receive a trigger to start an email workflow (for example from a manual run, schedule, or webhook).
  • Use an OpenAI chat model via LangChain to understand what you want and decide on the next actions.
  • Search Gmail for messages, like unread emails or messages from a specific sender.
  • Send emails on your behalf using Gmail OAuth2 credentials.
  • Return a clear success result or follow an error path with retry logic.

You can ask it to do things like “Send a follow-up email to Sam about our pricing” or “Show me unread emails from john@example.com and summarize them”, and the workflow figures out which tools to call and how to respond.

Meet the key pieces of the workflow

The template is built from several n8n nodes that each play a specific role. Let’s walk through them in a friendly, non-intimidating way.

1. Execute Workflow Trigger

This is where everything starts. The Execute Workflow Trigger node kicks off the workflow and can be configured in different ways:

  • Run it manually from the n8n editor.
  • Schedule it to run at specific times.
  • Call it via a webhook or from another workflow.

It is the entry point that receives your instructions, either as natural language (“Draft an email to…”) or as structured data.

2. Email Agent (LangChain Agent)

This is the brain of the operation. The Email Agent node uses LangChain to connect to the OpenAI chat model and to the Gmail tools available in the workflow.

What it does behind the scenes:

  • Reads your input and figures out your intent.
  • Extracts important details like recipient email, subject line, number of messages to fetch, and email body.
  • Decides whether it needs to read messages from Gmail or send a new email.
  • Uses a system message (included in the template) that tells it how to behave, how to write emails, and how to handle unread-email queries.

You can think of the Email Agent as a smart router that understands language and picks the right Gmail action to use.

3. OpenAI Chat Model

The OpenAI Chat Model node is the language model that powers the agent’s intelligence. It is responsible for:

  • Parsing intent from your prompt.
  • Filling in “slots” such as recipient, subject, and email body.
  • Implementing the logic defined in your system message, including how to format outputs and which tools to call.

This is where your prompt engineering skills come into play, since the behavior of the agent depends heavily on how you instruct this model.

4. Get Messages (Gmail)

Whenever the agent needs to read existing messages, the Get Messages Gmail node steps in. For example, if you say:

“Show unread emails from john@example.com.”

The workflow will use this node to search Gmail and return the matching messages. You can configure:

  • Filters like sender or labels.
  • Limits on how many messages to fetch.
  • Other search parameters to refine results.

5. Send Email (Gmail)

When it is time to actually send something, the Send Email Gmail node takes over. It:

  • Builds a plain-text email using the agent’s output.
  • Uses Gmail OAuth2 credentials to send the message from your account.
  • Fills in recipient, subject, and body with values returned by the Email Agent.

This is how your AI-generated drafts turn into real emails sent from your Gmail account.

6. Success / Try Again

To keep things clean and easy to monitor, the template ends with two simple Set nodes:

  • Success – captures the agent’s final response when everything works as expected.
  • Try Again – handles errors and gives you a clear path to add retry logic or alerts.

This structure makes it much easier to debug and to extend the workflow later.

How to set up the n8n Email Agent template

Ready to get this running in your own n8n instance? Here is a straightforward setup flow you can follow.

  1. Create or open your n8n account
    Log in to n8n and open the workflow editor where you will import or recreate the template.
  2. Import or rebuild the template
    Add the nodes shown in the template diagram or import the workflow directly from the shared template. Make sure all the key nodes are included: Execute Workflow Trigger, Email Agent, OpenAI Chat Model, Gmail Get Messages, Gmail Send Email, Success, and Try Again.
  3. Configure credentials
    You will need two main sets of credentials:
    • OpenAI API key – set this in the OpenAI Chat Model node credentials.
    • Gmail OAuth2 credentials – used by both the Get Messages and Send Email Gmail nodes.

    Store these in n8n’s credential manager rather than hard-coding them.

  4. Tune the Email Agent system message
    Open the Email Agent node and review the system message. This is where you:
    • Set the tone of voice for emails.
    • Define how the agent should sign off (for example, with your name or company name).
    • Add any business rules or constraints that matter for your organization.

    The template comes with explicit instructions, such as signing emails as a specific name. Edit these so they match your own brand and policies.

  5. Run a few test prompts
    Try something simple like:
    “Send an email to alice@example.com with subject ‘Meeting’ and body ‘Can we reschedule to Thursday?’”
    Check how the agent fills in the fields, sends the email, and what the Success output looks like. Adjust your prompts and system message as you go.

Best practices for a reliable email automation setup

Once the template is working, you can make it more robust with a few smart configuration choices.

Security and privacy first

Since this workflow touches both your email and OpenAI, treat credentials carefully:

  • Store OpenAI and Gmail credentials securely in n8n’s credential manager.
  • Use a Gmail account or service account with restricted access whenever possible.
  • Be cautious about sending sensitive information in prompts or email content.

Prompt engineering for predictable behavior

The more explicit your instructions, the more consistent the agent becomes. In the Email Agent system message, consider:

  • Defining clear rules for tone, structure, and length of emails.
  • Adding examples for common email types, such as:
    • Order confirmations
    • Meeting requests
    • Follow-up emails
  • Specifying exactly what information the model should always return.

This helps the OpenAI Chat Model behave more like a well-trained assistant instead of a freeform writer.

Control and validate outputs

Before anything gets sent out to real people, you want to be sure the details are right. The template already uses expressions to map values from the agent’s output, but you can go further:

  • Validate recipient email formats before sending.
  • Check that the subject line is present and not empty.
  • Add extra n8n nodes for stricter validation if your use case requires it.

This small bit of extra checking can save you from awkward mistakes.

Keep an eye on rate limits and costs

Both OpenAI and Gmail APIs have usage limits and potential costs attached. To stay on the safe side:

  • Monitor your OpenAI token usage.
  • Watch Gmail API quotas, especially if many workflows run in parallel.
  • Use batching or throttling nodes in n8n if you expect high volume.

Ways to customize and extend the template

Once the basic version is working, you can turn this into a more advanced email management system. Here are some ideas that build directly on the existing template:

  • HTML email templates
    Use the Gmail node’s HTML body option to send nicely formatted emails instead of plain text.
  • Attachments
    Add nodes that fetch files from storage or other apps, then include them using MIME encoding so the agent can send attachments.
  • Multi-step approvals
    Insert a manual confirmation step, a Slack message, or a dashboard check before sending certain emails, especially for sensitive communication.
  • Logging and audit trails
    Store copies of sent emails in a database or Google Sheet so you have a history of what the agent has done.
  • Advanced email parsing
    Use OpenAI to summarize incoming emails, extract action items, or pull out structured data from long threads.

Troubleshooting common issues

If something feels off, you are not alone. Here are a few typical issues and how to fix them.

Agent returns incorrect fields

If the agent is mixing up recipient and subject, or not returning the fields you expect, tighten up the system message. You can:

  • Ask the model to return a very specific JSON format.
  • Define the keys it must use, for example:
    • email_address
    • subject
    • email_body
  • Give one or two examples of valid outputs in the instructions.

Gmail authentication fails

If Gmail nodes are failing to connect:

  • Double-check your OAuth2 credentials in n8n.
  • Make sure the Gmail account actually has API access enabled.
  • Reauthorize the credential if tokens have expired or if you changed scopes.

Too many emails returned from Gmail

When the Get Messages node returns more emails than you want, try:

  • Lowering the limit in the Get Messages node configuration.
  • Using more specific filters, like date ranges, labels, or sender filters.
  • Letting the agent set dynamic limits, as demonstrated in the template, but with clear maximums.

Example workflows you can build with this template

Need some inspiration? Here are two concrete ways you can use the Email Agent template right away.

1) Read unread emails and summarize them

Set up the workflow so that when it is triggered, it:

  1. Fetches all unread emails from a specific sender or with certain filters.
  2. Uses the OpenAI model to summarize the content.
  3. Returns a concise digest you can read in seconds.

This is great for daily or weekly briefings, especially if you get a lot of similar emails.

2) Draft and send follow-up emails

In another scenario, you can have the agent:

  1. Find the last message thread with a specific contact.
  2. Draft a follow-up email based on that context.
  3. Pause for manual review and approval.
  4. Send the email via Gmail once you confirm.

This keeps you in the loop while saving time on writing repetitive follow-ups.

When this template is the right choice

You will get the most value from this Email Agent template if you:

  • Handle lots of repetitive email tasks like sales outreach, customer follow-ups, or internal notifications.
  • Want automation, but still need the option for human oversight.
  • Care about consistent branding and tone across all emails.

By pairing n8n automation with well-designed prompts, you get a flexible system that feels personal but runs on autopilot most of the time.

Wrap-up and next steps

The n8n Email Agent template gives you a no-code way to blend OpenAI’s language intelligence with Gmail’s powerful tools. With thoughtful prompt design, access controls, and a bit of validation, you can safely offload a lot of your everyday email work.

Ready to see it in action?

Call-to-action: Import the template into your n8n instance, connect your OpenAI and Gmail credentials, and try a few test prompts. If you would like a downloadable version of the workflow or a step-by-step video walkthrough, subscribe to our newsletter or get in touch with our team for a guided setup.

Want help tailoring this workflow for your team’s exact needs? Reach out for a hands-on setup or a custom n8n template designed around your specific use case.

Agentic RAG n8n Template — Step-by-Step Guide

Agentic RAG n8n Template – Technical Reference & Configuration Guide

This guide provides a technical deep dive into the Agentic RAG (Retrieval-Augmented Generation) n8n template (RAG AI Agent Template V4). It explains the workflow architecture, node responsibilities, data flow, and configuration details for building a knowledge-driven agent using Postgres + PGVector, Google Drive, and OpenAI embeddings. All steps, nodes, and behaviors from the original template are preserved and reorganized into a reference-style format for easier implementation and maintenance.

1. Conceptual Overview

1.1 What is an Agentic RAG Workflow?

Traditional RAG implementations typically follow a simple sequence: retrieve semantically similar document chunks from a vector store, then generate an answer with an LLM. The Agentic RAG template extends this pattern with an agent that can:

  • Select among multiple tools (RAG retrieval, SQL over JSONB, or full-document access).
  • Perform precise numeric and aggregated computations using SQL.
  • Handle both unstructured content (PDFs, Google Docs, plain text) and structured/tabular data (spreadsheets, CSV files).
  • Fallback to whole-document analysis when chunk-based context is insufficient.

This architecture improves answer accuracy, especially for numeric and tabular queries, supports deeper cross-document reasoning, and reduces hallucinations by grounding responses in explicit data sources.

1.2 Key Capabilities and Benefits

  • Agentic tool selection – The agent chooses between RAG, SQL, and full-document tools based on the query type.
  • Accurate numeric analysis – SQL queries run against JSONB rows stored in Postgres for spreadsheets and CSVs.
  • Whole-document reasoning – The agent can fetch entire file contents if chunked retrieval does not provide enough context.
  • Automated ingestion for tabular data – Schemas and row data are inferred and stored without creating new SQL tables per file.
  • Vector store hygiene – Scheduled cleanup keeps PGVector in sync with Google Drive, removing vectors for trashed files.

2. Workflow Architecture

2.1 High-Level Data Flow

The n8n template is a complete end-to-end workflow with the following main phases:

  • Triggering:
    • Google Drive Trigger for file creation and updates.
    • Chat/Webhook Trigger for user queries and agent sessions.
  • File ingestion:
    • File type detection and content extraction for Google Docs, Google Sheets, PDFs, Excel, CSV, and plain text.
    • Normalization of extracted content into a consistent text or tabular representation.
  • Text preprocessing:
    • Recursive character-based text splitting for unstructured content.
    • Chunk size control to optimize embeddings and retrieval quality.
  • Embedding & storage:
    • OpenAI embeddings for text chunks.
    • Storage of vectors, metadata, and tabular rows in Postgres with PGVector.
  • Agent execution:
    • LangChain-style agent that calls tools exposed via n8n Postgres nodes.
    • RAG retrieval, SQL queries, and full-document access for answering user questions.
  • Maintenance:
    • Periodic cleanup of vectors and metadata for deleted or trashed Google Drive files.

2.2 Core Storage Schema in Postgres

The template uses three primary Postgres tables:

  • documents_pg (vector store)
    • Stores embeddings for text chunks.
    • Includes original chunk text and metadata fields such as file_id and chunk indices.
  • document_metadata
    • Contains file-level metadata, including:
      • File identifier.
      • Title or name.
      • Source URL or Drive link.
      • Creation timestamp.
      • Schema information for tabular files.
  • document_rows
    • Stores tabular data rows as JSONB.
    • Enables flexible SQL queries using JSON operators.
    • Supports numeric aggregations and filters without creating a dedicated SQL table per file.

Using JSONB for rows allows the agent to run queries like sums, averages, or maxima over spreadsheet data while keeping the schema flexible across different files.

3. Node-by-Node Breakdown

3.1 Trigger Nodes

3.1.1 Google Drive Trigger

Purpose: Start the ingestion pipeline whenever a file is created or updated in a specific Google Drive folder.

  • Credentials: Google Drive OAuth credentials configured in n8n.
  • Configuration:
    • Target a specific folder by its folder ID.
    • Set the trigger to watch for file creation and update events.
  • Behavior:
    • Emits file metadata to downstream nodes for extraction and processing.
    • Supports different file types, which are later routed to the appropriate ExtractFromFile node.

3.1.2 Chat / Webhook Trigger

Purpose: Accept user messages or session inputs and pass them into the agent execution flow.

  • Typical usage:
    • Integrate with a chat UI.
    • Expose an HTTP endpoint for programmatic queries.
  • Data passed:
    • User query text.
    • Optional session or user identifiers for context management.

3.2 File Extraction & Text Processing Nodes

3.2.1 ExtractFromFile Nodes

Purpose: Convert various file formats into normalized text or structured rows.

File types handled include:

  • PDF documents.
  • Google Docs.
  • Google Sheets.
  • Excel files.
  • CSV files.
  • Plain text files.

Behavior and configuration notes:

  • Each node is configured to:
    • Detect and extract the main textual content or tabular data.
    • Produce consistent output fields so that downstream nodes can handle all file types uniformly.
  • Tabular sources (Sheets, Excel, CSV) produce row-based outputs that will be inserted into document_rows as JSONB.
  • Unstructured sources (PDF, Docs, text) produce raw text that is later split into chunks for embeddings.

3.2.2 LangChain Code + Recursive Character Text Splitter

Purpose: Segment large text documents into semantically coherent chunks that are suitable for embedding and retrieval.

  • Implementation:
    • Uses LangChain-style code inside n8n to implement a recursive character text splitter.
    • Leverages an LLM to detect natural breakpoints when appropriate.
  • Chunking strategy:
    • Ensures each chunk falls within configured minimum and maximum character sizes.
    • Merges smaller segments to avoid overly short chunks that degrade embedding quality.
  • Output:
    • Array of chunks, each with text in a specific property expected by the Embeddings node.

Edge case consideration: If no text is extracted or the splitter receives empty input, no chunks are produced and no embeddings will be created. This is typically surfaced as “no vectors inserted” and should be checked during troubleshooting.

3.3 Embeddings & Vector Storage Nodes

3.3.1 OpenAI Embeddings Node

Purpose: Convert text chunks into embedding vectors.

  • Model: Typically configured with text-embedding-3-small, although any supported OpenAI embedding model can be used.
  • Inputs:
    • Chunk text from the Recursive Character Text Splitter.
  • Outputs:
    • Vector representations for each chunk, along with the original text and metadata fields.

Configuration notes:

  • Ensure the property name containing the text matches what the Embeddings node expects.
  • Verify that OpenAI credentials are correctly set in n8n and that the model name is valid.

3.3.2 PGVector Storage in Postgres

Purpose: Persist embeddings in a PGVector-enabled Postgres table and expose them as a vector store tool for the agent.

  • Table: documents_pg
  • Data stored:
    • Embedding vectors.
    • Original chunk text.
    • Metadata fields such as:
      • file_id.
      • Chunk index.
      • Any additional attributes needed for filtering.
  • Usage:
    • Configured as a LangChain-style vector store tool within the agent.
    • Supports top-K similarity search for RAG queries.

3.4 Postgres Metadata & Tabular Data Nodes

3.4.1 document_metadata Table Initialization

Purpose: Maintain file-level metadata for all ingested documents.

  • Initialization:
    • Dedicated n8n nodes named similar to “Create Document Metadata Table” must be executed once to create the table.
  • Typical fields:
    • Document ID or file ID.
    • Title or filename.
    • Source URL or Drive link.
    • Creation or ingestion timestamp.
    • Schema definition for associated tabular files.

3.4.2 document_rows Table Initialization

Purpose: Store tabular rows from spreadsheets and CSV files as JSONB, enabling flexible SQL queries.

  • Initialization:
    • Run the “Create Document Rows Table” node once to generate the document_rows table.
  • Data model:
    • A row_data column of type JSONB for each row.
    • References to the originating document via a document or file ID.
  • Benefits:
    • No need to create one SQL table per spreadsheet or CSV file.
    • Queries can use JSON operators and explicit casting for numeric fields.

3.5 Agent & Tool Nodes

3.5.1 Agent Node (LangChain-style)

Purpose: Orchestrate calls to tools based on the user query, using a system prompt and reasoning loop.

  • Inputs:
    • User message from the Chat/Webhook Trigger.
    • Available tools exposed via PostgresTool nodes and vector store integration.
  • Outputs:
    • Final chat response, optionally including references or citations.
  • Behavior:
    • Prefers RAG-based vector retrieval for general Q&A.
    • Uses SQL tools for explicit numeric or aggregated questions.
    • Falls back to whole-document access when retrieval is insufficient.

3.5.2 PostgresTool Nodes (Agent Tools)

The agent is given several tools, each exposed via n8n PostgresTool nodes:

  • List Documents
    • Queries document_metadata to enumerate available documents.
    • Used by the agent to discover what content exists before choosing a retrieval strategy.
  • Get File Contents
    • Retrieves full text for a specific file.
    • Supports deeper analysis when chunk-level context is not enough.
  • Query Document Rows
    • Executes SQL queries over document_rows, including aggregations and numeric computations.
    • Ideal for questions like sums, averages, or maximum values in tabular data.
  • Vector Store RAG
    • Runs top-K similarity search against documents_pg.
    • Returns the most relevant chunks for grounding the agent’s response.

Prompting strategy: The system prompt instructs the agent to:

  • Use RAG retrieval as the default for general questions.
  • Use SQL tools only when explicit tabular or numeric precision is required, such as sums or averages.
  • Inspect available documents and call the full-document tool if vector retrieval does not yield sufficient context.

3.6 Cleanup & Synchronization Nodes

3.6.1 Vector Store Cleanup

Purpose: Keep the vector store aligned with Google Drive by removing embeddings and metadata for trashed or deleted files.

  • Triggering:
    • Typically scheduled using an n8n Cron node or similar mechanism.
  • Behavior:
    • Queries Google Drive for trashed files in the watched folder.
    • Removes corresponding entries from documents_pg and metadata tables.

Edge case: If the Google Drive API is not authorized to list trashed files, cleanup will not remove those vectors. Ensure the OAuth scope includes access to file metadata and trash status.

4. Configuration & Deployment Checklist

Use this checklist to bring the template into a working state:

  1. Provision Postgres with PGVector
    • Use a provider like Neon, Supabase, or a self-hosted Postgres instance.
    • Install and enable the PGVector extension.
  2. <

n8n WhatsApp Audio Transcription & TTS Workflow

n8n WhatsApp Audio Transcription & TTS Workflow

Imagine opening WhatsApp in the morning and seeing that every voice note, every audio question, and every voicemail has already been transcribed, answered with AI, turned back into audio, and sent as a helpful reply – all without you lifting a finger.

This is the kind of leverage that automation gives you. In this guide, you will walk through an n8n workflow template that receives WhatsApp media via a webhook, decrypts incoming audio, video, image, or documents, transcribes audio with OpenAI, generates a smart text response, converts it to speech (TTS), stores the audio on Google Drive, and sends a reply back via an HTTP API such as Wasender.

Use it to automate voice responses, voicemail transcriptions, or build conversational WhatsApp agents that work while you focus on higher value work. Treat this template as a starting point for your own automation journey, not just a one-off integration.

The problem: manual handling of WhatsApp voice notes

Voice messages are convenient for your customers and contacts, but they can quickly become a time sink for you and your team. Listening, interpreting, responding, and following up can eat into hours of your day, especially across different time zones.

Some common challenges:

  • Listening to every single voice note just to understand the request
  • Manually writing responses or recording reply audios
  • Copying data into other tools like CRMs, support systems, or docs
  • Missing messages because you were offline or busy

These are not just small annoyances. Over time, they slow your growth and keep you stuck in reactive mode.

The possibility: a smarter, automated WhatsApp workflow

Automation changes the story. With n8n, you can design a workflow that listens for WhatsApp messages 24/7, understands them with AI, and responds in a human-like way, in the same format your users prefer: audio.

This specific n8n workflow template:

  • Automatically decrypts WhatsApp media (image, audio, video, document) sent to your webhook
  • Uses OpenAI speech models to transcribe audio into text
  • Runs the text through a GPT model to generate a contextual, natural language response
  • Converts that response back into audio via text-to-speech (TTS)
  • Stores the generated audio in Google Drive and creates a public share link
  • Sends the audio reply back to the original sender through an HTTP API such as Wasender

In other words, you are building a full pipeline from WhatsApp audio to AI understanding and back to WhatsApp audio again. Once running, it saves you time on every single message and becomes a foundation you can keep improving.

Mindset: treat this template as your automation launchpad

This workflow is more than a recipe. It is a pattern you can reuse across your business. When you import it into n8n, you are not just solving one problem, you are learning how to:

  • Receive webhooks from external platforms
  • Decrypt and process media securely
  • Use OpenAI models for transcription and conversation
  • Handle files with Google Drive
  • Call external APIs to send messages back

Start with the template as provided, then iterate. Change the prompts, add logging, store transcripts, or connect to your CRM. Each small improvement compounds into a more focused, more automated workflow that supports your growth instead of holding it back.

The architecture: how the workflow fits together

The n8n template is built from a set of core nodes that work together as a pipeline:

  • Webhook node – receives incoming WhatsApp webhook POST requests
  • If node – filters out messages sent by the bot itself using a fromMe check
  • Set (Edit Fields) node – extracts useful fields such as the message body and remoteJid
  • Switch node – routes execution based on message content type (text, audio, unsupported)
  • Code node – decrypts encrypted WhatsApp media using mediaKey and HKDF-derived keys
  • OpenAI nodes
    • Transcribe a recording (speech to text)
    • Message a model (generate a reply)
    • Generate audio (TTS output)
  • Google Drive nodes – upload the generated audio and share it publicly
  • HTTP Request node – sends the audio URL back through your messaging API (for example Wasender)

Once you understand this flow, you can adapt the same pattern for many other channels and use cases.

Step 1: receiving the WhatsApp webhook in n8n

Your journey starts with getting WhatsApp messages into n8n. Configure your WhatsApp provider or connector so that it sends POST requests to an n8n Webhook node whenever a new message arrives.

Key points:

  • Set the Webhook node path to match the URL that you configure in your WhatsApp provider
  • Use the If node right after the webhook to filter out messages sent by the bot itself by checking body.data.messages.key.fromMe

By ignoring your own outgoing messages, you avoid loops and keep the logic focused on user input.

Step 2: extracting the data you actually need

Webhook payloads often come with deep nesting, which can make expressions hard to manage. The Set (Edit Fields) node helps you normalize the structure early so the rest of your workflow stays clean and readable.

For example, you can map:

body.data.messages.message  -> message payload
body.data.messages.remoteJid -> sender JID

By copying these nested values into top-level JSON paths, your later nodes can reference simple fields instead of long, error-prone expressions.

Step 3: routing by message type with a Switch node

Not all messages are equal. Some will be text, some audio, some images or other media. The Switch node checks the message content and decides what to do next.

Typical branches:

  • Text – send directly to the GPT model for a text-based reply
  • Audio – decrypt, transcribe, then process with GPT
  • Unsupported types – send a friendly message asking the user to send text or audio

This structure lets you extend the workflow later with new routes for images or documents without changing the core logic.

Step 4: decrypting WhatsApp media with a Code node

WhatsApp media is delivered encrypted, so before you can transcribe audio or analyze video or images, you need to decrypt the file. The template uses a Code node that relies on Node.js crypto utilities to perform this decryption.

The high level steps are:

  1. Decode the mediaKey (base64) from the incoming message
  2. Use HKDF with sha256 and a WhatsApp-specific info string for the media type (for example "WhatsApp Audio Keys") to derive 112 bytes of key material
  3. Split the derived key:
    • IV = first 16 bytes
    • cipherKey = next 32 bytes
    • The remaining bytes are used for MAC in some flows, but not required for decryption here
  4. Download the encrypted media URL as an arraybuffer and remove trailing MAC bytes (the template slices off the last 10 bytes)
  5. Decrypt with AES-256-CBC using the derived cipherKey and IV
  6. Use n8n helper helpers.prepareBinaryData to prepare the decrypted binary for downstream nodes

A simplified, conceptual example of the core decryption logic:

const mediaKeyBuffer = Buffer.from(mediaKey, 'base64');
const keys = await hkdfSha256(mediaKeyBuffer, info, 112);

const iv = keys.slice(0, 16);
const cipherKey = keys.slice(16, 48);

const ciphertext = encryptedData.slice(0, -10); // remove MAC bytes
const decipher = crypto.createDecipheriv('aes-256-cbc', cipherKey, iv);
const decrypted = Buffer.concat([  decipher.update(ciphertext),  decipher.final(),
]);

Important notes:

  • HKDF info strings vary by media type: image, video, audio, document, or sticker
  • The number of trailing MAC bytes can differ by provider, the example uses 10 bytes based on this template, but you should validate against your provider’s payload
  • Never hard-code secrets or API keys, keep them in n8n credentials or environment variables

Once this step works, you have a clean, decrypted audio file ready for AI processing.

Step 5: transcribing audio with OpenAI

With decrypted audio binary data available, you can now turn spoken words into text. The template uses the OpenAI Transcribe a recording node for this.

Configuration tips:

  • Model – choose a speech to text model that is available in your OpenAI account (for example a Whisper based endpoint)
  • Language – you can let OpenAI detect the language automatically or specify one explicitly
  • Long recordings – for very long audios, consider splitting them into chunks or using an asynchronous transcription approach

Once transcribed, the text can be reused across your entire stack, not just for replies. You can store it in a database, index it for search, or feed it into analytics later.

Step 6: generating a contextual reply with a GPT model

Now comes the intelligence layer. The transcribed text is passed to an OpenAI Message a model node, where a GPT model such as gpt-4.1-mini generates a response.

The node usually:

  • Concatenates available text sources such as the transcription and any system prompts
  • Sends this prompt to the GPT model
  • Receives a conversational, summarized, or transformed response text

This is your moment to design how your assistant should behave. You can instruct it to respond as a support agent, a sales assistant, a coach, or a simple Q&A bot. Adjust the prompt to match your tone and use case, then iterate as you see how users interact.

Step 7: turning text back into audio with TTS

Many users prefer to receive audio replies, especially on WhatsApp. After you have the GPT generated text, the template uses an OpenAI Generate audio node to perform text to speech.

The flow is:

  • Send the reply text to the TTS node
  • Receive an audio file as binary data
  • Upload that binary to Google Drive using the Upload file node
  • Use a Share file node to grant a public “reader” permission and extract the webContentLink

The result is a shareable URL to the generated audio that your messaging API can deliver back to WhatsApp.

Step 8: delivering the audio reply back to WhatsApp

The final step closes the loop. The template uses an HTTP Request node to call an external messaging API such as Wasender, passing the recipient identifier and the audio URL.

A conceptual example of the request body:

{  "to": "recipient@whatsapp.net",  "audioUrl": "https://drive.google.com/uc?export=download&id=<fileId>"
}

Adjust this payload to match your provider’s requirements. Some APIs accept a file URL like above, others require a direct file upload. Once configured, your user receives an audio reply that was fully generated and delivered by your automation.

Testing, learning, and improving your workflow

To turn this template into a reliable part of your operations, treat testing as part of your automation mindset. Start small, learn from each run, and improve.

  • Begin with a short audio message to validate decryption and transcription
  • Use logging in the Code node (console.log) and inspect the transcription response to confirm intermediate data
  • If decryption fails, double check:
    • mediaKey base64 decoding
    • Correct HKDF info string for the media type
    • Number of bytes trimmed from the encrypted data
    • That the encrypted media URL is accessible and complete
  • For TTS quality, experiment with different voices or TTS models available in your OpenAI node

Each iteration brings you closer to a stable, production ready WhatsApp audio automation.

Security and operational best practices

As you scale this workflow, you also want to protect your data, your users, and your budget. Keep these points in mind:

  • Store all API keys and OAuth credentials in the n8n credential manager, not in plain text in nodes
  • Use HTTPS for all endpoints and, where possible, restrict access to your webhook using IP allowlists or secret tokens supported by your WhatsApp provider
  • Monitor file sizes and add limits so that very large media files do not cause unexpected costs
  • Think about data retention and privacy, especially for encrypted media, transcripts, and generated audio that may contain sensitive information

Good security practices let you automate confidently at scale.

Ideas for extending and evolving this template

Once the base workflow is running, you can treat it as your automation playground. Here are some improvements you can explore:

  • Support multiple languages and enable automatic language detection in the transcription step
  • Implement rate limiting and retry logic for external API calls to handle spikes and temporary failures
  • Store transcripts and audio references in a database for audit trails, search, or analytics
  • Add an admin dashboard or send Slack alerts when errors occur so you can react quickly

Every enhancement makes your WhatsApp assistant more capable and your own workload lighter.

Bringing it all together

This n8n WhatsApp Audio Transcription and TTS workflow template gives you an end to end pipeline that:

  • Receives and decrypts WhatsApp media
  • Uses OpenAI to transcribe and understand audio
  • Generates helpful, contextual replies with a GPT model
  • Converts those replies back into audio
  • Stores and shares the audio via Google Drive
  • Sends the response back over your WhatsApp messaging API

With careful credential handling, validation, and a willingness to iterate, you can adapt this pattern for customer support, automated voicemail handling, voice based assistants, or any audio first experience you want to build on WhatsApp.

You are not just automating a task, you are freeing up attention for the work that truly moves your business or projects forward.

Next step: try the template and build your own version

Now is the best moment to turn this into action. Import the workflow, connect your tools, and send your first test audio. From there, keep refining until it feels like a natural extension of how you work.

Call to action: Import this workflow into your n8n instance, configure your OpenAI and Google Drive credentials, and test it with a sample WhatsApp audio message. If you need help adapting it to your specific WhatsApp provider or want an annotated version for beginners, reach out to our team or request a walkthrough.

Super Assistants: MCP Servers with n8n & Unipile

Super Assistants: Build Modular MCP Servers With n8n & Unipile (So You Stop Doing The Same Task 47 Times)

Imagine this: your Slack is pinging, Gmail is overflowing, LinkedIn wants your attention, your calendar is a Tetris game, and your CRM is quietly judging you for not updating it. You jump between tools like a very tired human API, copying, pasting, scheduling, following up, and wondering if this is really what technology was supposed to do for us.

Good news: it is not. That is what automation is for. And that is where a modular MCP server architecture built on n8n, Unipile, and your favorite tools comes in to save your sanity.

This guide walks you through how to build what we like to call “Super Assistants” – multi-channel automation servers that plug into Slack, Gmail, Google Calendar, Airtable CRM, and Unipile (for LinkedIn and messaging). The result is a flexible assistant platform that can route, automate, and orchestrate tasks across channels, so you can stop doing the same repetitive work over and over and let your workflows do the heavy lifting.

What Is a Modular MCP Server (and Why Should You Care)?

As your team grows, your tools multiply. Slack, email, calendar, CRM, LinkedIn, messaging apps – they all want to be special. A modular MCP (Multi-Channel Platform) server architecture gives each of them their own “zone” while keeping your automation clean, secure, and scalable.

Instead of one giant, tangled automation monster, you split responsibilities into separate MCP servers, each focused on a specific domain:

  • Slack MCP Server (BenAI-content) – handles inbound and outbound Slack messages, DMs, and search
  • CRM MCP Server (Airtable) – manages contacts, records, and updates in your CRM
  • Calendar MCP Server (Google Calendar) – creates, updates, deletes events, and checks availability
  • Email MCP Server (Gmail) – sends, drafts, labels, and replies to emails
  • Unipile MCP (LinkedIn & messaging) – retrieves profiles, sends invitations, posts, and manages chats

The result is a set of “Super Assistants” that work together, each one very good at one thing, instead of one assistant that is mediocre at everything.

How n8n Fits In: High-level Architecture

At the center of this setup is n8n, which acts as the orchestration layer. Think of it as the conductor in an automation orchestra. Each MCP server exposes a set of tools and actions through nodes or triggers, and n8n connects them into actual workflows.

In the example design, the n8n canvas is divided visually into panels, each dedicated to one MCP server and its related nodes. This keeps things organized and makes it much easier to understand what is going on at a glance.

Core Components of Your Super Assistant Stack

  • Triggers – Webhook triggers or MCP-specific triggers that start flows when something happens in Slack, email, calendar, etc.
  • Tool nodes – Slack, Gmail, Google Calendar, Airtable nodes, plus HTTP Request nodes for Unipile.
  • Business logic – Conditional nodes, formatting, deduplication, and validations so your workflows do not behave like chaos gremlins.
  • Persistence – Airtable used as a lightweight CRM and a store for stateful metadata and integration IDs.
  • Notification & logging – Slack channels and Airtable audit tables for alerts, logs, and “what just happened?” moments.

What Can This MCP Setup Actually Do?

Once your modular MCP servers are in place, you can start doing useful (and sanity-saving) things like:

  • Auto-creating CRM records from Slack conversations or inbound emails, so you are not manually copying lead details into Airtable.
  • Scheduling meetings based on calendar availability across teams, instead of playing email ping-pong.
  • Sending follow-ups via Gmail or LinkedIn when a lead hits a certain stage in Airtable.
  • Publishing LinkedIn posts or sending tailored connection invites through Unipile, without living inside LinkedIn all day.

In other words, your MCP servers quietly handle the repetitive work while you pretend it was easy all along.

Key Design Patterns for MCP Servers With n8n

Before we jump into the practical steps, it helps to know a few patterns that keep your automation from turning into spaghetti.

1) Separate Triggers From Processing

Do not cram all your logic into the first node that fires. Keep webhooks and platform-specific triggers inside their respective MCP server, then normalize and forward events to a processing flow or shared queue.

Standardize common fields like user_id, channel, event_type, and timestamp. Once everything looks the same, your downstream logic becomes much simpler and you avoid a massive “if this is Slack, do X, if this is email, do Y, but if this is LinkedIn, panic” situation.

2) Use a Thin Integration Layer

Each MCP server should expose a small, clean set of actions such as:

  • createRecord
  • getRecord
  • sendMessage
  • createEvent

This keeps your flows loosely coupled and makes it much easier to swap out tools or update implementations later without rewriting everything.

3) Idempotency and Deduplication

One of the fastest ways to annoy users is to send the same message twice or create duplicate records. Make actions idempotent where possible and store external IDs such as:

  • message_id
  • event_id
  • airtable_record_id

Use Airtable or a lightweight database to track processed events so your automations know when they have already done something and do not try to do it again.

4) Secrets and Credential Management

Automation is fun, leaking tokens is not. Store API keys and OAuth tokens in secure credential stores such as n8n credentials, environment variables, or a dedicated secrets manager. Limit token scopes as much as possible, for example Slack bot tokens restricted to specific channels.

5) Observability and Alerts

Things will break sometimes. The key is to notice fast and debug easily. Centralize your logs and send alerts to a dedicated Slack channel, such as the benai-content channel used in the example.

Include contextual links back to the triggering record in Airtable or n8n so that when something fails, you can jump straight to the source instead of playing detective.

Step-by-step: Building Your MCP Servers in n8n

Now for the practical part. Below is a walkthrough of how to assemble the MCP servers shown in the architecture using n8n and external services. Follow these steps and you will have a working Super Assistant instead of a pile of good intentions.

Step 1 – Create the Slack MCP Server

  1. Add an MCP Server – Slack trigger to receive channel events from Slack. This is your entry point for messages, mentions, and other activity.
  2. Implement Slack action nodes such as:
    • Send Slack post to a channel
    • Send Slack DM to a user
    • Get users (list)
    • Search messages
  3. Normalize Slack events into a common payload shape, then:
    • Forward them to a processing flow, or
    • Call an Airtable Create Record node directly if you are logging conversations as CRM entries.

Once this is in place, Slack stops being a black hole of conversations and starts feeding structured data into your system.

Step 2 – Build the Airtable CRM MCP Server

  1. Use Airtable nodes such as:
    • Get Record
    • Search Record
    • Create Records
    • Update Record
    • Get Schema
  2. Keep your CRM data model simple with tables like:
    • Contacts
    • Companies
    • Deals
  3. Store integration IDs for traceability, for example Slack message IDs, email IDs, or LinkedIn profile IDs, so you can always link an Airtable record back to its origin.

This MCP server becomes your central source of truth for leads, customers, and interactions, instead of scattered notes and half-remembered conversations.

Step 3 – Set Up Calendar and Email MCP Servers

Next, tackle scheduling and email, the two main culprits behind “I thought you saw my message” confusion.

Calendar MCP Server (Google Calendar)

  • Expose nodes and actions such as:
    • createEvent
    • getEvent
    • updateEvent
    • deleteEvent
    • getAvailability
  • Use strict ISO 8601 time formats to avoid date-time confusion.
  • Validate attendees before sending invites so you do not spam the wrong inboxes.

Email MCP Server (Gmail)

  • Expose actions like:
    • sendEmail
    • createDraft
    • replyEmail
    • addLabels
    • getEmails
  • Use this MCP server to handle automated follow-ups, label routing, and organized inbox workflows.

Together, these servers help you go from “I will get back to you later” to “my system already scheduled that and sent a confirmation.”

Step 4 – Connect Unipile for LinkedIn and Messaging

Now for the social side. With Unipile, you can automate LinkedIn and messaging activity directly from n8n using HTTP Request nodes.

Use HTTP requests to call Unipile API endpoints for:

  • getLinkedinProfile
  • sendInvitation
  • createPost
  • performLinkedinSearch
  • Messaging endpoints:
    • List chats
    • Start new chat
    • Send messages

Some practical tips while you are at it:

  • Keep LinkedIn invitations under 300 characters so they are readable and not rejected.
  • Write LinkedIn posts that target executives with a clear pain point and a direct call to action.

This MCP server lets you scale outreach and content without manually copying the same message into LinkedIn 50 times.

Security and Compliance: Automation Without Nightmares

When you are wiring together Slack, email, calendar, CRM, and LinkedIn, you are handling a lot of sensitive data. Keep your legal team happy with a few key practices:

  • Data minimization – Only store fields you actually need in Airtable. Avoid saving full email bodies unless there is a clear reason.
  • Access control – Limit who can modify credentials and n8n flows. Not every user needs admin-level power.
  • Audit trails – Track timestamps and actor IDs for changes. Store webhook request bodies for troubleshooting, masking sensitive fields where required.
  • GDPR/CCPA compliance – Honor deletion requests, avoid exporting PII unnecessarily, and make sure your flows can handle data removal gracefully.

Scaling and Performance: When Your Super Assistant Gets Popular

At some point, the volume of messages, events, and records will grow. That is a good problem, but still a problem. To keep your n8n-based MCP architecture running smoothly, consider:

  • Queueing high-volume tasks like message batches using a broker such as Redis or SQS.
  • Sharding workloads across multiple n8n instances or using separate worker nodes for CPU-heavy tasks like parsing and enrichment.
  • Caching frequently requested data such as user lists or templates to reduce API calls and stay within rate limits.

This helps your automations stay fast and reliable, even when your team, leads, and channels all ramp up at the same time.

Monitoring and Testing Your MCP Servers

Before you trust your Super Assistant with live customers, give it some practice runs.

  • Test each MCP action:
    • Simulate inbound Slack events.
    • Send emails to a sandbox mailbox.
    • Create and delete calendar events in a test calendar.
  • Monitor success rates and keep an eye on API quota usage so you do not suddenly hit rate limits at the worst possible moment.
  • Implement retry logic with exponential backoff for transient failures so your workflows are resilient instead of fragile.

Next Steps: Where to Take Your Super Assistant From Here

Once your basic MCP servers are in place and humming, you can start leveling up your automation stack.

  • Add conversational AI middleware to summarize long messages or draft replies automatically, then send them through your MCP servers.
  • Implement role-based automation with different templates and flows for sales, support, operations, and other teams.
  • Expose a developer-friendly API so internal tools and apps can trigger MCP actions programmatically.

This is where your Super Assistant goes from “helpful” to “how did we ever work without this?”

Wrapping Up: Super Assistants With n8n, Modular MCP Servers, and Unipile

By designing your automation around modular MCP servers, you get flexibility, reliability, and a system that is much easier to evolve over time. The n8n canvas architecture shown in the example is a practical starting point:

  • Organize nodes by domain (Slack, CRM, calendar, email, Unipile).
  • Normalize events before processing to keep flows simple.
  • Secure credentials and keep secrets out of your workflows.
  • Instrument logging and observability so you can see what is happening and fix issues quickly.

With these patterns, you can add new channels, scale safely, and keep humans in the loop where it actually matters, instead

n8n Telegram AI Personal Assistant

How a Busy Founder Turned Telegram Into an AI Personal Assistant with n8n, OpenAI & Pinecone

By Tuesday afternoon, Nikhil’s Telegram was a war zone.

Investors, suppliers, team members, and friends all used the same chat app to reach him. Some sent voice notes while walking between meetings, others fired off quick messages like “Can you confirm the call for Thursday?” or “Email the supplier about the shipment delay.”

Every ping felt urgent. Every task felt small. Together, they were slowly burning him out.

Nikhil did not need another productivity app. He needed something that lived where his chaos already existed: inside Telegram. That is where he decided to build his own AI personal assistant, powered by n8n, OpenAI, and Pinecone.

The Problem: Telegram Messages That Never Turn Into Actions

Nikhil ran a growing startup. His day was a mix of quick decisions and tiny follow-ups that were easy to forget:

  • “Schedule a call with Mark next Monday at 2pm.”
  • “Email the new client with onboarding details.”
  • “Call the supplier and confirm delivery.”
  • “What did we decide in last week’s pricing meeting?”

Most of these came in as Telegram texts or rushed voice notes. He tried to keep up by forwarding messages, setting reminders, and manually updating his calendar and inbox. It worked, until it didn’t.

One day he missed a critical client call because he forgot to add it to his calendar after a voice note. That was the final straw.

He had already been experimenting with n8n for automation. So he asked himself a simple question:

What if Telegram itself could understand my messages, look up contacts, schedule meetings, send emails, and even trigger phone calls, all by itself?

The Vision: A Telegram AI Assistant That Actually Gets Things Done

Nikhil sketched out what his ideal assistant would do. It had to:

  • Accept both text and voice messages directly in Telegram.
  • Transcribe voice notes accurately, then interpret what he wanted.
  • Access his contacts and calendar without breaking security rules.
  • Use a knowledge base to answer questions based on his own docs and SOPs.
  • Delegate work to specialized “agents” for email, calendar, and phone calls.

He wanted something reliable and extensible, not a quick hack. That is when he found an n8n workflow template designed exactly for this: a Telegram AI personal assistant that connects:

  • Telegram for messages and voice notes
  • OpenAI as a LangChain-style agent
  • Pinecone as a vector store for his knowledge base
  • Google Sheets for contact data
  • Dedicated calendar, email, and phone-call agents

It was not just a chatbot. It was an orchestration layer for his entire communication workflow.

The Architecture Behind the Magic

Before Nikhil deployed anything, he wanted to understand how this assistant would think and act.

The Core Building Blocks

The template was built around a clear flow:

  • Telegram trigger – Listens for incoming messages and voice notes.
  • Content-type switch – Routes text, voice, or unsupported content.
  • Audio downloader + transcription – Downloads voice files and uses OpenAI speech-to-text.
  • Personal Assistant agent – A LangChain-style agent implemented as an n8n agent node.
  • Tools – Contacts (Google Sheets), Calendar Agent, Email Agent, Phone Call Agent, and Knowledge Base (Pinecone + embeddings).
  • Memory buffer – Keeps recent chat history for coherent conversations.
  • Response node – Sends the final answer or confirmation back to Telegram.

In other words, Telegram became the front door. The agent became the brain. The tools became the hands.

Rising Action: Turning a Telegram Bot Into a Real Assistant

With the architecture clear, Nikhil started wiring everything up in n8n. Each node in the workflow became part of the story of how his assistant would handle a single message.

Step 1: Listening to Every Ping (Telegram Trigger)

First, he set up the Telegram Trigger node. This node would be the official entry point for every message and voice note.

He added his bot token, configured the webhook URL, and confirmed that the node was outputting Telegram message objects correctly. From that moment on, every “Hey, can you…” entered the workflow through this trigger.

Step 2: Teaching the Workflow to Recognize Message Types

Next came the Content-type switch. The assistant needed to know if someone sent:

  • Plain text
  • A voice note
  • Something unsupported like stickers or random files

If the content was unsupported, the workflow would send back a friendly message explaining what the bot could handle. That way, users were guided instead of left confused.

Step 3: Turning Voice Notes Into Usable Text

Voice notes were Nikhil’s biggest source of missed tasks, so he paid close attention to this part.

For messages marked as voice, the workflow used the Telegram file API node to download the audio file. Then it passed that file to OpenAI’s speech-to-text (or a Whisper node) to generate a clean transcription.

The final text was stored as a CombinedMessage property. From the assistant’s perspective, a voice note and a typed message now looked the same.

Step 4: Normalizing Everything Into a Single Payload

To keep the logic simple, Nikhil added a step to combine content and set properties. Regardless of the source, every message ended up with:

  • CombinedMessage – the final text the user intended
  • Message Type – text or voice
  • Source Type – where it came from

This uniform payload made it much easier for the Personal Assistant agent to reason about what to do next.

The Turning Point: The Agent Starts Making Decisions

The real shift happened when Nikhil wired up the Personal Assistant agent.

The Agent as the Brain

Inside n8n, the template used an agent node that behaved like a LangChain-style decision-maker. This node read the CombinedMessage, reviewed recent chat history from the memory buffer, and then decided which tools to call.

Its responsibilities were clear:

  • Choose the right tool or combination of tools (email, calendar, phone call, knowledge base).
  • Fetch contact details from the Contacts Data tool when communication was needed.
  • Ensure emails were only sent to verified addresses and always signed as Nikhil.
  • Pass clean, well-structured JSON payloads to the Calendar, Email, and Phone Call agent workflows.

Instead of building dozens of rigid if-else rules, Nikhil let the agent interpret natural language and orchestrate everything.

The Tools: Modular Workflows That Do the Heavy Lifting

Behind the scenes, each “action” the agent could take was implemented as a separate workflow. This made the system modular and easier to audit.

  • Contacts Data

    Powered by Google Sheets, this tool stored names, phone numbers, and email addresses. The workflow always verified numbers and formatted them in E.164 format before triggering any phone calls.

  • Calendar Agent

    This workflow created, updated, or canceled events. The agent passed it a structured payload with start and end times, context, and who the meeting was with.

  • Email Agent

    Emails were only sent to validated addresses from the Contacts Data tool. Every message was signed as Nikhil, so the assistant never pretended to be anyone else.

  • Phone Call Agent

    This triggered an external calling workflow, along with concise instructions for what the call should achieve, such as “Confirm delivery details with supplier.”

Because each tool was its own workflow, Nikhil could update or replace them without touching the main assistant logic.

Adding a Brain for Knowledge: Pinecone + OpenAI Embeddings

Nikhil also wanted his assistant to answer questions like:

“What is our refund policy?” or “Summarize the onboarding SOP for new hires.”

To handle this, he used the Embeddings OpenAI node to convert his documentation, SOPs, and FAQs into embeddings, then stored them in Pinecone.

When a question came in, the Personal Assistant agent could query the Pinecone vector store, retrieve the most relevant chunks, and respond with accurate, context-aware answers. If needed, it could even cite sources.

Deployment: From Prototype to Production-Ready Assistant

Once the logic worked in tests, Nikhil shifted his focus to deploying the assistant safely and reliably.

Deployment Checklist Nikhil Followed

  1. Set up an n8n instance (cloud or self-hosted) and secured it with HTTPS and authentication.
  2. Configured the Telegram Bot token and webhook URL inside the Telegram Trigger node.
  3. Provisioned OpenAI API keys for both chat and speech-to-text, then stored them as credentials in n8n.
  4. Created a Pinecone account and configured the Pinecone Vector Store node.
  5. Built a Google Sheets document for Contacts Data and set the Sheets node credential with the right scope.
  6. Installed and tested separate agent workflows for Email, Calendar, and Phone Call, confirming they accepted the expected JSON schema.
  7. Tested voice transcription accuracy and adjusted model choice or sampling if needed.
  8. Enabled logging and alerting to monitor workflow health and failures.

Keeping It Safe: Security, Compliance, and Best Practices

Because this assistant touched contacts, emails, and phone calls, Nikhil treated security as a first-class requirement.

  • He never stored API keys or tokens in plain text, using n8n credentials and vault features instead.
  • Access to the Google Sheets contact list was restricted to only necessary accounts.
  • All inputs were validated and sanitized before being passed to external APIs or agent workflows.
  • Phone numbers were always formatted in E.164 for reliable calling and privacy compliance.
  • He logged audit trails for key actions like emails sent, calls placed, and calendar events changed.

When Things Go Wrong: How Nikhil Debugged His Assistant

No automation is perfect on the first run. Nikhil hit a few bumps and used the template’s troubleshooting guidance to fix them.

Transcription Issues

In noisy environments, voice notes were sometimes mis-transcribed. To improve accuracy, he:

  • Encouraged users to send shorter, clearer voice messages.
  • Tested a more robust speech model when background noise was common.

Missing Contacts

When the assistant could not find a contact, it was usually because:

  • The Google Sheet ID or sheet name in the Contacts Data node was incorrect.

He fixed the configuration and added a polite fallback response when a contact was not found, avoiding any use of placeholder emails.

Tool Invocation Failures

Occasionally, a tool workflow failed to execute. The usual culprits were:

  • Incorrect workflow IDs when the agent tried to call another workflow.
  • Payloads that were too large or not structured as expected.

By verifying the invoked workflow IDs and keeping agent payloads small and well-structured, he eliminated most of these issues.

Real-Life Moments: How the Assistant Changed Nikhil’s Day

Example 1: Scheduling a Meeting Without Leaving Telegram

One morning, Nikhil typed into Telegram:

“Schedule a call with Mark next Monday at 2pm.”

Behind the scenes, the assistant:

  1. Looked up Mark’s contact details in the Google Sheets-based Contacts Data tool.
  2. Invoked the Calendar Agent with structured timing and context.
  3. Created the event, then replied in Telegram confirming the meeting.

There was no manual calendar entry, no context switching, and no risk of forgetting.

Example 2: Turning a Voice Note Into a Phone Call

Later that week, while walking between buildings, Nikhil sent a voice note:

“Call supplier and confirm delivery details.”

The assistant quietly:

  1. Downloaded the voice file and transcribed it using OpenAI speech-to-text.
  2. Fetched the supplier’s phone number from the Contacts Data sheet.
  3. Formatted the number in E.164 format.
  4. Triggered the Phone Call Agent with a concise instruction set for the call.

By the time he reached his next meeting, the call was already in motion.

Growing the Assistant: How Nikhil Plans to Extend the Template

Once the core assistant was stable, ideas for improvement came quickly. The template made it easy to extend the system with additional features:

  • Add two-way calendar confirmations with inline Telegram buttons.
  • Integrate a CRM like HubSpot or Pipedrive instead of Google Sheets for richer contact data.
  • Implement role-based access or multi-user support so multiple principals can safely share the same bot.
  • Introduce rate limiting or budget tracking for expensive API calls to OpenAI.

Because each capability was just another tool or workflow, the assistant could grow alongside his business.

Resolution: From Overwhelmed to Orchestrated

What started as a chaotic stream of Telegram messages turned into a calm, orchestrated system.

Nikhil no longer worried about missing calls or forgetting to send follow-up emails. His Telegram AI assistant, built with n8n, OpenAI, and Pinecone, was quietly:

  • Listening to every message and voice note.
  • Understanding intent using a LangChain-style agent.
  • Pulling in contacts, calendar data, and knowledge base entries.
  • Delegating tasks to specialized Email, Calendar, and Phone Call agents.
  • Sending clear

AI News Data Ingestion with n8n

AI News Data Ingestion with n8n: Turn Information Overload into an Automated Advantage

AI is moving fast. New tools, research, and announcements land every hour, across dozens of platforms. Trying to track it all manually is exhausting, and it pulls you away from the work that actually grows your product or business.

What if that constant stream of AI news could quietly organize itself in the background, while you stay focused on strategy, writing, or building?

This article walks you through a production-ready n8n workflow template for AI news data ingestion. It polls RSS feeds and social sources, scrapes full content, evaluates relevance with a language model, extracts external sources, and stores canonical files in an S3-backed data store via an API.

More than a technical tutorial, think of this as a journey: from information chaos to a calm, automated system that works for you. Along the way, you will see how this workflow balances speed, deduplication, metadata fidelity, and automated relevance checks so you can power an AI newsletter, research feed, or content product with confidence.


The Problem: Information Everywhere, Focus Nowhere

If you publish an AI newsletter, run a research feed, or curate AI content for your audience, you probably face at least one of these challenges:

  • You chase updates across newsletters, Reddit, Google News, Hacker News, and official AI blogs.
  • You copy links into documents, then later realize you have duplicates and broken URLs.
  • You spend hours deciding what is actually relevant to AI, and what is just noise.
  • You wish you had a clean, structured archive of all content and sources, but it feels too big to build.

Manual curation can be rewarding, but when the volume of content explodes, it quickly becomes unsustainable. The result is stress, inconsistency, and missed opportunities.

This is the exact pain this n8n AI news ingestion workflow template is designed to relieve.


The Mindset Shift: Let Automation Do the Heavy Lifting

Automation is not about replacing your judgment. It is about protecting your time and energy so you can use your judgment where it matters most.

By handing off repetitive tasks to n8n, you:

  • Free yourself from constant tab-switching and copy-paste work.
  • Build a reliable system that works every hour, not just when you have time.
  • Turn a fragile, ad hoc process into a repeatable pipeline you can trust and scale.

This workflow template is a concrete starting point. You do not need to design everything from scratch. Instead, you can plug in your feeds, adapt it to your stack, and then iterate. Each improvement becomes another step toward a fully automated, focused workflow that supports your growth.


The Vision: A Calm, Curated AI News Stream

At a high level, this n8n workflow implements an end-to-end content ingestion system optimized for AI news. It is designed to give you:

  • Timely coverage of AI updates from multiple sources.
  • Automatic filtering so only AI-related content flows through.
  • Clean storage in an S3-backed data store, with rich metadata ready for downstream use.

Concretely, the workflow:

  • Aggregates signals from RSS newsletters, Google News, Hacker News, and AI-focused subreddits.
  • Normalizes feed metadata and generates deterministic file names for reliable deduplication.
  • Scrapes full article HTML and markdown, evaluates AI relevance with a language model, and extracts authoritative external sources.
  • Uploads temporary artifacts to S3, copies them into a permanent store via an internal API with rich metadata, and cleans up temporary files.

The result is a structured, searchable, and trustworthy base of AI content that you can use to power newsletters, feeds, or internal knowledge systems.


The Architecture: Three Zones That Work Together

To keep things maintainable and easy to extend, the workflow is organized into three conceptual zones. Thinking in these zones will help you customize and grow the pipeline over time.

  1. Feed & trigger collection – schedule triggers and RSS readers that keep a steady flow of fresh AI content coming in.
  2. Normalization & enrichment – unify formats, avoid duplicates, scrape full content, and apply AI-based relevance checks.
  3. Storage & cleanup – persist canonical files and metadata in S3 via an API, then keep your storage clean by removing temporary artifacts.

Let us walk through each of these zones and the core components that bring them to life.


Zone 1: Collecting AI Signals With Triggers and Feed Readers

Bringing multiple AI sources into one flow

The first step toward a calmer workflow is centralizing your inputs. The template uses a combination of schedule triggers (for periodic polling) and RSS triggers (for feed-driven updates). Together, they continuously pull in fresh content from a diverse set of sources, such as:

  • Curated newsletters like The Neuron, FuturePedia, Superhuman
  • Google News and Hacker News feeds
  • AI-related subreddits such as r/ArtificialInteligence and r/OpenAI
  • Official AI blogs from OpenAI, Google, NVIDIA, Anthropic, Cloudflare and others

Each feed may look different at the source, but the workflow does the work of making them feel the same to your system.

Normalizing feeds into a unified schema

To make the rest of the pipeline simple and predictable, every incoming item is mapped into a common structure, including fields like:

  • title
  • url
  • authors
  • pubDate or isoDate
  • sourceName
  • feedType
  • feedUrl

As part of this normalization, the workflow also constructs a deterministic upload file name. This single detail is powerful. It enables idempotent processing and makes deduplication straightforward, which saves you time and storage later on.


Zone 2: Avoiding Duplicates and Enriching Content

Smart deduplication and identity checks

Before the workflow spends resources on scraping and analysis, it checks whether an item has already been processed. It does this by searching an S3 bucket using a prefix based on the deterministic file name.

  • If the item already exists, the workflow skips further processing.
  • If it does not exist, the pipeline continues and treats it as a new resource.

This simple identity check prevents duplicate ingestion from repeated feed hits or re-polling, which is essential when you scale to many sources and higher frequencies.

Scraping and content extraction

Once an item passes the identity check, the workflow runs a headless scrape of the article page. This step captures:

  • The full HTML of the page.
  • A generated markdown version of the content.

These artifacts are then uploaded as temporary files (for example, .html.temp and .md.temp) into a dedicated data-ingestion S3 bucket. Using temporary uploads keeps your permanent store clean and allows for:

  • Asynchronous processing.
  • Safe retries if something fails mid-pipeline.
  • Clear separation between raw ingestion and finalized content.

Relevance evaluation with a language model

Not every article your feeds pick up is worth your attention. To keep your system focused on AI topics, the workflow uses a language model via a LangChain node to evaluate the scraped content.

The model receives the page content and applies rules such as:

  • Exclude job postings and purely product-storefront pages.
  • Require AI or AI-adjacent subject matter.
  • Filter out content that is primarily about unrelated industries.

A structured output parser then maps the model response into a clear boolean flag plus an optional chain-of-thought. Only items flagged as relevant move forward to the next step. This is where you begin to feel the time savings: your attention is no longer spent triaging noise.

Extracting authoritative external sources

For the items that pass the relevance check, the workflow uses an information-extractor AI node to scan links on the scraped page. Its goal is to identify authoritative external source URLs that support the article’s claims, such as:

  • Official product announcements.
  • Research papers.
  • Datasets or documentation.

These external source URLs are added to the metadata, so newsletter editors and downstream systems can quickly reference a canonical source. This helps you build not just a feed of links, but a trustworthy knowledge base.


Zone 3: Persisting Files and Keeping Storage Clean

Copying temporary files into a permanent store

Once content is scraped, evaluated, and enriched with external sources, the workflow is ready to make it permanent. It does this by calling an internal HTTP copy API that moves files from temporary S3 keys to permanent ones.

Along with the files themselves, the API receives a carefully curated metadata object that can include:

  • title, authors, timestamp
  • source-name and feed-url
  • image-urls and external-source-urls
  • Custom content types that reflect the feedType, for example:
    • application/vnd.aitools.newsletter+md

This rich metadata layer is what makes the pipeline so flexible. It lets you plug the same ingestion system into newsletters, internal research tools, dashboards, or even future AI agents that rely on structured content.

Cleaning up temporary artifacts

After the copy is successful, the workflow deletes the temporary files from S3. This keeps your ingestion bucket tidy and avoids long-term clutter from intermediate artifacts.

By the time a single article exits the pipeline, it has gone from a noisy feed item to a fully enriched, deduplicated, and properly stored asset you can confidently use and reuse.


Building Reliability: Retries, Delays, and Error Handling

For automation to truly support you, it has to be reliable. The template includes several patterns that help the workflow run smoothly in production:

  • Retries on HTTP copy failures using n8n’s built-in retry settings with backoff, so transient network issues do not break the pipeline.
  • Wait nodes (delays) between steps to reduce the risk of hitting rate limits when many feeds fire at once.
  • Filter nodes that stop processing early when scrape errors occur or duplicate resources are detected, which saves compute and avoids noisy failures.

These practices make the workflow resilient and give you confidence to let it run on its own, every hour or even more frequently.


Why This Design Works So Well for AI Newsletters

Newsletters and curated feeds thrive on three qualities: timeliness, relevance, and trustworthy context. This n8n template is intentionally built around those needs.

  • Timeliness: Schedule triggers and near-real-time RSS triggers keep your content fresh without manual checking.
  • Relevance: A language model triages AI-related content so you see fewer false positives and can focus on the stories that matter.
  • Context: Automatic extraction of external authoritative links gives you and your readers deeper references and verification.

The result is a system that quietly does the heavy lifting, while you focus on crafting narratives, offering insights, and growing your audience or product.


Ideas to Grow and Customize Your Pipeline

One of the biggest advantages of using n8n is that your workflow can evolve with your goals. Once you have this template running, you can extend and harden it step by step.

Potential improvements and extensions

  • Content fingerprinting: Generate a hash of normalized content to strengthen deduplication, even when titles differ slightly.
  • Observability and metrics: Emit events or metrics to systems like Prometheus or a logging sink to track ingestion rate, rejection rate, and error rate.
  • Incremental content updates: Support re-ingestion with versioning so you can capture late edits to articles over time.
  • Dedicated scraping service: Offload scraping to a microservice for more control over render timeouts and better handling of JavaScript-heavy pages.
  • Rate limiting: Add rate limits around API calls and S3 operations to avoid hitting provider quotas during traffic spikes.

You do not need to implement everything at once. Start with the core template, then add improvements as your needs grow. Each enhancement is another step toward a powerful, tailored AI content engine that reflects how you work.


Security and Privacy: Building on a Safe Foundation

As you automate more of your content ingestion, it is important to keep security and privacy front of mind. The template already follows sensible practices that you can adopt and extend:

  • Store API credentials securely in n8n credentials vaults, not in plain-text nodes.
  • Ensure your copy API enforces authentication and accepts only the content types you intend to store.
  • Avoid logging sensitive metadata, such as private internal URLs, to any public log sinks.

With these safeguards in place, you can scale your automation with confidence.


Putting It All Together: A Blueprint for Curated AI News

This n8n workflow template is more than a collection of nodes. It is a blueprint for a curated AI news stream, built for maintainability, scale, and editorial quality.

In one integrated pipeline, you get:

  • Multiple feed sources across newsletters, aggregators, Reddit, and official AI blogs.
  • Deterministic identity and deduplication using S3 prefix checks and consistent file names.
  • Machine learning based relevance filtering tailored to AI and AI-adjacent topics.
  • Automatic extraction of authoritative external sources for verification and context.
  • Clean persistence into an S3-backed system with API-managed metadata and tidy cleanup of temporary files.

It is ideal for AI newsletters, research feeds, or content platforms that want a reliable ingestion foundation without building everything from scratch.


Your Next Step: Experiment, Iterate, and Make It Your Own

The real transformation happens when you take this template and adapt it to your world. Use it as a starting point, then let your creativity and specific needs guide your changes.

How to get started

You can:

  • Download or clone the template into your n8n instance.
  • Start with a small set of feeds to validate the flow and get comfortable with the structure.
  • Iterate on the relevance prompt in the language model step so it reflects your editorial voice and criteria.

If you would like help adapting the workflow to your feeds, APIs, or infrastructure, you can reach out for support. Guidance on scraping strategies, model prompts, or metadata schemas can accelerate your path from idea to

Automate Phone Calls with n8n and VAPI.ai

Automate Phone Calls with n8n and VAPI.ai

This guide walks you through an n8n workflow template that automatically places a phone call with VAPI.ai, checks the call status in a loop, and captures the assistant’s summary when the call is finished. The goal is to help you understand the logic behind each node so you can confidently customize or extend the workflow.

What You Will Learn

By the end of this tutorial, you will know how to:

  • Trigger an automated phone call from n8n using VAPI.ai
  • Send all required call details and assistant variables in a POST request
  • Poll the call status until the conversation ends
  • Store the AI assistant’s final summary for later use
  • Apply best practices around security, error handling, and scaling

Why Automate Phone Calls with n8n and VAPI.ai?

Automated phone calls are useful for reminders, outreach, appointment confirmations, follow-ups, and basic customer support. When you combine:

  • n8n for workflow orchestration and integrations, and
  • VAPI.ai for conversational voice AI and telephony,

you get a flexible system that can run personalized calls at scale, without building your own phone infrastructure.

Conceptual Overview of the Workflow

The template uses a simple control loop:

  1. A trigger in n8n starts the workflow and passes in call parameters.
  2. n8n sends a POST request to VAPI.ai to create an outbound call.
  3. n8n receives a call ID from VAPI.ai.
  4. Using that call ID, n8n periodically checks the call status.
  5. As long as the call is not finished, n8n waits for a short delay and checks again.
  6. When the call ends, n8n extracts the assistant’s analysis summary and stores it for downstream steps.

At a high level, the template includes these core nodes:

  • Execute Workflow Trigger – starts the automation and provides call inputs.
  • Phone Call (HTTP Request) – tells VAPI.ai to start the call.
  • Call Status (HTTP Request) – checks the current state of the call.
  • Ongoing Call (If node) – decides whether to keep polling or exit the loop.
  • Wait 3s – pauses between polls to avoid hammering the API.
  • Set Fields – stores the call summary when everything is done.

Preparing Your Inputs

The workflow expects certain call details to be present in the trigger data. These values are later passed to VAPI.ai through assistantOverrides.variableValues and the customer object.

Key Input Fields

Make sure your trigger provides the following fields (for example in a webhook’s query or body):

  • phone_number
  • first_name
  • type
  • instructions
  • call_purpose
  • response_style
  • tone
  • pause_between_sentences
  • fallback_response

These values allow you to customize how the assistant speaks and behaves on a per-call basis.

Step-by-Step: Building the n8n Workflow

Step 1: Configure the Execute Workflow Trigger

The first node simply starts the workflow. It can be:

  • An HTTP Webhook that receives call details from another system
  • A scheduled trigger that runs at specific times
  • Any other n8n trigger that fits your use case

Ensure that the trigger passes the input fields listed above. In the example template, these values are accessed with expressions such as {{$json.query.query.first_name}}, which assumes the data is coming in via query parameters on a webhook.

Step 2: Start the Phone Call with an HTTP Request

Next, you create the outbound phone call in VAPI.ai using an HTTP Request node in n8n.

Basic HTTP Request Configuration

  • Method: POST
  • URL: https://api.vapi.ai/call/
  • Headers:
    • Authorization: Bearer <YOUR_API_KEY>
  • Body: JSON payload with assistant ID, overrides, customer info, and phone number ID

Example JSON Body (using n8n expressions)

{  "assistantId": "6acda9bc-ef39-4a4c-84a3-0fdd38f2ab88",  "assistantOverrides": {  "variableValues": {  "first_name": "{{ $json.query.query.first_name }}",  "type": "{{ $json.query.query.type }}",  "instructions": "{{ $json.query.query.instructions }}",  "call_purpose": "{{ $json.query.query.call_purpose }}",  "response_style": "{{ $json.query.query.response_style }}",  "tone": "{{ $json.query.query.tone }}",  "pause_between_sentences": "{{ $json.query.query.pause_between_sentences }}",  "fallback_response": "{{ $json.query.query.fallback_response }}"  }  },  "customer": {  "number": "{{ $json.query.query.phone_number }}",  "name": "{{ $json.query.query.first_name }}"  },  "phoneNumberId": "75207c9a-a7c0-474f-b638-87838b5639bc"
}

Replace assistantId, phoneNumberId, and the API key with your own values. The expressions in double curly braces pull data from the trigger node.

When this request succeeds, VAPI.ai returns a response that includes a unique call ID. You will use that ID in the next step to track the call.

Step 3: Poll the Call Status with a GET Request

Once the call is created, you need to know when it has finished. The template uses another HTTP Request node to fetch the current status of the call.

Call Status Node Configuration

  • Method: GET
  • URL: something like https://api.vapi.ai/call/{{ $json.id }}
  • Headers:
    • Authorization: Bearer <YOUR_API_KEY>

The expression {{ $json.id }} refers to the ID returned by the previous Phone Call node. This GET request returns a payload that includes a status field, which indicates whether the call is still ongoing or has ended.

Step 4: Check If the Call Is Still Ongoing

The workflow uses an If node to inspect the status value from the Call Status response. The goal is to loop while the call is active and exit once it is complete.

Ongoing Call (If Node) Condition

  • leftValue: {{$json.status}}
  • operator: notEquals
  • rightValue: ended

This means:

  • If status is not ended, the call is still in progress and the workflow should wait and check again.
  • If status is ended, the call is finished and the workflow should proceed to capture the summary.

Step 5: Wait Between Polls to Avoid Rate Limits

If the If node determines that the call is still ongoing, the workflow moves to a Wait node.

Wait 3s node: This node pauses the workflow for 3 seconds before looping back to the Call Status node.

You can adjust this delay depending on your needs. Shorter intervals will detect call completion faster but increase API usage. Longer intervals reduce API calls but may delay downstream actions slightly.

Step 6: Store the Assistant’s Summary When the Call Ends

When the If node detects that status = ended, the workflow goes to a Set node to capture the analysis summary from the VAPI.ai response.

Set Fields Node Mapping

In the template, the Set node creates a field called response and assigns it the assistant’s summary:

response = {{ $json.analysis.summary }}

After this step, you have the call summary stored in the workflow data. You can then:

  • Log it to a database such as MySQL, Postgres, or Airtable
  • Attach it to a contact in a CRM such as HubSpot or Salesforce
  • Send it to a Slack channel or email for your team

Example: Where the Assistant Summary Comes From

When a call is completed, VAPI.ai typically returns an analysis object that contains:

  • summary – a condensed description of the conversation
  • Other metadata or insights (depending on your VAPI.ai configuration)

The template assumes this structure and uses $json.analysis.summary as the source for the response field. If your payload structure is slightly different, adjust the expression accordingly.

Best Practices and Design Considerations

Use Webhooks When Available

The polling approach in this template is simple and easy to understand. However, it is not always the most efficient. If VAPI.ai supports webhooks for call updates or completion events, consider:

  • Configuring a webhook in VAPI.ai that points to an n8n Webhook node
  • Letting VAPI.ai notify n8n when the call status changes instead of continuously polling

This reduces API usage and improves scalability, especially at higher call volumes.

Handle Errors and Retries

Network issues, invalid inputs, or API errors can occur at any step. To make your workflow more robust:

  • Use n8n’s On Fail workflows or error workflows to catch failures
  • Implement retries with backoff for transient errors in HTTP Request nodes
  • Log error details to a database or monitoring channel for later analysis

Secure Your Secrets

Never hard-code sensitive data like API keys or IDs directly in the node configuration. Instead:

  • Store your VAPI.ai API key and other secrets in n8n credentials or environment variables
  • Restrict permissions in your VAPI.ai account to the minimum required
  • Rotate keys on a regular schedule

Rate Limits and Cost Management

Automated calling can generate significant traffic and cost if not carefully managed. To stay in control:

  • Review VAPI.ai rate limits and pricing
  • Keep polling intervals reasonable to avoid unnecessary requests
  • Log call counts, durations, and statuses for auditing and forecasting

Idempotency and Duplicate Prevention

If your workflow is triggered by external systems or webhooks, it is possible to receive duplicate events. To avoid placing the same call multiple times:

  • Use an external request or event ID to detect duplicates
  • Store processed IDs in a database or in workflow metadata
  • Skip call creation if a given ID has already been handled

Testing and Debugging Your Workflow

Before moving to production, thoroughly test the workflow in a safe environment.

  1. Use a staging or test assistant in VAPI.ai and a phone number you personally control.
  2. Enable logging of raw request and response bodies in the Phone Call and Call Status nodes so you can inspect what is being sent and received.
  3. Simulate edge cases:
    • Call failures or rejected calls
    • Very short calls and very long calls
    • Unexpected status values
  4. If VAPI.ai offers sandbox or mock endpoints, use them to avoid real calls during early development.

Security, Privacy, and Compliance

Automated phone calls often involve personal data and sometimes call recording. To stay compliant:

  • Check local laws and regulations around consent and call recording
  • Only store personally identifiable information (PII) when necessary
  • Ensure that any stored data is encrypted at rest and in transit

Advanced Enhancements and Ideas

  • Dynamic assistantOverrides: Adjust tone, instructions, and response style based on customer segment, language, or call purpose.
  • Event-driven callbacks: Replace polling with event-based webhooks from VAPI.ai if available for better scalability.
  • Sentiment and follow-ups: Run sentiment analysis on the summary or transcript, then trigger follow-up workflows based on keywords or sentiment scores.
  • Monitoring dashboard: Build a dashboard that tracks active calls, completion rates, and costs using n8n plus your preferred database or BI tool.

Production Readiness Checklist

Before you rely on this workflow in production, verify the following items:

  • All placeholder values such as assistantId, phoneNumberId, and API keys are replaced with correct production values.
  • Secrets are stored in n8n credentials or environment variables, not in plain text.
  • The phone number associated with phoneNumberId is provisioned and allowed to make outbound calls to your target regions.
  • Error handling, logging, and retry policies are configured and tested.
  • Legal and compliance checks for consent and recording are completed for each region you call.

Recap

This n8n and VAPI.ai workflow template gives you a solid foundation for automated, AI-powered phone calls. You learned how to:

  • Trigger calls and pass in personalized variables
  • Start a call via an HTTP POST to VAPI.ai
  • Poll the call status in a controlled loop until it ends
  • Capture and store the assistant’s summary for follow-up actions

With improvements such as webhooks, robust error handling, and secure secret management, you can turn this template into a production-grade voice automation system.

FAQ

Can I change how the assistant speaks on each call?

Yes. The assistantOverrides.variableValues object

Mike Weed: Expert Pest Control & Entomology

Mike Weed: Professional Pest Control for Home & Lawn

Protecting your home, family, and lawn from pests is much easier when you work with someone who truly understands insect biology and behavior. That is exactly what you get with Mike Weed, an Associate Certified Entomologist (A.C.E.) and pest control expert with more than 45 years of experience across Alabama, Florida, and Georgia.

This guide-style article will walk you through:

  • What it means to work with a certified entomologist
  • The types of pest control services Mike provides for homes and lawns
  • How the service process works from first contact to follow up
  • Where Mike is licensed and why local expertise matters
  • Common questions about safety, frequency, and termites
  • Simple steps you can take today to reduce pest pressure

Use this as a practical reference if you are deciding how to handle a current infestation or planning long term pest prevention.


Learning Goals: What You Will Understand By The End

By the time you finish reading, you should be able to:

  • Explain why an Associate Certified Entomologist offers a higher level of pest control expertise
  • Identify which of Mike’s services apply to your home, lawn, or specific pest problem
  • Know exactly what to expect when you schedule a pest control visit
  • Understand how licensing and regional knowledge improve treatment results
  • Apply basic prevention tips to reduce pests before and after professional service

Core Concept: Why Work With a Certified Entomologist?

Many pest control providers rely mainly on experience and standard treatment routines. Mike Weed combines that hands on experience with formal entomology training and the rare A.C.E. (Associate Certified Entomologist) credential, held by fewer than 2% of professionals in the industry.

What the A.C.E. Credential Means for You

Choosing an A.C.E. means you are working with someone who:

  • Understands insect biology such as life cycles, breeding habits, and how pests respond to environmental changes
  • Targets pests accurately instead of relying on trial and error or broad, heavy chemical use
  • Designs safer treatment plans that consider families, pets, and surrounding ecosystems

Mike’s Professional Background

  • 45+ years in pest control, including technician work, district management, and branch management
  • Experience with major companies like St. Regis Paper Company, Orkin, and Cook’s Pest Control
  • Independent pest control practice since 2009, focused on personalized, science based solutions

This blend of field experience and entomological knowledge results in science driven pest control that is both effective and responsible.


Overview of Services: Home, Lawn, and More

Mike offers comprehensive pest control services for residential properties and lawns. The goal is not just to remove visible pests, but to prevent future infestations by addressing the underlying causes.

Main Types of Pest Control Services

  • Home pest control: Treatment and prevention for ants, roaches, spiders, silverfish, and other common household pests.
  • Lawn & landscape pest control: Control of grubs and lawn damaging insects, plus perimeter treatments that help keep pests from entering your home from the yard.
  • Rodent control: Inspection to locate entry points, baiting when appropriate, and exclusion recommendations to keep rodents out long term.
  • Termite inspections & control: Professional inspections, detection of termite activity, and treatment plans designed to protect your home’s structure.
  • Mosquito & nuisance pest management: Seasonally timed services that reduce biting insects and other outdoor pests so you can enjoy your yard.

Whether you need a one time treatment for a specific issue or ongoing maintenance, services are tailored to your property and pest pressure.


How Mike’s Pest Control Service Works

The process is designed to be simple, transparent, and effective. Below is a step by step explanation so you know exactly what will happen when you reach out.

Step 1 – Contact and Scheduling

You start by describing your pest problem and scheduling a convenient time for an inspection.

Share details such as what pests you have seen, where you see them most often, and how long the issue has been going on. This helps Mike prepare for the on site visit.

Step 2 – Comprehensive Inspection

During the visit, a certified professional conducts a detailed inspection of your home and lawn. This includes:

  • Identifying the specific pest species involved
  • Locating entry points where pests are getting inside
  • Finding conducive conditions such as moisture problems, clutter, or landscaping issues that attract pests

The inspection is the foundation of the treatment plan. Accurate identification and understanding of the pest’s behavior allow for more precise control.

Step 3 – Customized Treatment Plan

After the inspection, you receive a clear, written treatment plan that explains:

  • Which pests will be treated
  • What methods and products will be used
  • How many visits are recommended
  • Pricing and scheduling options

The plan is designed around your home, your lawn, and your comfort level, not a one size fits all program.

Step 4 – Targeted Treatment

Once you approve the plan, Mike applies targeted treatments based on entomological principles and safety guidelines. The focus is on:

  • Using the least invasive methods that still achieve strong results
  • Placing treatments where pests live and travel, not just where they are visible
  • Minimizing unnecessary chemical use while maintaining effectiveness

Because the treatments are informed by pest biology and behavior, they are more efficient and often more sustainable over time.

Step 5 – Follow Up and Long Term Prevention

Effective pest control does not end with one visit. Mike provides:

  • Follow up checks when needed to confirm that treatments are working
  • Prevention advice so you can reduce conditions that attract pests
  • Options for quarterly or seasonal programs if your property needs ongoing protection

This combination of professional treatment and homeowner education helps maintain a pest resistant environment over the long term.


Service Area and Licensing

Licensing and local experience are critical in pest control because different regions face different pest pressures and regulations. Mike is fully certified and operates across the Gulf Coast region.

  • Certified in: Alabama, Florida, and Georgia
  • Local knowledge: Treatments are timed and tailored to coastal conditions, high humidity, and the seasonal patterns of local pests

Understanding how weather, climate, and regional ecosystems affect pest behavior allows for better timing of applications and more reliable results.


What Homeowners Say

Client feedback highlights the value of detailed inspections and science-based treatments. Here are examples of the type of comments Mike regularly receives:

“After years of trying DIY products, Mike’s inspection revealed the real issue and fixed it. Professional, courteous, and effective.” – Local homeowner

“Our lawn looks better and we haven’t had issues with ants inside since the service. Highly recommended.” – Repeat customer

These testimonials reflect the difference that trained entomology and careful inspection can make compared to generic store bought solutions.


Frequently Asked Questions

Is pest control safe for my pets and children?

Yes. Safety is a priority in every treatment. Products and methods are chosen with your household in mind. Mike explains any precautions before starting work, and many of the solutions used are low risk once they have dried or settled according to label directions.

How often should I schedule pest control service?

The ideal schedule depends on your property and pest pressure. Many homeowners choose quarterly or seasonal programs to stay ahead of issues. Others prefer one time targeted treatments for specific infestations. During your consultation, Mike can recommend a frequency based on what he finds.

Do you provide termite inspections and treatments?

Yes. Termite inspections and treatment plans are available to protect your home from structural damage. Using a biological and behavioral understanding of termites, Mike identifies the most efficient and appropriate treatment approach for your situation.


Practical Tips to Reduce Pest Pressure Yourself

Professional pest control is most effective when combined with simple prevention steps. Here are some actions you can take right away:

  • Trim vegetation so that bushes, shrubs, and tree branches do not touch your home’s foundation or walls. Plants can act as bridges for insects.
  • Seal gaps and cracks around doors, windows, and plumbing penetrations to block common entry points.
  • Eliminate standing water in gutters, birdbaths, and low areas in the yard to reduce mosquito breeding sites.
  • Store firewood properly by keeping it off the ground and away from the exterior walls of your home to lower the risk of termites and wood boring insects.

Following these tips alongside professional service helps keep your home and lawn healthier and less attractive to pests.


About Mike Weed

Over several decades, Mike has built a career that spans:

  • Technical roles and leadership positions at St. Regis Paper Company, Orkin, and Cook’s Pest Control
  • District and branch management responsibilities
  • Independent pest control practice since 2009, serving homeowners across Alabama, Florida, and Georgia

His combination of hands on fieldwork, management experience, and entomological certification makes him a trusted resource for anyone who wants informed, effective pest management instead of guesswork.


Ready to Protect Your Home and Lawn?

If you are dealing with an active infestation or want to set up a preventative pest control program, you can request a prompt, expert evaluation.

Call 850-712-0481 Email MikeWeed1958@gmail.com

You can also submit a service request with your name, phone number, email address, and a brief description of your pest issue. Expect a timely, professional response.


Stay Connected and Keep Learning

To stay ahead of seasonal pest problems and learn practical tips from an A.C.E. certified professional, follow Mike on:

Facebook, LinkedIn, Pinterest, Yelp, and YouTube.

Regular updates and educational content can help you recognize early signs of pest activity and know when it is time to call in a professional.


© 2024 Mike Weed. All rights reserved. Website by Gulf Coast Local.

Repurpose YouTube to Socials with n8n Template

Long-form YouTube content is an exceptional source of high-value insights, yet converting a single video into platform-optimized posts for Twitter (X) and LinkedIn is typically a manual and repetitive task. This guide presents a refined overview of the “The Recap AI” n8n workflow template, which automates that entire process. The template uses Apify to scrape YouTube metadata and transcripts, then leverages an LLM to generate structured, on-brand social content. You will learn how the workflow is architected, which n8n nodes are involved, how to configure them, and how to adapt the automation to your own content operations.

Why automate YouTube content repurposing?

For most teams, video production is the most resource-intensive part of their content strategy. Repurposing a single YouTube video into multiple social assets significantly increases reach without increasing production time. With an automated n8n workflow, you can reliably transform one long-form video into:

  • Twitter (X) threads and standalone tweets
  • LinkedIn posts tailored to professional audiences
  • Additional short-form content or snippets with minimal extra effort

Automation ensures consistency in tone, structure, and formatting, while reducing manual copywriting and coordination overhead. It also allows non-technical stakeholders to trigger and review content without touching the underlying workflow.

Overview of the “Recap AI” n8n template

At a high level, the template implements the following flow:

  • Receives a YouTube URL via a simple form trigger.
  • Invokes an Apify actor to scrape the video’s metadata and subtitles.
  • Extracts and normalizes the transcript and key attributes such as title and URL.
  • Builds LLM prompts that combine the transcript with curated example posts.
  • Calls an LLM (for example, Anthropic Claude) to generate multiple Twitter and LinkedIn options.
  • Parses the model output into structured JSON fields.
  • Delivers the generated content to Slack for review, with the option to extend into full auto-publishing.

The result is a modular, extensible workflow that can be integrated into existing editorial pipelines or content operations platforms.

Architecture and key n8n components

1. Entry point: Form Trigger

The workflow starts with a Form Trigger node. This node exposes a simple web form where users paste a YouTube video URL and submit it to n8n. The design is intentionally lightweight so that marketers, content editors, or other non-technical team members can initiate the process without logging into n8n directly.

2. Data acquisition: Apify YouTube scraper

Once the URL is received, an HTTP Request node calls Apify’s streamers~youtube-scraper actor. This actor is responsible for:

  • Fetching the video’s subtitles (SRT or equivalent captions).
  • Retrieving key metadata such as title, URL, and other descriptive fields.

The template maps the SRT subtitles into a transcript variable that becomes the primary content source for the LLM. Standardizing this input at the workflow level ensures that every downstream node receives consistent, structured data, regardless of the specific video.

3. Prompt engineering: Set nodes for examples and templates

A set of Set nodes is used to define and manage the prompt strategy for the LLM. In particular:

  • set_twitter_examples stores a collection of high-performing Twitter/X examples that represent the desired voice, format, and structure for threads or single tweets.
  • set_linked_in_examples holds LinkedIn-specific examples, including preferred post length, narrative style, and call-to-action patterns.
  • Additional Set nodes combine the dynamic transcript data with these examples to build the final prompt payload that is sent to the LLM.

This approach allows teams to tune brand voice and messaging by updating example content in a single place, instead of rewriting prompts across multiple nodes.

4. Content generation: LLM node (Claude / Anthropic in template)

The core generation step is handled by an LLM node configured in a LangChain-style pattern. In the reference template, the model is set to claude-sonnet-4 from Anthropic, but the structure can be adapted to other providers such as OpenAI.

The prompt instructs the model to:

  • Analyze the transcript to identify the primary pain point, the core solution, and a quantifiable outcome.
  • Map these elements into proven social content frameworks suitable for Twitter threads and LinkedIn posts.
  • Produce three distinct tweet options and three LinkedIn post options, all aligned with the example patterns supplied earlier.

By clearly specifying the number of variants and the expected structure, the workflow increases the reliability and usefulness of the generated content.

5. Structuring the output: Parsing nodes

Once the LLM returns its response, Output Parser nodes convert the free-form text into machine-friendly JSON. These parsers extract:

  • tweet_options – an array of candidate tweets or thread components.
  • post_options – an array of LinkedIn post drafts.

Clean parsing at this stage is essential for downstream automation, such as automated scheduling, logging to a content calendar, or routing to different review channels.

6. Distribution and review: Slack integration

Finally, Slack nodes push the generated content into a designated Slack channel. The template is configured so that each tweet option and each LinkedIn option can be posted as separate messages, often using split nodes to iterate over the arrays. This makes it easy for editors to:

  • Review and compare multiple options.
  • Provide feedback directly in Slack.
  • Copy and paste approved content into scheduling tools.

For teams that want to go further, these Slack nodes can be replaced or augmented with email notifications, Google Sheets exports, or direct posting integrations.

Prerequisites and environment setup

Required accounts and services

  • n8n instance (cloud or self-hosted) with access to create workflows and credentials.
  • Apify account with an API token, used as an authenticated header for the HTTP Request node.
  • LLM provider account such as Anthropic Claude or OpenAI, with credentials configured for the LLM/LangChain node.
  • Optional: Slack app and OAuth credentials if you plan to push outputs to a Slack channel.

Configuration steps in n8n

  1. Import the template
    Load the “Recap AI” template into your n8n instance. Connect the Form Trigger node to a simple web form, either embedded on your website or made available via an internal dashboard.
  2. Configure Apify credentials
    In n8n, create an HTTP credential using your Apify API token. Attach this credential to the HTTP Request node that calls the streamers~youtube-scraper actor, and confirm that the startUrls field is correctly populated with the submitted YouTube URL.
  3. Set up the LLM provider
    Add your LLM API key or select the configured Anthropic/OpenAI credentials in the LLM node. Verify the model name (for example, claude-sonnet-4) and adjust the prompt format if your provider has specific requirements.
  4. Customize example posts
    Update the set_twitter_examples and set_linked_in_examples nodes with examples that reflect your brand voice, preferred structure, and typical calls to action. The quality and diversity of these examples significantly influence the final outputs.
  5. Integrate Slack or alternative destinations
    If using Slack, configure OAuth credentials and specify the target channel IDs in the Slack nodes. If you prefer another review mechanism, adapt the final nodes to send outputs via email, store them in Google Sheets, or log them to Airtable.
  6. Run a test and iterate
    Trigger the workflow with a public YouTube URL. Inspect the transcript, the LLM response, and the final Slack messages. Iterate on prompt wording, add or refine examples, and adjust the output parser rules until the JSON structure and content quality meet your standards.

Best practices for reliable, high-quality social content

  • Invest in strong examples
    The Set nodes that hold example posts are critical. Provide several high-performing threads and LinkedIn posts that demonstrate the exact formatting you want, including hooks, body structure, and CTAs.
  • Clean up transcripts when needed
    Auto-generated subtitles may contain filler words and transcription noise. Consider adding a lightweight preprocessing step to strip out repeated filler terms if they consistently degrade LLM output.
  • Specify structure in the prompt
    Use explicit instructions such as: “Produce 3 tweet options. Each option must include a short hook, a 4-line body, and a clear CTA asking users to reply with WORKFLOW.” Structural guidance significantly reduces inconsistent formatting.
  • Tune temperature and system messages
    Lower temperature values will yield more consistent, predictable posts. Higher values may generate more creative hooks but can also introduce variability. Adjust system instructions to reinforce tone, voice, and compliance requirements.
  • Maintain a human approval step
    Even with strong prompts, automated publishing without review can amplify mistakes. Keep at least one human-in-the-loop checkpoint for brand, legal, and factual validation before posts go live.

Practical use cases for content and growth teams

Teams using this template typically focus on scaling distribution of existing YouTube content. Common scenarios include:

  • Converting a single in-depth tutorial into a full week of social posts.
  • Generating Twitter/X threads that drive followers and DMs using comment-gated CTAs.
  • Producing LinkedIn posts that highlight thought leadership and direct readers back to the original YouTube video or a community.

Typical output patterns might look like:

  • Twitter: A concise hook, followed by a 5 to 6 step breakdown of the workflow, and a CTA such as “Follow, RT, and comment ‘WORKFLOW’ to get the template via DM.”
  • LinkedIn: A problem-to-solution narrative that quantifies the benefit (for example, “saves 5 hours per week”), includes a brief walkthrough, and ends with a CTA like “Comment WORKFLOW to get access.”

Troubleshooting and optimization

Missing transcript or subtitles

If no transcript is returned:

  • Verify that the startUrls parameter in the Apify request is correctly set to the YouTube URL.
  • Confirm that the video is not private, unlisted with restrictions, or age-restricted.
  • Check Apify settings to ensure auto-generated captions are enabled when available.

Unstructured or messy LLM output

If the JSON output is inconsistent or difficult to parse:

  • Strengthen the system prompt with explicit schema requirements.
  • Provide clearer examples in the Set nodes that show the exact JSON structure expected.
  • Refine the output parser node to validate and normalize the model’s text into a stable schema.

Slack messages not appearing

If Slack notifications fail:

  • Confirm that the Slack app has the correct OAuth scopes for posting messages.
  • Double-check the channel ID and any thread-related configuration. If thread_ts is invalid, messages may not post as expected.
  • Test the Slack node independently using simple sample text to isolate credential or permission issues.

Extending and customizing the workflow

The template is intentionally modular so it can evolve with your automation strategy. Common extensions include:

  • Auto-publishing to Twitter/X using the Twitter API or a connected social scheduling tool.
  • Short-form video generation for TikTok or Instagram Reels by adding a clip-splitting node and connecting to a rendering service.
  • Content calendar integration by writing generated posts to Google Sheets or Airtable for planning and analytics.
  • Approval workflows using Notion, Airtable, or email-based approval steps that must be completed before auto-posting is triggered.

Conclusion: Operationalizing YouTube-to-social at scale

Automating YouTube-to-social repurposing is one of the highest-leverage improvements content teams can make. The Recap AI n8n template provides a ready-made foundation that connects YouTube, Apify, LLMs, and Slack into a cohesive, reviewable workflow. With minimal configuration, you can turn every long-form video into a consistent stream of platform-optimized posts, without expanding your editorial team.

Next steps
Connect your Apify and LLM credentials, customize the example posts to match your brand, and start testing the template with your existing YouTube content. Iterate on prompts and parsing rules until the workflow reliably produces publish-ready drafts.

If you would like the exact prompt configurations referenced in this guide, you can comment “WORKFLOW” under the blog post or use the download option to access the n8n JSON and a full video walkthrough.

Want to see it in action with your own content? Paste a public YouTube URL and you can generate sample Twitter and LinkedIn outputs as a mockup.