Automated Mailchimp Campaign Tracking with n8n

Automated Mailchimp Campaign Tracking with n8n

This guide walks you through an n8n workflow template that automatically tracks Mailchimp campaigns, stores their semantic context, and generates useful reports. You will learn how the workflow works, how each node fits together, and how to set it up step by step.

What you will learn

By the end of this tutorial-style article, you will be able to:

  • Connect Mailchimp to n8n using webhooks for campaign tracking.
  • Split long campaign content into chunks and generate embeddings for semantic search.
  • Store and query embeddings in Supabase as a vector database.
  • Use a RAG (Retrieval Augmented Generation) agent with an Anthropic chat model in n8n.
  • Log status and insights to Google Sheets and send error alerts to Slack.

Why use n8n for Mailchimp campaign tracking?

Traditional campaign tracking focuses on raw events and basic metrics. This template goes further by capturing the meaning of your campaign content and making it searchable for future AI workflows.

By extracting semantic context and storing it in a vector store, you can:

  • Search campaigns semantically instead of relying only on exact keyword matches.
  • Use a RAG-enabled assistant to summarize, compare, or analyze campaigns.
  • Automate reporting into Google Sheets and send notifications to Slack.
  • Scale your history so that future AI tools can reuse past campaigns as context.

The result is a resilient Mailchimp campaign tracking system that turns your email history into a searchable knowledge base.

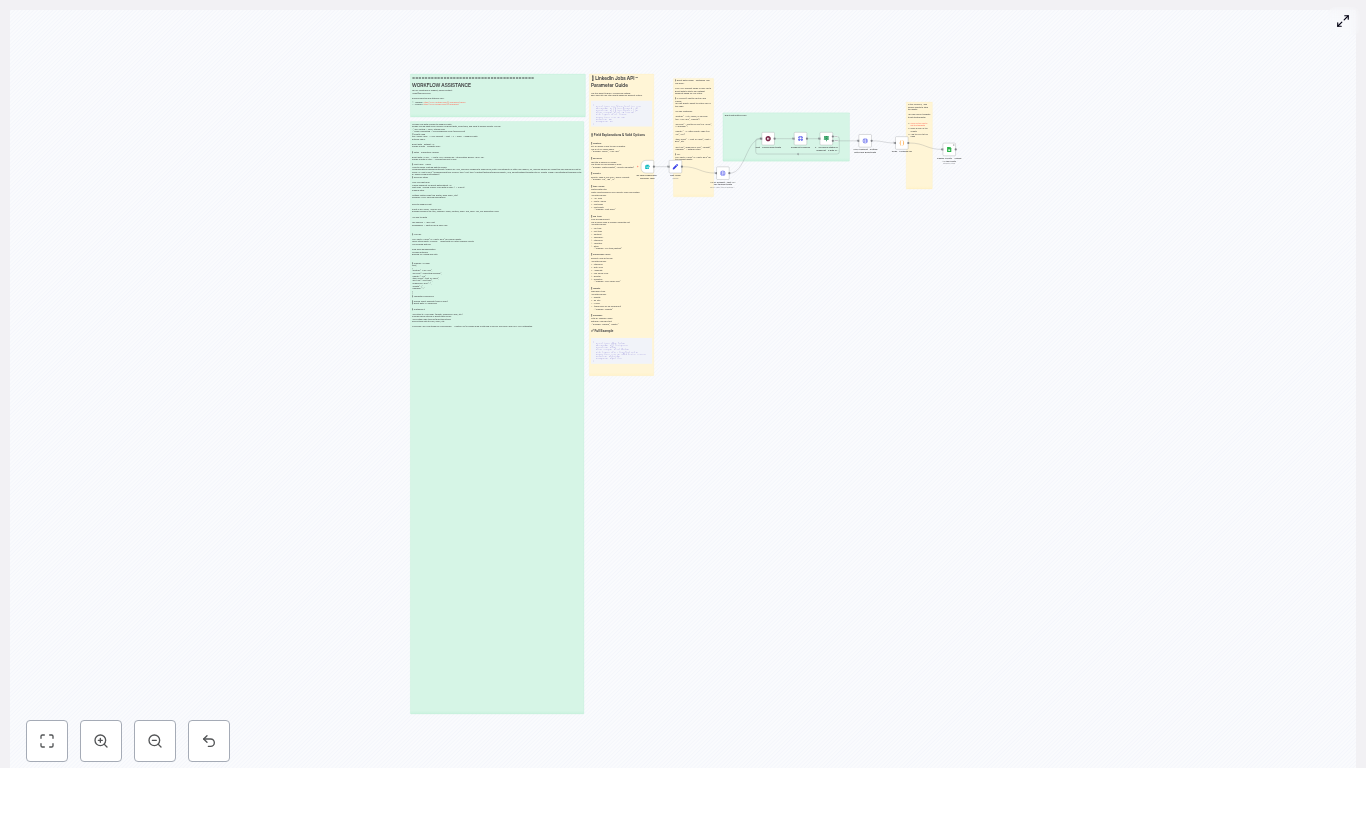
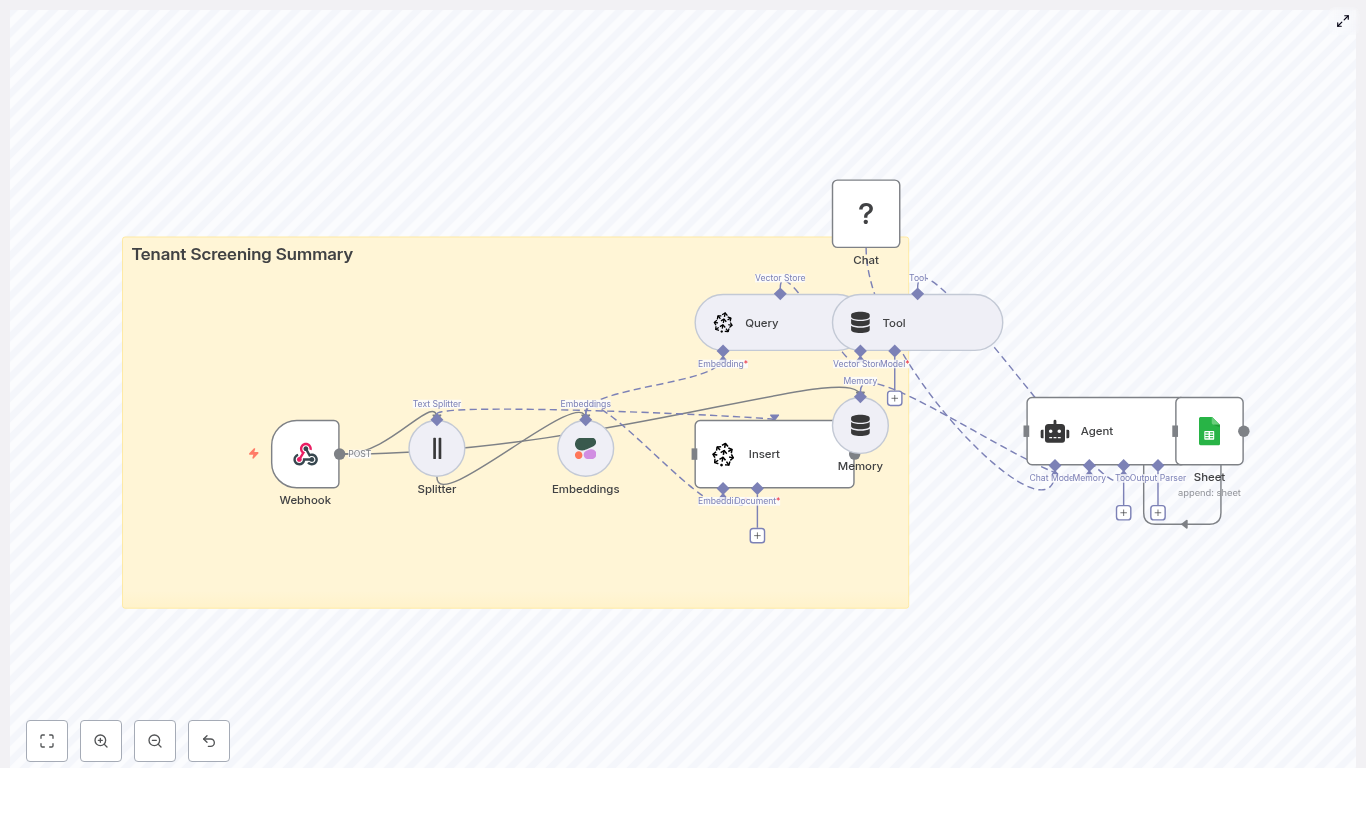
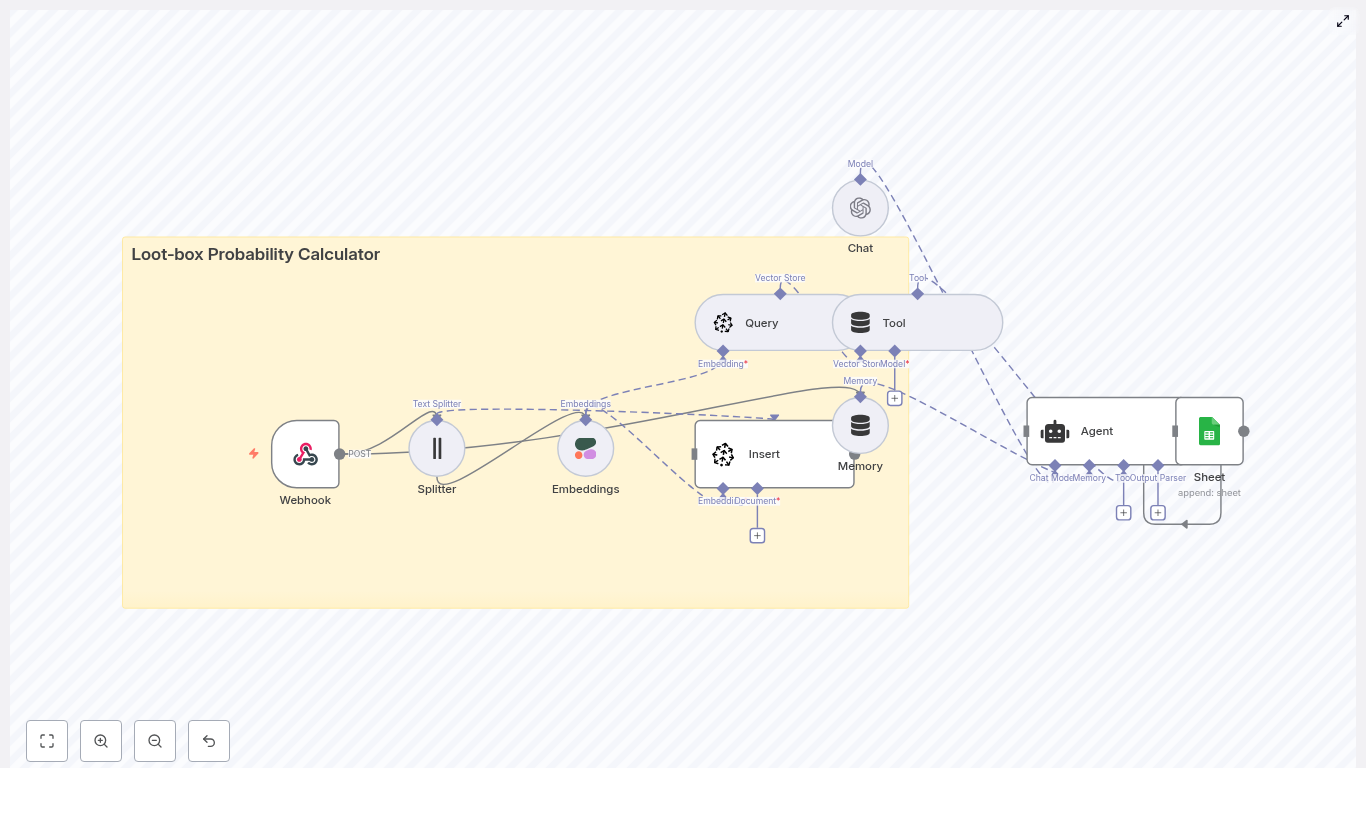
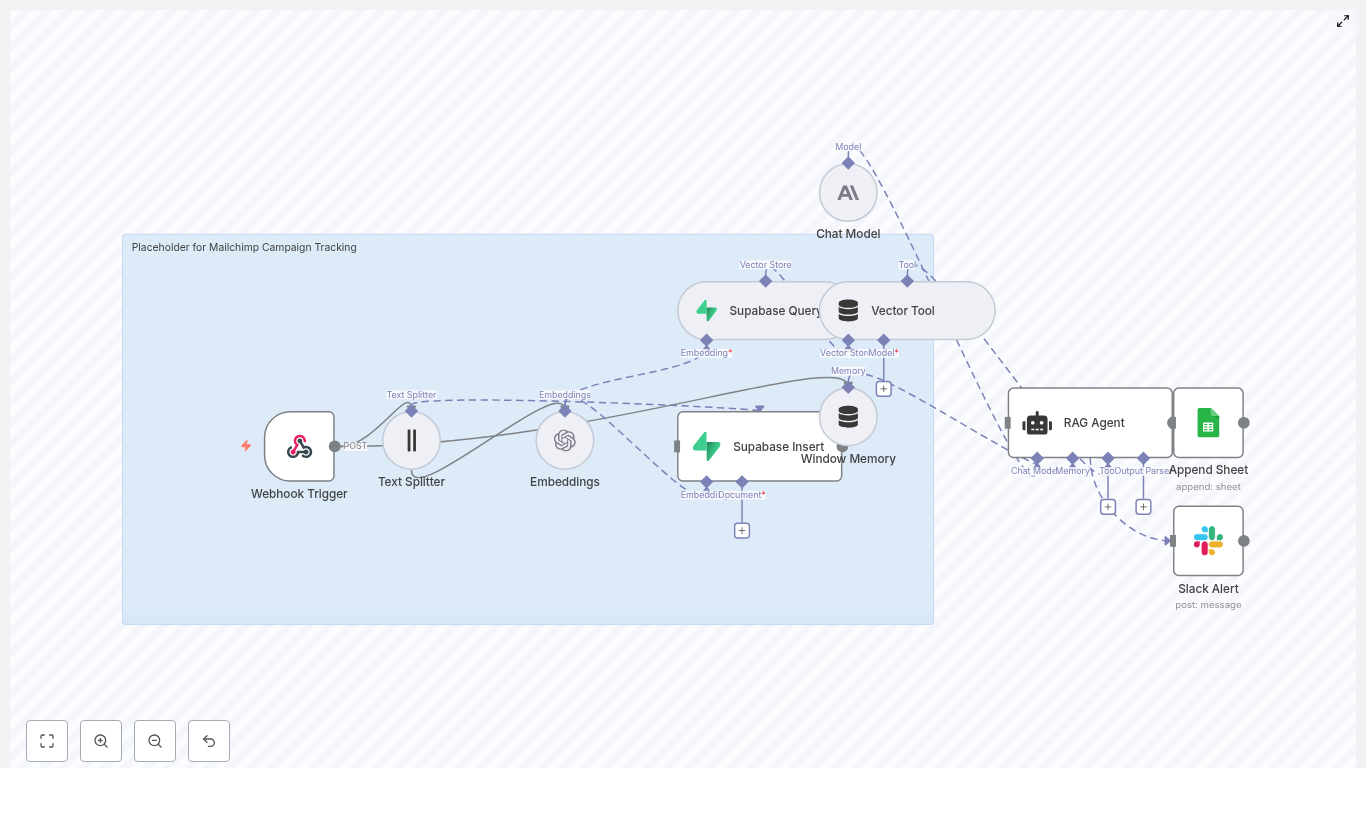
How the n8n Mailchimp tracking template works

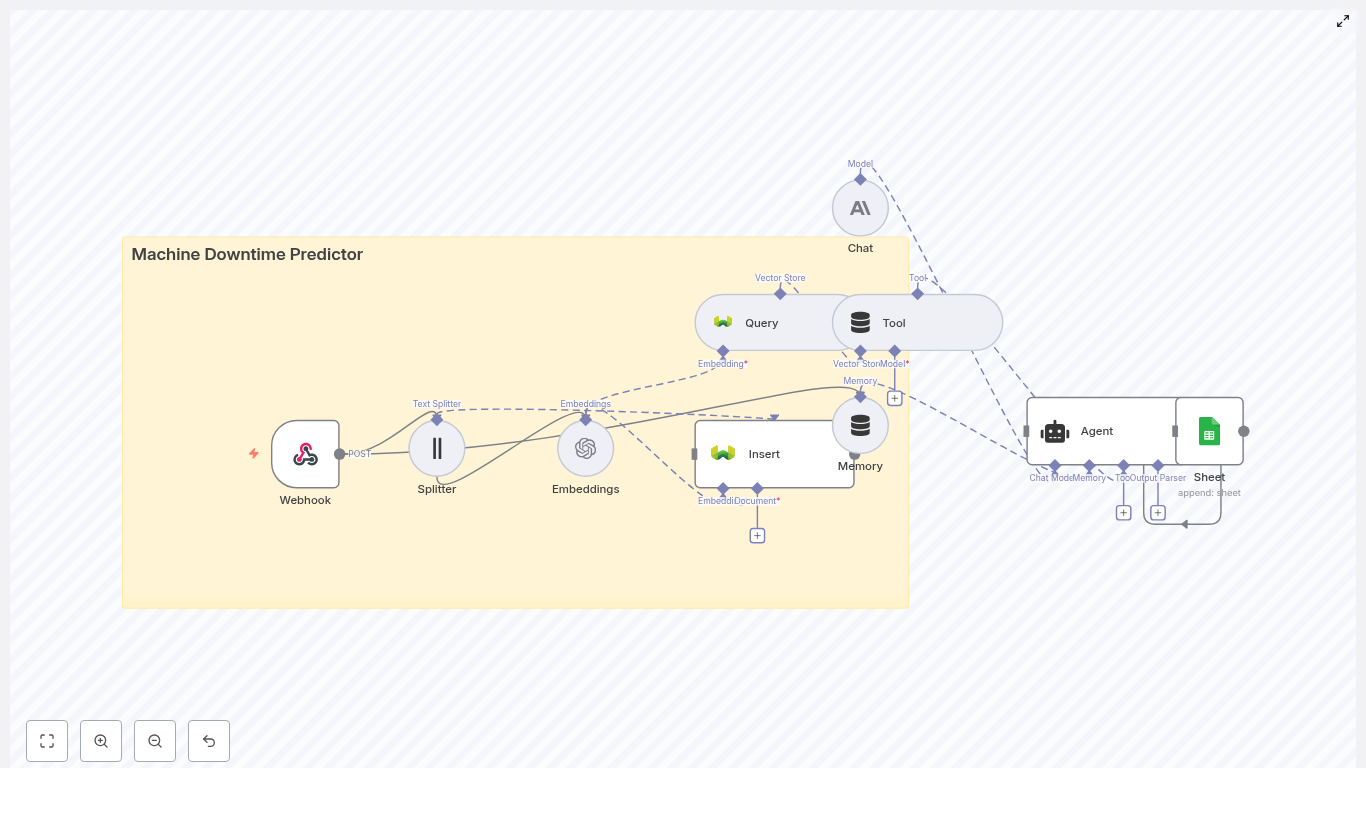
At a high level, the workflow follows this path:

  1. Mailchimp sends a webhook to n8n when a campaign event occurs.
  2. n8n splits the campaign content into chunks and creates embeddings using OpenAI.
  3. Those embeddings are stored in a Supabase vector store for later retrieval.
  4. A RAG agent (using an Anthropic chat model) uses those stored vectors as context.
  5. The agent writes structured results to Google Sheets.
  6. If something fails, n8n sends an alert to Slack.

Next, we will break down each component so you can understand the full flow and then set it up yourself.

Core concepts and components

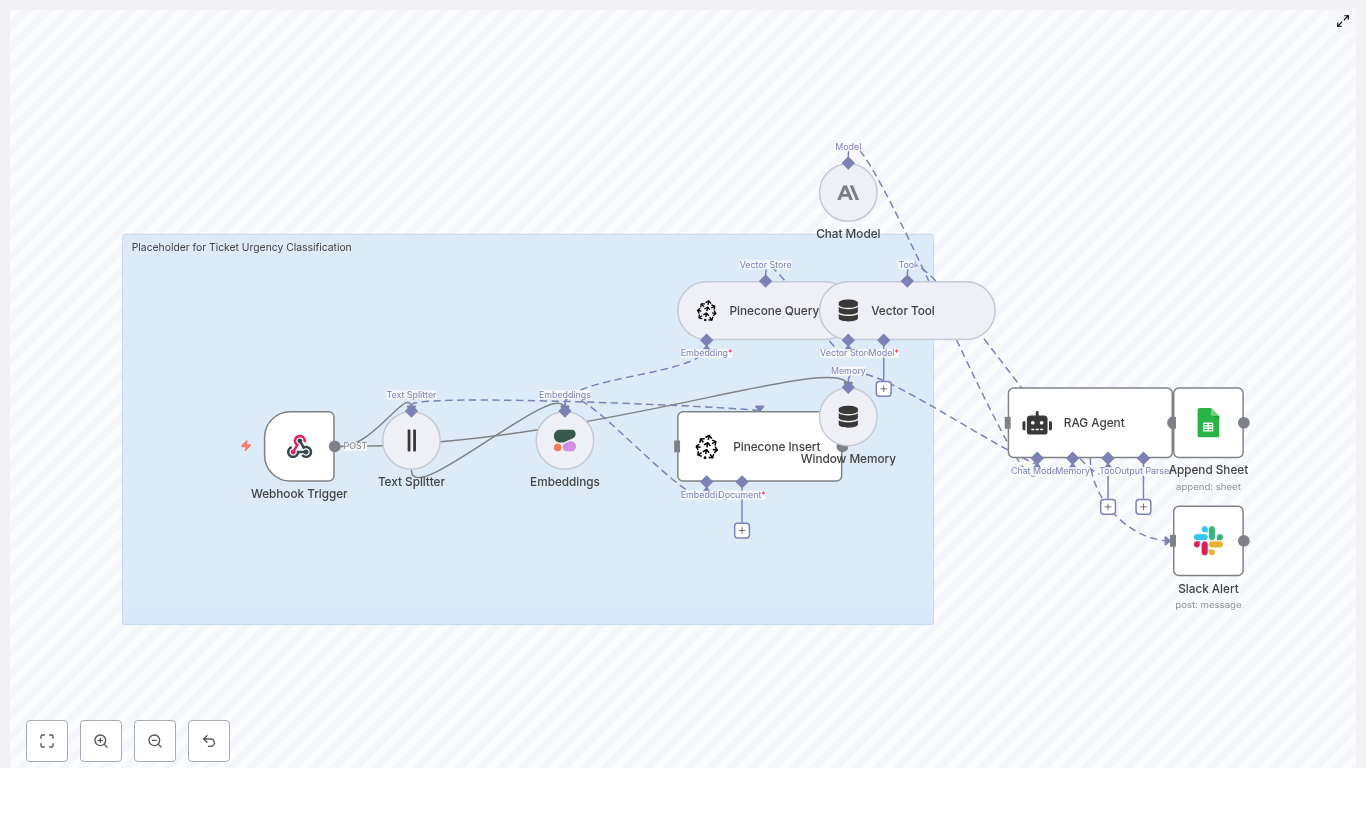
1. Webhook Trigger – receiving Mailchimp events

The Webhook Trigger node is the entry point of the workflow. Mailchimp sends POST requests to this webhook whenever specific events occur, such as:

  • campaignSent
  • campaignUpdate

You configure Mailchimp to POST to a path like /mailchimp-campaign-tracking on your n8n instance. Every time Mailchimp fires the webhook, n8n starts the workflow and passes along the campaign data.

2. Text Splitter – preparing content for embeddings

Mailchimp campaign bodies are often long. Most embedding models work best when text is broken into smaller pieces, so the template includes a Text Splitter node.

In the template, recommended settings are:

  • chunkSize: 400
  • chunkOverlap: 40

This means each chunk is about 400 tokens, with a 40 token overlap to preserve context between chunks. You can adjust these values if your content is shorter, longer, or if your embedding model has different token limits.

3. Embeddings – turning text into vectors

The Embeddings node converts each text chunk into a numerical vector. These vectors capture semantic meaning, which is what enables:

  • Semantic search
  • Context retrieval for the RAG agent

The template uses the OpenAI model text-embedding-3-small by default. You can replace it with another embedding model, as long as you update any related configuration (like vector dimensions in Supabase).

4. Supabase Insert & Supabase Query – your vector store

Once embeddings are created, they need to be stored in a database that supports vector similarity search. This template uses Supabase as the vector store.

  • Supabase Insert Stores each embedding and its metadata (such as campaign ID, content chunk, timestamps) in a vector index named mailchimp_campaign_tracking.
  • Supabase Query Later, when the RAG agent needs context, this node retrieves the most relevant vectors from the mailchimp_campaign_tracking table using similarity search.

Correct configuration of the vector column and index in Supabase is essential for fast and accurate retrieval.

5. Vector Tool – connecting Supabase to the RAG agent

The Vector Tool node exposes Supabase as a tool that the RAG agent can call during its reasoning process. Instead of manually wiring queries, the agent can request relevant campaign chunks through this tool, which simplifies the flow.

6. Window Memory – short term context

The Window Memory node stores a rolling window of recent messages or context. In this template, it gives the agent access to short term state between calls, which can be helpful if the agent needs to refer back to earlier prompts or intermediate steps.

7. Chat Model (Anthropic) – the reasoning engine

The Chat Model node is the language model that interprets the retrieved context and generates structured outputs. The template uses an Anthropic chat model, but you can swap in another supported provider if you prefer.

The model:

  • Takes the retrieved campaign chunks as context.
  • Applies the system prompt instructions.
  • Generates summaries, statuses, or insights that will later be logged.

8. RAG Agent – combining tools, memory, and model

The RAG Agent node brings everything together:

  • It uses the Anthropic chat model.
  • It uses the Window Memory for short term context.
  • It calls the Vector Tool to retrieve relevant campaign chunks from Supabase.

The agent is guided by a system message such as:

“You are an assistant for Mailchimp Campaign Tracking”

Based on this instruction, the agent can:

  • Parse campaign details.
  • Summarize content.
  • Generate a status or result that will be written to Google Sheets.

9. Append Sheet (Google Sheets) – logging results

When the RAG agent completes successfully, the workflow continues to the Append Sheet node. This node writes a new row to a specific sheet in a Google Sheets document.

In the template configuration:

  • The sheet name is Log.
  • At least one column named Status is appended.

You can extend this to include additional columns, such as campaign ID, subject line, summary, or risk score. This sheet becomes your audit log and reporting source for stakeholders.

10. Slack Alert – catching and surfacing errors

If the RAG agent fails or another critical error occurs, the workflow routes to a Slack Alert node.

This node sends a message to a Slack channel, for example #alerts, containing error details so your team is aware that something went wrong. This reduces silent failures and helps you maintain trust in the automation.


Step-by-step setup guide

Step 1: Prepare your n8n environment

  • Use n8n.cloud or a self-hosted n8n instance.
  • Ensure it has SSL and a public URL, which is required for Mailchimp webhooks to reach it.

Step 2: Create and collect required credentials

You will need the following credentials before importing the template:

  • OpenAI API key (or another embedding provider) Used by the Embeddings node to generate vector representations of text.
  • Anthropic API key (or another chat model provider) Used by the Chat Model node that powers the RAG agent.
  • Supabase project and API key Set up a Supabase project and create a vector table or index named mailchimp_campaign_tracking. Configure the vector column according to the embedding model dimensions.
  • Google Sheets OAuth2 credentials Grant access to the spreadsheet you will use for logging, including the Log sheet.
  • Slack app token Give the workflow permission to post messages to your alert channel, such as #alerts.

Step 3: Import the n8n template

  1. Open your n8n instance.
  2. Import the Automated Mailchimp Campaign Tracking template.
  3. Open each node that requires credentials and select the correct credential from the dropdown (OpenAI, Anthropic, Supabase, Google Sheets, Slack).

Step 4: Configure the Mailchimp webhook

  1. In Mailchimp, go to your audience or campaign settings where webhooks are configured.
  2. Create a new webhook and set the POST URL to your n8n webhook endpoint, for example: https://your-n8n-domain.com/webhook/mailchimp-campaign-tracking
  3. Select the events you want to track, such as campaignSent and campaignUpdate.
  4. Save the webhook configuration.

Step 5: Test the full workflow

  1. Trigger a sample campaign event in Mailchimp (for example, send a test campaign or update an existing one).
  2. Check n8n to confirm that the Webhook Trigger node fires and the workflow runs.
  3. Verify that:
    • Text is split into chunks correctly.
    • Embeddings are created without errors.
    • Supabase contains new entries in the mailchimp_campaign_tracking vector table.
    • A new row is added to the Google Sheets Log sheet with a Status value and any other configured fields.
    • No Slack error alerts are sent. If they are, inspect the error message and adjust configuration.

Troubleshooting and optimization tips

Embedding issues

  • Embeddings fail or are missing Check that your embedding API key is valid, the model name is correct, and you are not hitting rate limits. Look at the node execution logs in n8n for specific error messages.

Chunk size tuning

  • Chunks too small If your chunks are tiny, you may store more vectors than necessary and lose broader context. Increase chunkSize.
  • Chunks too large If chunks are too long, you might hit token limits and reduce retrieval precision. Decrease chunkSize or adjust chunkOverlap to balance context and efficiency.

Supabase vector configuration

  • Confirm that your vector column type and similarity index match the embedding dimension of your chosen model.
  • Follow Supabase documentation to configure indexes for fast similarity search.

Cost and rate limits

  • Embedding every draft and version can increase both cost and API load. Consider:
    • Embedding only final or sent campaigns.
    • Sampling drafts instead of storing every minor change.

Security considerations

  • Protect your webhook endpoint with a secret token or signature validation.
  • Use Mailchimp’s webhook secret and verify the signature in the Webhook Trigger or a preliminary node in n8n.
  • Store all API keys securely using n8n credentials storage rather than hard coding them.

Practical use cases for this template

  • Campaign retrospectives Query similar past campaigns from the vector store and have the RAG agent generate summaries or lessons learned automatically.
  • Creative and subject line research During planning for a new campaign, semantically search for past campaigns with similar topics or styles and review their performance.
  • Automated reporting and audit trails Use the Google Sheets Log sheet as a living dashboard for stakeholders, with status, summaries, and key metadata appended automatically.
  • Risk or sensitivity monitoring Extend the RAG agent prompt so it checks for risky or sensitive content patterns and sends Slack alerts when it detects them.

Best practices for reliable automation

  • Monitoring and alerting Keep the Slack alert node active and consider adding additional checks so you are notified about failed embeddings, Supabase insert errors, or model issues.
  • Credential hygiene Rotate API keys regularly and manage them through n8n’s secure credential storage.
  • Vector database management Archive or downsample older embeddings if your Supabase vector table grows too large. You can keep only key campaigns or summaries to control cost.
  • Prompt versioning Track changes to your RAG agent system message and prompts. Versioning makes it easier to reproduce past behavior and understand why outputs changed over time.

Recap

This n8n template transforms Mailchimp campaign tracking from static logs into a dynamic, AI-ready knowledge base. By combining:

  • Mailchimp webhooks
  • Text chunking and embeddings
  • A Supabase vector store
  • A RAG agent powered by an Anthropic chat model
  • Google Sheets logging
  • Slack alerts for failures

you gain a robust system that not only records campaign activity but also makes it searchable and actionable for future workflows, summaries, and reports.

FAQ

Can I use a different embedding or chat model provider?

Yes. You can swap out the OpenAI embedding model or the Anthropic chat model for any provider supported by n8n, as long as you update the credentials and adjust your Supabase vector configuration to match the new embedding dimensions.

Do I have to use Supabase as the vector store?

This template is built around Supabase, but the concept is portable. If you use another vector database, you would need to replace the Supabase nodes and adjust the Vector Tool configuration accordingly.

Can I customize what gets written to Google Sheets?

Yes. The template appends a Status column to a sheet named Log, but you can add more columns, such as campaign ID, subject line, summary, risk score, or any other structured data the RAG agent produces.

How do I extend the RAG agent behavior?

Modify the system message and prompts in the RAG Agent node. For example, instruct it to check for compliance issues, sentiment, or brand guideline violations, then log those details or trigger Slack alerts.


Get started with the template

Ready to use automated Mailchimp campaign tracking in n8n?

  1. Import the template into your n8n instance.

Automate “On This Day” HN Digests with n8n & Gemini

Automate “On This Day” HN Digests with n8n & Gemini

On a quiet Tuesday night, Lena stared at her blinking cursor.

She was a developer turned indie creator who ran a small Telegram channel about tech history and developer culture. Her audience loved the occasional “On This Day on Hacker News” posts she manually assembled. Those posts always got the most replies, the longest threads, and the highest engagement. But there was a problem.

They took forever to create.

Every evening she would:

  • Dig through old Hacker News front pages
  • Copy and paste headlines into a messy document
  • Try to spot patterns or themes
  • Write a short recap and format it for Telegram

One missed day became two, then a week. The audience kept asking for more “On This Day” digests, but Lena knew she could not keep doing it by hand.

“If I do this manually,” she thought, “I’ll either burn out or stop altogether.”

That night she decided she needed a fully automated workflow. Something that could:

  • Look up Hacker News front pages for the same calendar date across many years
  • Summarize and categorize the most interesting headlines
  • Publish a clean Markdown digest straight to her Telegram channel

Her solution started with n8n and Google Gemini.

The spark: why automate “On This Day” Hacker News digests?

Lena already knew that Hacker News archives are a goldmine. Looking back at old front pages showed her:

  • How conversations about AI, privacy, and open source evolved
  • Which tools and startups quietly appeared years before they became mainstream
  • How trends rose and fell over time

Her audience loved seeing these timelines unfold, especially when she could say things like “On this day in 2012, the first big post about X hit the front page.”

Automating this “On This Day” HN digest with n8n would let her:

  • Surface short tech histories and trends for social channels automatically
  • Stop wasting time on tedious research and copy paste work
  • Deliver consistent, engaging content to her Telegram channel, newsletter, or blog

She did not just want a script. She wanted a reliable, end to end workflow that would run every day, even if she was offline.

Meet the toolkit: n8n, Gemini, Telegram, and Hacker News

Before she drew the first node, Lena chose her stack.

  • n8n – her orchestration hub, a visual automation platform that could schedule runs, call APIs, parse HTML, and chain logic together
  • Google Gemini (or any capable LLM) – the brain that would analyze headlines, group them into themes, and write a Markdown digest
  • Telegram Bot API – the publishing channel, so the final digest would arrive automatically in her Telegram audience’s feed
  • Hacker News front page at https://news.ycombinator.com/front – the source for historical front page headlines

With the pieces in place, she opened n8n and started sketching the architecture on a whiteboard.

Designing the workflow: from daily trigger to Telegram digest

Lena did not want a fragile chain of ad hoc scripts. She wanted a clear pipeline, so when something broke she would know exactly where to look.

Her end to end n8n workflow would look like this:

  • Scheduler – kick off the workflow once per day
  • Date generator – compute the same month and day for each year she cared about
  • Scraper – fetch the Hacker News front page HTML for each of those dates
  • Extractor – parse headlines and the date from the HTML
  • Aggregator – merge everything into a structured JSON payload
  • LLM summarizer – send that JSON to Gemini with a carefully written prompt
  • Publisher – post the Markdown digest to her Telegram channel

Once she had the big picture, she turned that sketch into concrete n8n nodes.

Rising action: building the n8n pipeline step by step

1. Making it daily: Schedule Trigger

The first problem was consistency. Lena wanted the digest to appear every evening at the same time, without her intervention.

She dropped a Schedule Trigger node into the canvas and configured it to run every day at a fixed hour, for example 21:00.

This node would become the heartbeat of the whole system, and every part of the workflow would start from here.

2. Time travel in code: generating the year list

Next, she needed to fetch the same calendar date across multiple years. If today was March 3, she wanted March 3 for 2007, 2008, 2009, and so on up to the current year.

She added a Code node called CreateYearsList. Inside that JavaScript node, she wrote logic to:

  • Determine the current date
  • Loop from a chosen start year, such as 2007, up to the current year
  • Generate ISO formatted date strings like YYYY-MM-DD for each year on that same month and day
  • Handle edge cases, like starting mid year or ensuring the dates exist

The node output an array called something like datesToFetch, a clean list of date strings that the rest of the workflow could iterate over.

3. Tidying the payload: CleanUpYearList

To keep things predictable, Lena added a Set node named CleanUpYearList.

Its job was simple: normalize the date array into a single JSON key that every downstream node would expect. That small step made debugging easier later, because all the dates lived under one consistent field instead of being scattered across different structures.

4. One date at a time: SplitOutYearList

Fetching every date in one big HTTP call was not an option. She wanted each date to be handled individually so that a failure for one year would not break the entire run.

She used a Split Out node, SplitOutYearList, to iterate over the list of dates. This node took the array of datesToFetch and produced one item per date.

Now each subsequent HTTP call could work with a single date, be retried independently, and be batched with delays to respect rate limits.

5. Scraping history: GetFrontPage HTTP Request

With individual dates flowing through the pipeline, Lena wired up the HTTP Request node, GetFrontPage.

For each item, the node would call:

https://news.ycombinator.com/front?day=YYYY-MM-DD

She configured it to:

  • Use the current item’s date in the day query parameter
  • Return the raw HTML of the front page for that day
  • Enable batching and add a small delay, for example 3 seconds between requests, so she would not hit rate limits

Now, for every date, she had the full HTML of the historical Hacker News front page ready for parsing.

6. Pulling out the good parts: ExtractDetails HTML node

The raw HTML was messy and noisy. Lena needed just two things:

  • The list of front page headlines
  • The date string that Hacker News shows on the page

She added an HTML Extract node called ExtractDetails. Inside that node she:

  • Targeted the .titleline selector to grab the headlines
  • Used a selector like .pagetop > font to extract the date text from the page header
  • Configured the node to return arrays of headlines so they could be matched back to the correct date

This node turned messy HTML into structured data: arrays of titles and the associated page date for each request.

7. Giving data a home: GetHeadlines and GetDate

To keep everything clean, she used two Set nodes, GetHeadlines and GetDate.

These nodes:

  • Placed the parsed headlines into a dedicated JSON field, for example headlines
  • Stored the associated date into a field like date

That small bit of structure made it much easier to merge and aggregate later. Each item now clearly said: “Here are the headlines, and here is the date they belong to.”

8. Building the master JSON: MergeHeadlinesDate and SingleJson

At this point the workflow had many items, one per date, each with its own headlines and date metadata. Gemini, however, would work best with a single structured JSON object.

Lena added a Merge node followed by an Aggregate node, often called something like MergeHeadlinesDate and SingleJson.

These nodes:

  • Combined the headlines and date fields by position
  • Aggregated all items into one JSON payload
  • Produced a final structure that grouped headlines by year or date

The result was a clean JSON object that looked roughly like: an array of entries, each with a date and a list of headlines and URLs. Perfect to hand off to an LLM.

9. The turning point: letting Gemini write the digest

This was the moment Lena had been working toward. She did not want to manually read through dozens of headlines every night. She wanted an AI assistant to do the heavy lifting and produce a polished “HN Lookback” summary for her.

She added an LLM node, which in her case used Google Gemini, and named it something like Basic LLM Chain.

Inside this node she crafted a tight, explicit prompt. The instructions told the model to:

  • Accept a structured JSON input that contained an array of dates and their headlines
  • Scan across all years and select the top 10 to 15 most interesting headlines
  • Group those headlines into themes such as Open Source, Fundraising, AI, Privacy, or Startups
  • Produce a Markdown digest titled something like “HN Lookback” for that day
  • Format each entry with:
    • A year prefix
    • A Markdown link to the original URL
    • Short, readable descriptions

Conceptually, her prompt read a bit like this:

<provide the JSON>
You are a news categorizer. From the list, produce a Markdown "HN Lookback" for this day covering startYear to endYear. Choose 10-15 top headlines, group by themes, and include markdown links and prefix each entry with its year.

By being explicit about structure, count, and formatting, Lena got consistent, channel ready Markdown output that barely needed editing.

10. The payoff: publishing to Telegram

Now she needed to put that Markdown in front of her audience.

She added a Telegram node, connected it to her bot, and configured it to:

  • Send messages to her chosen Telegram channel
  • Use Markdown parse mode so all headings, bullets, and links rendered correctly
  • Ensure the bot had permission to post, ideally as an admin

When she ran a test, the full “On This Day” Hacker News digest appeared in her channel as a neatly formatted post, complete with themes, years, and clickable links.

For the first time, she saw the entire process run end to end without touching a browser.

Keeping Gemini on track: prompt engineering in practice

After a few test runs, Lena noticed that small changes in the prompt could produce very different results. To keep the digest consistent, she refined her instructions using a few principles:

  • Be strict about output format She included a clear Markdown template in the prompt and told the model to follow it exactly.
  • Prioritize by interest She asked the model to favor headlines that looked historically significant, had strong engagement, or represented important shifts in tech.
  • Limit the number of entries She constrained the digest to 10 to 15 headlines so the post stayed readable and scannable.
  • Always include URLs and year prefixes Every bullet had the original URL as a Markdown link and a year at the start, so readers could quickly see when the story appeared.

These small tweaks made the difference between a chaotic list and a polished, repeatable format her subscribers came to expect.

Behind the scenes: scheduling, batching, and rate limits

Once the core flow worked, Lena turned her attention to reliability and respect for external services.

When scraping historical Hacker News pages, she followed a few rules:

  • Batch HTTP requests She avoided hammering the site by spacing out requests, using 3 to 5 second delays between calls.
  • Use retries with backoff For transient network errors, she configured retries with exponential backoff to avoid failing the entire job on a single bad response.
  • Cache when possible For older dates that never change, she considered caching results so the workflow did not re scrape the same pages every time.

These safeguards made the workflow both polite and robust.

Staying safe and sane: best practices for the workflow

As she prepared to run the automation daily, Lena added a few guardrails.

  • Respect Hacker News terms of service She monitored her scraping volume and kept an eye on the site’s guidelines, and considered using official APIs or archives if her usage grew.
  • Validate URLs Before publishing, she checked that links did not obviously point to broken or malicious targets.
  • Control LLM costs She set sensible token limits in the Gemini node and monitored usage so costs did not spike unexpectedly.
  • Log outputs and add review steps She logged every digest and kept the option to insert a human approval step in n8n before posts went live.

With these in place, she felt comfortable leaving the workflow on autopilot.

When things break: how Lena debugged common issues

Not every run was perfect at first. A few early failures taught her where to look when something went wrong.

  • Empty or missing headlines She discovered that if the HTML structure changed, her .titleline selector would fail. The fix was to inspect the latest HTML and update the selector.
  • Incorrect dates When the digest showed mismatched years, she traced it back to inconsistent date formatting. Ensuring every node used ISO YYYY-MM-DD format fixed the issue.
  • LLM ignoring the template If Gemini drifted from the requested format, she tightened the prompt and added a small example of the exact Markdown layout she

Automate Toggl Daily Reports with n8n & RAG

Automate Toggl Daily Reports with n8n, Pinecone and Cohere

Imagine wrapping up your workday and having a clean, human-friendly summary of everything you did just appear in your Google Sheet or Slack. No copy-pasting from Toggl, no guesswork, no “what did I actually do between 2 and 4 pm?”

That is exactly what this n8n workflow template helps you do. It takes raw Toggl time entries, turns them into embeddings, stores them in a vector database, and uses a RAG (Retrieval-Augmented Generation) agent to generate concise daily reports you can actually use.

In this guide, we’ll walk through what the template does, when it’s useful, and how all the pieces fit together so you can set it up with confidence and tweak it for your own needs.

Why bother automating Toggl daily reports?

If you’ve ever tried to write daily summaries from Toggl manually, you know the drill. It’s repetitive, easy to forget, and surprisingly time-consuming. On top of that, manual summaries are often inconsistent and miss context that would be helpful later.

Automating your Toggl daily reports helps you:

  • Get consistent summaries for managers, clients, or your future self
  • Simplify billing, invoicing, and project reviews
  • Spot where your time really goes across projects and tasks
  • Free up mental energy for actual work instead of admin

By combining n8n with Pinecone (as a vector database), Cohere embeddings, and an LLM-powered RAG agent, you can turn messy raw logs into context-rich summaries and save them wherever you want: Google Sheets, Slack, or other tools in your stack.

What this n8n template actually does

At a high level, the template implements a pipeline that:

  1. Receives Toggl time entry data via a webhook
  2. Splits long text into smaller chunks for better embeddings
  3. Uses Cohere to generate embeddings for each chunk
  4. Stores those embeddings and metadata in a Pinecone index
  5. Queries Pinecone to retrieve relevant context later
  6. Uses a RAG agent with an Anthropic chat model to create a human-readable daily report
  7. Appends the final summary to a Google Sheet
  8. Alerts a Slack channel if something goes wrong (or optionally for daily digests)

Think of it as a little reporting assistant that quietly runs in the background, reads your Toggl logs, and writes a neat summary for you.

When should you use this automation?

This workflow is especially helpful if you:

  • Log your time in Toggl every day and want a structured daily recap
  • Need a record of what happened for billing, compliance, or client communication
  • Manage a team and want quick visibility into how time is being spent
  • Prefer storing reports in Google Sheets, Slack, or other tools accessible to your team

You can use it for individuals, teams, or even multi-tenant setups, as long as you structure your metadata and Pinecone namespaces correctly.

How the architecture fits together

Here’s the high-level architecture of the n8n workflow template:

  • Webhook Trigger – Accepts Toggl time entries or a batch payload via POST
  • Text Splitter – Breaks large text into smaller chunks for consistent embeddings
  • Embeddings (Cohere) – Converts each text chunk into a vector representation
  • Pinecone Insert – Stores vectors and metadata in a Pinecone index
  • Pinecone Query & Vector Tool – Fetches relevant vectors as context for the RAG agent
  • Window Memory – Keeps recent context if you want conversational or multi-step behavior
  • Chat Model (Anthropic) – The LLM that generates the natural language report
  • RAG Agent – Orchestrates retrieval and generation, using both raw data and vector context
  • Append Sheet (Google Sheets) – Saves the final summary in a spreadsheet
  • Slack Alert – Sends error notifications or optional summary messages

Now let’s walk through each piece so you know exactly what’s going on under the hood.

Step-by-step walkthrough of the workflow

1. Webhook Trigger – your entry point for Toggl data

The journey starts with a Webhook Trigger node in n8n. This exposes an HTTP endpoint that Toggl (or a custom exporter) can call with your time entries.

You’ll typically:

  • Set the path to something like /toggl-daily-report
  • Use the POST method
  • Send a payload that includes at least:
    • date
    • project
    • user
    • description
    • duration

This can be hooked up via Toggl webhooks if available, or via a scheduled script that exports daily entries and posts them to the webhook.

2. Text Splitter – keeping chunks manageable

Long descriptions and big batches of entries can cause trouble for embedding models. They might hit token limits or simply produce lower-quality embeddings.

The Text Splitter node solves this by splitting large blocks of text into smaller pieces. In this template, the default settings are:

  • chunkSize = 400
  • chunkOverlap = 40

That overlap is important. It keeps context flowing across chunks so the model does not lose important details at the boundaries. You can tweak these values depending on your embedding model and the style of your Toggl descriptions.

3. Embeddings with Cohere – turning text into vectors

Next up is the Embeddings (Cohere) node. This is where the text chunks get transformed into dense vectors that capture semantic meaning.

The template uses the embed-english-v3.0 model from Cohere. Along with each vector, you should store useful metadata so you can filter and query later. Common metadata fields include:

  • Date of the entry
  • Project name or ID
  • User or team member
  • Entry ID or a unique reference

This metadata is what lets you later pull vectors only for a specific day, project, or user when building the report.

4. Pinecone Insert – storing everything for retrieval

Once you have embeddings, they need a home. The Pinecone Insert node sends them to a Pinecone index, which in this template is named toggl_daily_report.

Inside Pinecone you can:

  • Use namespaces to separate environments (dev vs prod) or tenants
  • Store both the text chunks and the metadata alongside the vectors

This step is crucial for the RAG agent, because later it will query this index to find the most relevant context when generating your daily summary.

5. Pinecone Query & Vector Tool – fetching relevant context

When it is time to create a daily report, the workflow needs to know which entries are relevant. That is where the Pinecone Query node and Vector Tool come in.

The workflow queries Pinecone for vectors that match the day’s logs or a specific prompt. The Vector Tool wraps this behavior in a way that the RAG agent can call dynamically, so the agent can say, in effect, “go fetch me the most relevant entries for this date or project” while it is generating the summary.

6. Window Memory – short-term context for multi-step runs

The Window Memory node acts like short-term memory for the agent. It keeps a sliding window of recent messages or intermediate results.

That is especially helpful if:

  • You want the agent to behave in a conversational way
  • You run multi-step workflows that build on previous summaries
  • You want the model to reference earlier outputs within the same run

You can tune how much history is kept based on your needs and token limits.

7. Chat Model (Anthropic) & RAG Agent – generating the daily report

This is where the magic happens. The RAG agent combines:

  • The raw Toggl data
  • The retrieved vector context from Pinecone
  • A clear prompt and system message

The template uses an Anthropic chat model as the LLM that actually writes the summary. The RAG setup ensures the model is grounded in real data from your time entries instead of guessing.

A good prompt is critical here. You will typically include:

  • A system message like “You are an assistant for Toggl Daily Report.”
  • Instructions on what to include in the summary (projects, total hours, highlights, etc.)
  • Formatting guidance so the output is easy to parse later

Well-crafted system messages and examples can dramatically improve the quality and reliability of the reports you get.

8. Append Google Sheet – storing the final summary

Once the RAG agent has generated your daily report, the Append Sheet (Google Sheets) node writes it into a new row.

The example template uses a schema like:

  • date
  • user
  • summary
  • raw_count (number of entries)
  • status (where the RAG output is mapped in the example)

You can easily customize this structure. For instance, you might add:

  • Per-project totals
  • Billable vs non-billable hours
  • Client names or tags

9. Slack Alert – handling errors (and optional digests)

Things go wrong sometimes. To avoid silent failures, the template includes a Slack Alert node for error handling.

On failure, it sends a message like:

“Toggl Daily Report error: {error.message}”

to a designated Slack channel so you or your team can jump in quickly. You can also repurpose or duplicate this node to post successful daily summaries into Slack as a digest if that fits your workflow.

What you need to configure before running it

Before you hit “activate” in n8n, you’ll need to set up a few accounts and credentials:

  • Cohere API key for embeddings
  • Pinecone API key, environment, and index (named toggl_daily_report in this template)
  • Anthropic (or other LLM) API key for the chat model
  • Google Sheets OAuth2 credentials so n8n can append rows
  • Slack API token for sending alerts

Best practice is to store these as n8n credentials or environment variables, not hard-coded values. In Pinecone, you can use namespaces to separate dev and prod data, or to isolate different teams or clients.

Start with a small dataset and a test sheet so you can verify everything works before rolling it out to your entire team.

Prompting tips to get better RAG results

The RAG agent lives or dies on the quality of your prompts. A few practical tips:

  • Be explicit about the agent’s role.
    Use a system message like: “You are an assistant for Toggl Daily Report. You create concise, factual summaries of daily work based on the provided entries.”
  • Define the output format clearly.
    Decide whether you want:
    • Bullet lists
    • Plain text paragraphs
    • JSON objects
    • Table-like text

    This makes it much easier for Sheets, Slack, or other tools to parse the result.

  • Ask the agent to ground its claims.
    To reduce hallucinations, instruct the model to base all statements on entries retrieved from Pinecone and, where appropriate, reference those entries when stating hours or project details.

Best practices to keep things fast, accurate, and affordable

Use rich metadata and smart filtering

Whenever you insert vectors into Pinecone, attach metadata such as:

  • Date
  • Project
  • User
  • Billable flag

This lets you filter queries by day, project, or user, which:

  • Prevents “cross-day” contamination in your summaries
  • Improves relevance of retrieved context
  • Speeds up vector searches

Refine your chunking strategy

Chunking is a balancing act. Larger chunks mean fewer embeddings and lower cost, but risk losing nuance. Smaller chunks preserve detail but can be more expensive and noisy.

Using overlap, like the default chunkOverlap = 40, helps maintain continuity across chunks. Keep an eye on embedding costs and experiment with chunkSize and chunkOverlap until you find a sweet spot for your data.

Watch costs and rate limits

Your main cost drivers here are:

  • Embedding calls to Cohere
  • LLM calls to Anthropic (or your chosen model)

To keep things under control:

  • Batch embeddings where possible instead of sending one entry at a time
  • Avoid re-indexing entries that have not changed
  • Consider retention strategies or TTLs in Pinecone if you do not need vectors forever

Testing and monitoring your workflow

Before you trust this automation with your daily reporting, it is worth investing a bit of time in testing and monitoring.

Some ideas:

  • Use sample Toggl payloads to validate the entire flow end-to-end
  • Check that embeddings are generated correctly and stored in the right Pinecone namespace
  • Verify that the RAG agent output matches your expectations for tone and structure
  • Configure Slack alerts for critical errors so you know when something breaks
  • Optionally, send logs to platforms like CloudWatch or Datadog for deeper observability

Ways to customize this template

The template is meant as a solid starting point, not a rigid solution. A

Build a Machine Downtime Predictor with n8n

Build a Machine Downtime Predictor with n8n

Predictive maintenance helps you spot problems before machines fail, reduce unplanned downtime, and save costs. In this tutorial-style guide you will learn, step by step, how to build a machine downtime predictor in n8n using:

  • n8n Webhook and workflow orchestration
  • OpenAI embeddings for turning logs into vectors
  • Weaviate as a vector database for semantic search
  • An LLM agent (Anthropic or similar) for reasoning and recommendations
  • Google Sheets for logging and auditing predictions

The workflow listens for machine logs, splits and embeds the text, stores vectors in Weaviate, retrieves similar past incidents when new events arrive, and uses an agent to summarize findings and recommend actions. Everything is coordinated inside n8n.


What you will learn

By the end of this guide, you will be able to:

  • Explain how a machine downtime predictor works using embeddings and a vector database
  • Set up an n8n workflow that receives machine logs through a webhook
  • Split long diagnostic logs into chunks suitable for embedding
  • Create and store OpenAI embeddings in a Weaviate index
  • Query similar events from Weaviate when new logs arrive
  • Use an LLM-based agent to analyze incidents and predict downtime risk
  • Write the agent’s outputs to Google Sheets for tracking and analysis

Why build a machine downtime predictor with n8n?

Machine downtime prediction, often called predictive maintenance, gives operations teams an early warning system. Instead of reacting to breakdowns, you can:

  • Detect patterns in logs that precede failures
  • Compare new events to similar historical incidents
  • Generate context-aware recommendations automatically

n8n is ideal for this because it is:

  • Low-code – you connect nodes instead of building everything from scratch
  • Flexible – easy to swap models, vector stores, or output destinations
  • Integrable – works with your existing systems, APIs, and internal tools

In this template, you combine machine event logs, embeddings, and a vector database to quickly surface similar past incidents and generate informed predictions about potential downtime.


Concepts behind the workflow

Predictive maintenance using vectors

The core idea is to turn unstructured log text into numerical vectors so that similar incidents are close together in vector space. This enables semantic search such as:

  • “Find past logs that look like this new vibration spike event.”
  • “Show me similar temperature anomalies on the same machine type.”

You will use:

  • OpenAI embeddings to convert text into vectors
  • Weaviate to store and query those vectors
  • An LLM agent to interpret retrieved context and suggest actions

High-level architecture

The n8n workflow follows this pattern:

  • Webhook: Receives machine log data via POST
  • Splitter: Breaks long logs into smaller text chunks
  • Embeddings (OpenAI): Converts each chunk into a vector
  • Insert (Weaviate): Stores vectors plus metadata in a vector index
  • Query (Weaviate): Searches for similar events when a new log arrives
  • Tool + Agent: Uses the vector store as a tool for an LLM agent to analyze incidents and recommend actions
  • Memory: Keeps recent context for multi-step reasoning
  • Google Sheets: Logs the agent’s output for tracking and auditing

Key workflow components in detail

1. Webhook node: entry point for machine logs

The Webhook node is where your machines or monitoring systems send data. It should receive JSON payloads securely over HTTPS and validate that the request is trusted.

A typical payload might look like this:

{  "machine_id": "M-1023",  "timestamp": "2025-09-05T10:21:00Z",  "event": "vibration spike",  "details": "Rpm: 3200, temp: 96C, anomaly_score: 0.82",  "logs": "Full diagnostic log text..."
}

In your n8n workflow, this JSON becomes the input data that will be split, embedded, and stored.

2. Splitter: preparing text for embeddings

Diagnostic logs are often long. Embedding very long text directly can:

  • Hit token limits in the model
  • Reduce retrieval accuracy

The template uses a character text splitter configured with:

  • chunkSize = 400
  • chunkOverlap = 40

This means each chunk is about 400 characters, and each new chunk overlaps the previous one by 40 characters. The overlap preserves local context across chunks while keeping them small enough for efficient embedding.

3. OpenAI embeddings: converting text to vectors

Each log chunk is sent to an OpenAI Embeddings node. The node:

  • Takes chunk text as input
  • Outputs a vector representation of that text

Alongside the vector, you should keep important metadata, for example:

  • machine_id
  • timestamp
  • Chunk index or position
  • Optionally severity, source, or other tags

This metadata is critical for tracing vectors back to the original log segments and for filtering in Weaviate.

4. Weaviate vector store: indexing and search

Weaviate stores your embeddings and lets you run semantic queries. In this template, the index name is:

machine_downtime_predictor

You configure a schema that includes fields like:

  • machine_id
  • timestamp
  • severity
  • source

These fields let you filter queries. For example, you can search only within a specific machine, time range, or severity level.

5. Query + Tool: retrieving similar incidents

When a new event arrives, the workflow:

  1. Embeds the new log text using the same OpenAI embeddings model
  2. Sends that vector to a Weaviate Query node
  3. Retrieves the top-N most similar historical chunks, along with their metadata

The Query node is then wrapped as a Tool in n8n. This tool is available to the agent so that it can call the vector store when it needs context, for example:

  • “Find similar vibration spike events for this machine in the last 30 days.”

6. Agent + Chat (Anthropic or other LLM)

The Agent node coordinates reasoning. It uses a chat-capable LLM, such as Anthropic, to:

  • Summarize retrieved incidents
  • Estimate the likelihood of imminent downtime
  • Recommend actions like inspection, part replacement, or monitoring

The agent receives:

  • Current event details from the webhook
  • Similar incidents from the Weaviate tool
  • Recent conversation context from the Memory node

By designing a clear prompt and giving the agent structured instructions, you can get consistent, actionable outputs.

7. Memory and Google Sheets logging

Memory allows the agent to remember recent steps in a troubleshooting session. This is useful if you run multiple queries or follow-up questions for the same incident.

The Google Sheets node then logs each agent result, typically with columns such as:

  • timestamp
  • machine_id
  • event
  • predicted_downtime_risk
  • recommended_action
  • agent_summary
  • references (IDs of similar past events)

This creates a simple incident history you can analyze later or share with maintenance teams.


Step-by-step: building the n8n workflow

Now let us walk through building the workflow in n8n from scratch using the template structure.

Step 1: Create and secure the Webhook

  1. In n8n, add a Webhook node.
  2. Set the HTTP method to POST.
  3. Configure the path that your machines or monitoring tools will call.
  4. Secure the webhook:
    • Use HTTPS.
    • Require a header such as x-signature.
    • Verify the signature with a shared secret before processing the payload.

Once configured, send a test payload like the JSON shown earlier to confirm that n8n receives the data correctly.

Step 2: Add a Splitter for the logs

  1. Add a Text Splitter node after the Webhook.
  2. Choose a character-based splitter.
  3. Set:
    • chunkSize = 400
    • chunkOverlap = 40
  4. Configure it to split the logs field from the incoming JSON.

This ensures that even very long diagnostic logs are broken into manageable, context-rich segments for embedding.

Step 3: Generate embeddings with OpenAI

  1. Add an OpenAI Embeddings node and connect it to the Splitter.
  2. Select your embedding model in the node configuration.
  3. Map the chunk text from the Splitter as the input text.
  4. Make sure to pass through metadata such as:
    • machine_id
    • timestamp
    • Chunk index or any additional relevant fields

Each output item now contains an embedding vector plus metadata that identifies where it came from.

Step 4: Insert embeddings into Weaviate

  1. Add a Weaviate Insert node and connect it to the embeddings node.
  2. Set the index name to:
    machine_downtime_predictor
    
  3. Ensure that your Weaviate instance is configured with a schema that includes:
    • machine_id
    • timestamp
    • severity (if available)
    • source or any other useful tags
  4. Map the embedding vectors and metadata fields to the corresponding schema properties.

At this point, historical logs can be replayed into the webhook, embedded, and stored to build up your knowledge base of incidents.

Step 5: Query Weaviate when new events arrive

  1. Use the same embeddings process for incoming events that you want to analyze in real time.
  2. Add a Weaviate Query node connected to the embeddings output.
  3. Configure the query to:
    • Search in the machine_downtime_predictor index.
    • Return the top-N most similar documents.
    • Include both similarity scores and metadata in the response.
  4. Optionally, add filters based on machine_id, time range, or severity.

The query results will provide context for the agent: similar past incidents, how they were classified, and what actions were recommended or taken.

Step 6: Wrap the Query as a Tool and configure the Agent

  1. Create a Tool node in n8n and wrap the Weaviate Query node so that the agent can call it on demand.
  2. Add an Agent node and connect it to:
    • The Tool (Weaviate Query)
    • The Memory node (if you are using conversation memory)
    • The current event data from the Webhook
  3. Choose a chat-capable LLM such as Anthropic for the Agent.
  4. Design a deterministic prompt template that instructs the agent to:
    • Summarize recent similar incidents from the vector store.
    • Assess the likelihood of imminent failure or downtime.
    • Recommend next actions with:
      • Severity level
      • Estimated time to failure (ETA)

This structure helps the agent produce consistent, useful outputs instead of vague suggestions.

Step 7: Append agent results to Google Sheets

  1. Add a Google Sheets node at the end of the workflow.
  2. Set it to Append rows to your incident log sheet.
  3. Map the following fields from the Agent output and input:
    • timestamp (from the event)
    • machine_id
    • event
    • predicted_downtime_risk (for example a 0-100 score)
    • recommended_action
    • agent_summary
    • references (IDs or links to similar past events from Weaviate)

This sheet becomes your running history of predictions and recommendations, which you can later analyze or integrate into dashboards and ticketing systems.


Prompt and agent design tips

Good prompt design is crucial for reliable downtime predictions. Consider the following guidelines:

  • Use a structured output format, for example:
    • Summary
    • Risk Score (0-100)
    • Recommended Action
    • Confidence
  • Limit the context window to what matters:
    • Key machine metadata
    • Top 5 similar events from Weaviate
  • Reduce hallucinations by:
    • Asking the agent to reference vector IDs from Weaviate.
    • Encouraging it to quote short snippets from retrieved logs when relevant.
    • Instructing it not to invent data that is not present in the context.

Testing, validation, and tuning

Replay historical

Automate Spotify “Downloads” Playlist with n8n

Automate Your Spotify “Downloads” Playlist With n8n And Free Up Your Focus

Imagine opening Spotify and seeing a single “Downloads” playlist that always has your latest liked songs at the top, never bloated, never outdated, and always ready for offline listening. No more manual sorting, no more pruning old tracks by hand, and no more wondering whether your favorite new song actually made it into your downloads.

This guide walks you through an n8n workflow template that does exactly that. It automatically syncs your Liked Songs into a dedicated “Downloads” playlist, trims older tracks to a limit you choose, and keeps everything updated on a reliable schedule. Along the way, you will see how a simple automation like this can be a stepping stone toward a more focused, streamlined, and automated life.

The Problem: Manual Playlists, Scattered Focus

If you use Spotify regularly, you probably “like” tracks as you discover them. Over time, your Liked Songs become a huge archive of your musical history. That is great for nostalgia, but not so great for offline listening, limited phone storage, or staying organized.

Many listeners try to manage this by manually adding songs to a special playlist, or by juggling multiple playlists set to download. It works, but it costs time and attention that could be spent on deeper work, creativity, or simply enjoying the music itself.

The Possibility: Let Automation Handle The Repetition

Automation with n8n is not just about saving clicks. It is about reclaiming mental energy. When you delegate repetitive tasks to a workflow, you free yourself to focus on higher value work, strategic thinking, or personal projects.

This “Downloads” playlist workflow is a small but powerful example. It takes a routine task you probably do on autopilot and turns it into a background process that runs for you, every day, without fail. Once you experience this, you start to see other parts of your digital life that could be automated too.

The Vision: A Single, Smart “Downloads” Playlist

The goal of this n8n template is simple and powerful:

  • Keep one Spotify playlist named “Downloads” always in sync with your most recent Liked Songs.
  • Automatically remove older tracks once a configurable limit is reached.
  • Run on a schedule so your offline playlist is always fresh without manual effort.

This is ideal if you rely on Spotify’s offline download feature and want just one curated playlist set to download. You choose how many songs to keep, and n8n quietly does the rest in the background.

How The n8n Workflow Transforms Your Routine

At a high level, this n8n workflow template:

  • Looks for a playlist called “Downloads” and creates it if it does not exist.
  • Fetches your latest Liked Songs up to a limit you define.
  • Adds any newly liked tracks to the top of your Downloads playlist.
  • Prunes older or no-longer-liked tracks so the playlist never exceeds your chosen size.
  • Runs on an automated schedule, such as daily, so it becomes a habit-free system.

Think of it as your personal assistant for Spotify. You keep discovering and liking music, and the workflow quietly keeps your download-ready playlist perfectly tuned.

Step Into The Flow: Key Nodes And How They Work Together

The workflow uses several core n8n nodes to bring this automation to life. Understanding them will help you customize and extend the template later.

1. Schedule Trigger – Let It Run While You Focus

The journey starts with a Schedule Trigger. You decide how often your automation should run: daily, hourly, or at any interval that fits your listening habits.

Once set, the Schedule Trigger kicks off the workflow at your chosen times. No more remembering to update your playlist. n8n does it for you.

2. Globals (Set Node) – Define Your Download Limit

Next, a Set node named Globals defines a crucial variable: download_limit.

This value represents how many songs you want to keep in your Downloads playlist. The example uses 50 tracks by default. The template supports a maximum of 50 out of the box, but you can adjust this later where noted if you want to experiment with different limits.

This is your first conscious choice in the workflow: how big should your “always ready” playlist be so it fits your storage and your style of listening.

3. Get All Playlists – Find Your “Downloads” Home

The Get all Playlists node uses the n8n Spotify node to retrieve your playlists. The workflow then searches through them to see whether a playlist named Downloads already exists.

This step is about finding the “home base” for your automation. If the playlist is there, the workflow will reuse it. If not, it will create it for you.

4. If / Filter Nodes – Create Or Reuse The Downloads Playlist

Using a combination of If and filter logic, the workflow checks the playlists retrieved in the previous step:

  • If a playlist called Downloads exists, its URI is extracted and stored for later use.
  • If it does not exist, the workflow uses the Spotify node to create a new playlist named “Downloads” (the node often labeled “Create Downloads Playlist”).

This makes the template resilient. Whether you are starting from scratch or plugging into an existing playlist, the workflow adapts and keeps going.

5. Get Liked Tracks – Sync With Your Latest Favorites

The Get Liked Tracks node calls Spotify’s Library endpoint to fetch your saved or liked tracks. This is where your recent musical discoveries enter the automation.

To keep the process efficient, the node sets a limit using the value from your Globals node:

{{ $('Globals').item.json.download_limit }}

This means the workflow only fetches the most recent liked songs up to the configured maximum. You stay focused on your newest favorites instead of your entire listening history.

6. Filter Out New Tracks (Code Node) – Add Only What Is Missing

Now the workflow needs to figure out which of your liked tracks are not yet in the Downloads playlist. A Code node compares the URIs of tracks already in Downloads with the ones it just fetched from your Liked Songs.

It returns only the tracks that are truly new and need to be added. This keeps your workflow efficient and avoids unnecessary API calls or duplicates.

The logic looks like this in simplified JavaScript:

var downloades_uris = [];
for (const download of $('Get Downloads Playlist').first().json.tracks.items) {  downloades_uris.push(download.track.uri);
}

var result = [];
for (const item of $input.all()) {  if (!downloades_uris.includes(item.json.track.uri)) {  result.push(item);  }
}

return result.reverse();

Notice the reverse() at the end. This ensures that when tracks are added, the newest liked songs end up at the top of the playlist in the right order.

7. Add Tracks To Downloads (Loop + Spotify Node) – Keep The Top Fresh

Once the new tracks are identified, a SplitInBatches node loops over them. Combined with the Spotify node, it adds each track (or batches of tracks) to the top of your Downloads playlist.

The workflow uses the Spotify “add to playlist” operation with position = 0. This means your newest liked songs always appear first, so your offline playlist feels fresh every time you hit play.

8. Prune Old Tracks (Code + Delete) – Stay Within Your Limit

After new tracks are added, the workflow updates its view of the playlist, then runs another Code node to decide which tracks should be removed.

This node compares the current tracks in Downloads with your liked tracks:

  • If a song is in Downloads but is no longer liked, it can be queued for removal.
  • download_limit and trim older ones.

The core logic to identify tracks that should be removed looks like this:

var liked_uris = [];
for (const liked of $('Get Liked Tracks').all()) {  liked_uris.push(liked.json.track.uri);
}

var result = [];
for (const item of $input.first().json.tracks.items) {  if (!liked_uris.includes(item.track.uri)) {  result.push(item);  }
}

return result;

Once the tracks to remove are identified, the Spotify delete operation removes them, keeping the playlist within your chosen download_limit. The result is a clean, focused Downloads playlist that never grows out of control.

Important Code Snippets To Understand And Customize

The workflow includes small JavaScript snippets in n8n Code nodes. You have already seen two representative examples:

  1. Filtering out new tracks by comparing Downloads playlist URIs to Liked Songs.
  2. Finding tracks to remove by identifying playlist entries that are no longer in your Liked Songs.

These snippets are intentionally simple and readable so you can tweak them as your needs evolve. For example, you might later add additional conditions, such as filtering by artist or audio features.

Before You Start: Spotify App And n8n Configuration

To let n8n talk to Spotify securely, you need a Spotify Developer App and proper OAuth scopes. Setting this up is a one-time investment that unlocks ongoing automation.

  • Create a Spotify Developer App at developer.spotify.com.
  • Configure the Redirect URI to match what n8n expects for Spotify OAuth.
  • Ensure the OAuth scopes include:
    • playlist-read-private
    • playlist-modify-public and/or playlist-modify-private (depending on whether your Downloads playlist is public or private)
    • user-library-read
  • In n8n, create a Spotify OAuth2 credential and authorize it using your new Spotify app.

Note that newly created Spotify apps sometimes take a few minutes before OAuth works reliably. If authentication fails at first, give it a short time and try again.

Limitations, Tips, And Troubleshooting For A Smooth Experience

To keep your automation reliable and scalable, keep these practical points in mind:

  • Rate limits: Spotify enforces API rate limits. If you add or remove many tracks at once, consider batching them or adding short delays between requests using n8n’s control nodes.
  • Maximum limit: The example workflow uses a default download_limit of 50. You can change this, but be mindful that larger limits might trigger more API calls and increase the chance of rate limiting.
  • Pagination: If you have a very large library with thousands of liked songs, you may want to extend the workflow with pagination logic to fetch more than the Spotify API’s default page size.
  • Permissions: If playlist operations fail, double check your OAuth scopes and re-authorize the Spotify credential in n8n.
  • Testing: Run the workflow manually at least once and inspect the execution log in n8n. Use nodes like SplitOut to inspect playlist entries and confirm the JSON structure matches what your Code nodes expect.

Security And Privacy: Protecting Your Spotify Data

As you automate more of your life, security matters. With n8n, your Spotify credentials are stored using the built-in credentials feature, which keeps them separate from your workflow logic.

  • Never hardcode client secrets or tokens directly into public workflows.
  • Use n8n credentials to handle authentication securely.
  • Remember that the workflow only reads and modifies your Spotify data according to the permissions you grant through OAuth.

This gives you the freedom to experiment and extend your automation without exposing sensitive information.

Ideas To Grow This Workflow As Your Automation Skills Expand

Once you see this template working, you may feel inspired to personalize it. That is where the real power of n8n and this Spotify automation shows up.

  • Rename the playlist: Change “Downloads” to any name you like, such as “Offline Favorites” or “Daily Discoveries”.
  • Use batch operations: Replace per-track calls with Spotify’s batch add/remove endpoints to reduce API calls and improve performance.
  • Add logging: Log additions and removals to a Google Sheet, Notion, or a database, so you have a history of how your playlist evolves.
  • Send notifications: Trigger Slack or email notifications whenever tracks are added or removed, so you stay aware of changes.
  • Filter by criteria: Add extra filters based on artist, genre, or audio features, so only certain kinds of tracks make it into your Downloads playlist.

Each small improvement teaches you more about n8n and builds your confidence to automate other parts of your work and life.

Final Checklist Before You Hit “Execute”

Before you let this workflow run on autopilot, walk through this quick checklist:

  1. Set download_limit in the Globals Set node to your desired playlist size.
  2. Configure the Schedule Trigger with the frequency that matches your listening habits.
  3. Confirm that your Spotify OAuth credential in n8n is connected and has the correct scopes.
  4. Run the workflow manually once and verify that:
    • The Downloads playlist exists and is updated.
    • Newly liked tracks are added to the top.
    • Old or unliked tracks are removed to respect your download_limit.

From One Playlist To A More Automated Life

With this n8n workflow in place, you gain more than a tidy Spotify playlist. You get a glimpse of what is possible when you let automation handle the repetitive work. Your “Downloads” playlist becomes a living example of how small systems can quietly support your day, protect your focus, and free you to do more meaningful work.

Use this template as a starting point. Tune the limit, adjust the schedule, and then ask yourself: what else in my digital life could be automated like this? Each new workflow you build is an investment in your future time and attention.

If you would like to go further with n8n, subscribe to our newsletter for more automation tutorials and ready-to-use workflow templates. Need a copy of the workflow JSON or help adapting it to your setup? Reach out or leave a comment and we will help you tailor it to your needs.

Automate Ticket Urgency Classification with n8n

Automate Ticket Urgency Classification with n8n

Every support ticket that lands in your queue represents a customer waiting for help. The challenge is simple to describe yet hard to solve: which tickets deserve attention right now, and which can safely wait?

Manually scanning messages or juggling rigid rules can quickly become overwhelming. As your volume grows, the cost of misjudging urgency grows with it: delayed responses, stressed teams, and lost opportunities to delight your customers.

This is where automation becomes more than a convenience. It becomes a way to protect your focus, reclaim your time, and allow your team to work on the problems that truly need human judgment. In this guide, you will walk through an n8n workflow template that does exactly that: it automatically classifies ticket urgency, logs the results, and alerts you if anything goes wrong.

Along the way, you will see how embeddings, a Pinecone vector store, a retrieval-augmented generation (RAG) agent, and lightweight memory come together to create a powerful, reliable automation. Think of this template as a starting point, a foundation you can build on as you automate more of your support operations.

From reactive triage to intentional focus

Many teams start with simple, rule-based filters. If the subject contains “urgent” or “ASAP”, mark it high priority. If it includes a certain product name, route it to a specific queue. These rules help at first, but they quickly hit a ceiling.

Real tickets are messy. Customers use different languages, informal phrasing, and unexpected descriptions. Critical issues may not contain any obvious “urgent” keywords at all. As a result, your rules either become too complex to maintain or too simplistic to trust.

An AI-powered urgency classifier changes this dynamic. Instead of matching exact words, it understands meaning. It can interpret nuance, context, and multilingual inputs, so you can classify tickets accurately without constantly tweaking rules.

Why an AI-powered urgency classifier is worth it

  • Better accuracy on real-world language – Embeddings and vector search capture semantic meaning, so the system can handle varied phrasing, typos, and multilingual content.
  • Adaptable over time – You can improve performance by adding more examples or retraining embeddings, rather than rewriting rules from scratch.
  • Easy to integrate – The n8n template connects with tools you already use, such as Google Sheets, Slack, and your helpdesk platform.

Most importantly, this kind of automation frees your team from reactive triage. Instead of constantly firefighting, you can focus on resolving the issues that truly matter, faster and more consistently.

Adopting an automation mindset

Before diving into the technical steps, it helps to view this workflow not just as a one-off project, but as a stepping stone toward a more automated, focused way of working.

Automation in n8n does not have to be perfect on day one. You can start with a working template, test it on a small batch of tickets, and then gradually refine prompts, thresholds, and routing rules. Each improvement compounds over time.

Think of your support pipeline as a living system. As you learn more about your data and your customers, you can keep iterating. The template you are about to explore is designed to be modular, so you can extend it with feedback loops, auto-assignment, and multilingual support as your needs evolve.

Meet the n8n template that classifies ticket urgency

The provided n8n workflow template orchestrates a complete AI-powered classification pipeline. It receives incoming tickets, processes their content into embeddings, stores and retrieves contextual information from Pinecone, uses an Anthropic-based RAG agent to decide urgency, and logs everything into Google Sheets. If anything fails, a Slack alert notifies your team.

Let us walk through this journey step by step so you can see how the pieces fit together and where you might customize the workflow for your own environment.

1. Webhook Trigger – your gateway for incoming tickets

The journey begins with a Webhook Trigger node in n8n. This node listens for incoming HTTP POST requests from your helpdesk system or any other source that can send ticket data.

Your ticket payload should include at least:

  • Ticket ID
  • Subject
  • Description or message body
  • Metadata such as customer, current priority (if any), or tags

Once configured, every new ticket automatically flows into your classification pipeline without manual intervention.

2. Text Splitter – preparing text for embeddings

Some tickets are short and concise; others are long, with detailed context, logs, or back-and-forth replies. To handle long descriptions effectively, the workflow uses a Text Splitter node.

This node breaks long text into smaller chunks that are easier to embed and search. The template uses example settings such as:

  • chunkSize = 400
  • chunkOverlap = 40

The overlap helps preserve context between chunks so the model does not lose important details at the boundaries. This step sets the stage for accurate embeddings and better retrieval later on.

3. Embeddings with Cohere – turning text into vectors

Next, the workflow passes each text chunk to a Cohere Embeddings node. Here the text is converted into high-dimensional vectors using the embed-english-v3.0 model.

Each resulting vector is stored along with metadata, such as:

  • Ticket ID
  • Chunk index or position

This metadata makes it easy to trace any retrieved vector back to the original ticket text, which is crucial for interpretability and debugging.

4. Pinecone Insert – building your vector store

With embeddings created, the workflow inserts them into a Pinecone index. In the template, that index is named ticket_urgency_classification.

This Pinecone index acts as your semantic knowledge base. It allows the workflow to quickly search for similar tickets or relevant context whenever a new ticket needs to be classified. Over time, as you add more examples, this index becomes a powerful source of domain-specific knowledge.

5. Pinecone Query and Vector Tool – retrieving context on demand

When it is time to classify a ticket, the workflow uses a Pinecone Query node to search the index and retrieve the most relevant vectors. These represent tickets or documents that are semantically similar to the one you are currently processing.

A Vector Tool wraps this store so that the RAG agent can call it directly to fetch contextual documents in real time. This is what makes the workflow retrieval-augmented: the model does not rely solely on its pre-trained knowledge, it also consults your own data.

6. Window Memory – keeping short-term context

To support more complex scenarios, the template includes a Window Memory component. This keeps short-term state for the RAG agent, preserving recent interactions or clarifications.

Even if you start with simple one-shot classifications, this memory layer gives you a clear path to expand into multi-turn workflows later, such as chat-based triage or follow-up questions when the model is uncertain.

7. Chat Model and RAG Agent (Anthropic) – deciding urgency

At the heart of the workflow sits a Chat Model + RAG Agent powered by Anthropic. This agent receives:

  • The ticket text
  • Retrieved context from Pinecone
  • A structured classification prompt

Based on this information, the agent decides the ticket’s urgency, typically returning structured output such as JSON with fields like:

  • urgency: "High" | "Medium" | "Low"
  • rationale – an explanation of the decision
  • confidence – a numeric score you can use for routing

This structured output is key. It allows downstream nodes to parse urgency and confidence reliably, without fragile pattern matching or regular expressions.

8. Append Sheet – logging results in Google Sheets

Once the RAG agent has classified the ticket, the workflow uses an Append Sheet node to log the result in a central Google Sheets document.

Typical columns include:

  • Ticket ID
  • Timestamp
  • Urgency level
  • Rationale
  • Model confidence score

This log becomes your source of truth for tracking, metrics, audits, and continuous improvement. It also makes it simple to build dashboards or share insights with stakeholders.

9. Slack Alert on Error – staying in control

Automation should not be a black box. To keep you informed, the template includes a Slack Alert path that triggers on error.

If any node fails, such as an API timeout or rate limit error, a message is sent to a dedicated #alerts channel. This separation of alerts helps your operations team react quickly to issues without constantly checking logs.

Designing prompts and logic for reliable classification

The power of this workflow comes not only from its architecture but also from how you design the prompts and decision logic. Here are practical tips to help you reach reliable, production-ready performance.

Prompt and data preparation tips

  • Use a few-shot prompt in the RAG agent that includes clear examples of High, Medium, and Low urgency tickets. Show both labels and rationales so the model learns how you think.
  • Normalize ticket text before embedding. For example, lowercase text, remove noisy HTML, and redact personally identifiable information (PII) where necessary.
  • Return structured JSON output from the agent. This makes it easy for downstream nodes to parse fields like urgency and confidence.
  • Define a confidence threshold such as 0.7. If the model’s confidence falls below this value, route the ticket to a human review queue or assign a special urgency like “Review”.

These small design decisions help you build trust in the system and make it easier to iterate safely.

Scaling, performance, and cost as you grow

As you move from a pilot to a production deployment, performance and cost become increasingly important. The template is designed to scale, and a few practices can keep your system both fast and cost-effective.

  • Batch embedding inserts when importing historical data. Instead of inserting one embedding at a time, group them to reduce overhead.
  • Limit the number of retrieved vectors in Pinecone. Settings such as top_k = 3-5 are often enough to give the RAG agent good context while keeping token usage and latency under control.
  • Use approximate nearest neighbor settings in Pinecone for faster queries, and tune your index pod size to match your read and write throughput.
  • Prune or compress old vectors if you do not need long-term retention for certain tickets. This helps manage storage and keeps your index lean.

By treating performance as part of your design, you can scale confidently without surprises on speed or cost.

Measuring impact and improving over time

Automation is not a set-and-forget effort. The most successful teams treat their workflows as products that evolve. With this template, you have built-in tools for monitoring and evaluation.

Key metrics to track

  • Classification accuracy, measured through periodic human audits of a sample of tickets.
  • False positives and false negatives for High urgency tickets, since these have the biggest impact on customer experience.
  • End-to-end latency, from webhook trigger to logging in Google Sheets.
  • Failure rates and error patterns, based on alerts from your Slack channel.

A simple dashboard that shows daily ticket counts by urgency level can help you quickly spot regressions after model updates or prompt changes. Over time, you will see your automation grow more accurate and more aligned with your business needs.

Troubleshooting common issues with confidence

As you experiment and refine, you may encounter a few common challenges. Here is how to approach them without losing momentum.

1. Mismatched embedding dimensions

If you see errors related to vector dimensions, check that the Cohere model you are using matches the vector dimension expected by your Pinecone index. If you change the embedding model, you will need to rebuild or reindex your Pinecone collection so everything aligns.

2. Rate limits and API errors

APIs occasionally fail or throttle requests. Configure exponential backoff and retries in n8n for transient errors. For persistent problems, forward error payloads to Slack so a human can investigate quickly.

3. Noisy or inconsistent predictions

If the RAG agent returns inconsistent urgency labels, consider:

  • Refining your prompt with clearer instructions and more examples.
  • Adding more labeled examples into your Pinecone index to give the model richer context.
  • Layering simple business rules on top, such as “if the ticket contains ‘data breach’, mark as High automatically”.

These adjustments can dramatically stabilize your results without major architectural changes.

Staying secure and compliant

As you automate more of your support operations, it is important to keep security and compliance in focus.

  • Redact or remove PII before sending text to third-party APIs, unless you have appropriate data processing agreements in place.
  • Use least-privilege credentials for Pinecone, Cohere, Anthropic, and Google Sheets, and rotate keys periodically.
  • Audit access to Google Sheets and, where possible, restrict the append sheet to a dedicated service account.

Building these practices into your workflow from the start makes it easier to scale responsibly.

Extending the workflow as your ambitions grow

This n8n template is intentionally modular. Once you have it running smoothly, you can extend it to support richer workflows and deeper automation.

  • Auto-assign High urgency tickets to on-call agents using your helpdesk API, reducing response times even further.
  • Create feedback loops by allowing agents to correct urgency in Google Sheets, then periodically re-index corrected examples in Pinecone to improve accuracy.
  • Support multilingual tickets by detecting language and using language-specific embedding models or routing logic.

Each extension builds on the foundation you already have, so you can expand your automation one step at a time.

Deployment checklist – your launchpad

Before you turn this workflow loose on production traffic, walk through a quick deployment checklist. This keeps your rollout smooth and predictable.

  • Verify webhook authentication and confirm the incoming payload schema matches what your nodes expect.
  • Confirm Cohere, Pinecone, and Anthropic API keys are configured correctly in n8n.
  • Validate the Pinecone index name and ensure the vector dimension matches your embedding model.
  • Test the RAG prompt on a set of labeled tickets and tune the top_k retrieval size for best performance.
  • Enable Slack alerts for onError paths so issues surface immediately.

Once you have checked these items, you are ready to run a small batch test and observe the results with confidence.

Conclusion – a foundation for smarter support operations

Automating ticket urgency classification with n8n, embeddings, and Pinecone is more than a technical upgrade. It is a shift in how your team spends its time. Instead of manually sorting and guessing which tickets matter most, you let an AI-powered workflow handle the heavy lifting.

The result is faster, more consistent triage and a support team that can focus on high-impact work and meaningful customer conversations. You are not just saving minutes on each ticket, you are building an infrastructure that scales with your growth.

Start with the provided template, run it on a validation set, tune your prompts and confidence thresholds, and add human feedback loops. Each iteration brings you closer to a support operation that is proactive, data-driven, and resilient.

Call to action: Ready to put this into practice? Import the template into your n8n instance, connect

Automating Low Stock Alerts to Discord with n8n

Automating Low Stock Alerts to Discord with n8n

Managing product inventory in real time is critical for e-commerce, retail, and manufacturing teams. This n8n workflow template helps you automate low stock alerts, enrich them with AI, and send human-friendly summaries to tools like Discord or Slack while logging everything in Google Sheets.

In this guide you will learn:

  • How the low stock to Discord workflow is structured inside n8n
  • How to configure each node step by step
  • How embeddings, Pinecone, and a RAG agent work together
  • How to extend the workflow with Discord, automated reorders, and dashboards

What this n8n workflow does

This template listens for low stock events from your inventory system, converts them into vector embeddings, retrieves related history, and then lets a RAG (retrieval-augmented generation) agent generate a concise summary and recommendation. Finally, it logs the result in Google Sheets and notifies your team in Slack or Discord.

In practical terms, the workflow:

  • Receives low stock webhooks from your inventory or monitoring system
  • Splits and embeds the text payload using OpenAI
  • Saves those vectors in a Pinecone index for later semantic search
  • Uses a RAG agent to combine current and past events into a clear status message
  • Appends that status to a Google Sheet for auditing and reporting
  • Sends alerts to Slack or Discord, and raises a Slack error if something fails

This is especially useful when you want more than a raw alert. You get context-aware, consistent summaries like: “SKU-123 has hit low stock for the third time this month, recommend immediate reorder.”


How the workflow is structured in n8n

The workflow is built from several key nodes that work together:

  • Webhook Trigger – receives low stock events on the path /low-stock-discord
  • Text Splitter – breaks long text into chunks for better embeddings
  • Embeddings – uses OpenAI model text-embedding-3-small to create vector representations
  • Pinecone Insert – stores vectors in a Pinecone index called low_stock_discord
  • Pinecone Query + Vector Tool – retrieves related historical events for context
  • Window Memory – keeps short-term state for the RAG agent within a run
  • RAG Agent – uses a chat model (Anthropic in this template) plus retrieved vectors to generate a summary
  • Append Sheet – writes the final status to a Google Sheet named Log
  • Slack Alert (onError) – sends a Slack message if the AI or Sheets steps fail

Next, we will walk through how to configure each of these nodes in order, starting from the incoming webhook and ending with alerts and logging.


Step-by-step setup in n8n

1. Configure the Webhook Trigger

The Webhook Trigger is the entry point. It receives low stock events as HTTP POST requests.

  1. In n8n, add a Webhook node.
  2. Set the path to low-stock-discord so the full endpoint looks like: https://<your-n8n-url>/webhook/low-stock-discord (or similar, depending on your deployment).
  3. Set the HTTP method to POST.
  4. Configure your inventory system, monitoring tool, or webhook relay to send JSON payloads to this endpoint.

A typical payload might look like:

{  "product_id": "SKU-123",  "name": "Blue Hoodie",  "current_stock": 4,  "threshold": 5,  "location": "Warehouse A",  "timestamp": "2025-07-01T12:34:56Z"
}

You can extend this with fields like category, supplier, or notes. The rest of the workflow will still function as long as it receives valid JSON.


2. Prepare content with the Text Splitter

Before creating embeddings, it is helpful to split long text into smaller chunks. This improves both performance and semantic quality.

Add a Text Splitter node right after the Webhook:

  • Set chunkSize to 400
  • Set chunkOverlap to 40

These settings mean each text chunk will contain up to 400 characters with a 40 character overlap to preserve context between chunks.

When is this useful?

  • If your payload includes long descriptions or notes about the product
  • If you attach historical comments or investigation logs

You can adjust chunk size and overlap based on your typical payload length. For shorter events, the Text Splitter will simply pass through smaller chunks.


3. Generate embeddings with OpenAI

Next, we convert text chunks into vectors that can be stored in a vector database and searched semantically.

  1. Add an Embeddings node after the Text Splitter.
  2. Configure the node to use OpenAI as the provider.
  3. Set the model to text-embedding-3-small.
  4. In n8n, add your OpenAI API key in the credentials section and select it in this node.

The embeddings node will output vectors for each text chunk. These vectors are what you will store and later query in Pinecone.

You can swap to a different embedding model if you prefer, as long as it is supported by your provider and you update the configuration in n8n.


4. Store and retrieve context with Pinecone

4.1 Insert vectors into Pinecone

To make events searchable, you store their embeddings in a Pinecone index.

  1. Add a Pinecone Insert node after the Embeddings node.
  2. Configure credentials for Pinecone in n8n (API key and environment).
  3. Set the index name to low_stock_discord.
  4. Map the vector data and any useful metadata (like product_id, name, location, timestamp).

Each low stock event will now be saved as a vector in Pinecone, which lets you later search for “similar” situations using semantic similarity rather than exact keyword matches.

4.2 Query Pinecone for related events

To give your RAG agent context, you need to retrieve relevant past events for the same SKU or similar situations.

  1. Add a Pinecone Query node.
  2. Use the same index name: low_stock_discord.
  3. Feed it the current event’s embedding or another representation of the current text.
  4. Configure the number of results to return (for example, top 3 or top 5 similar events).

The retrieved vectors and their metadata will be passed to the RAG agent through a Vector Tool node. The Vector Tool wraps the query results so the agent can easily call them as part of its reasoning process.

Example of how this helps:

  • If the same SKU has hit low stock multiple times in the past month, the agent can see that pattern and recommend a larger reorder.

5. Maintain context with Window Memory

The Window Memory node holds short-term context during a single workflow execution. It does not store data permanently like Pinecone, but it gives the agent access to intermediate information within the current run.

Place a Window Memory node before the RAG agent and configure it to:

  • Store recent messages or steps that are relevant to the agent
  • Limit the “window” size so the context stays focused and token usage is controlled

This is useful when the agent needs to combine:

  • The original low stock payload
  • The Pinecone query results
  • Any additional notes or pre-processing you might add later

6. Set up the RAG Agent

The RAG agent is the brain of the workflow. It takes the current event, the retrieved context, and the short-term memory, then produces a concise status summary and recommendation.

  1. Add a RAG Agent node.
  2. Configure it to use:
    • The Vector Tool that wraps the Pinecone Query results
    • A chat model such as Anthropic (as in the template) or another supported LLM
  3. Set a clear system message to define the agent’s role. For example:
    You are an assistant for Low Stock Discord - generate a short alert summary and next-action recommendation.
  4. Map the inputs so the agent has:
    • The original low stock event data
    • The retrieved Pinecone context
    • Any relevant memory from the Window Memory node

The agent’s output should be a human-readable status message, something like:

Low stock alert for SKU-123 (Blue Hoodie) at Warehouse A.
Current stock: 4, threshold: 5.
This SKU has hit low stock 3 times in the last 30 days.
Recommendation: reorder 50 units and review forecast for this item.

This status message is what you will log to Google Sheets and post to Slack or Discord.


7. Log results in Google Sheets with Append Sheet

To keep an auditable record of all low stock events and AI-generated recommendations, the template uses Google Sheets.

  1. Add a Google Sheets node configured for Append.
  2. Set:
    • sheetId to SHEET_ID (replace with your real sheet ID)
    • sheetName to Log
  3. Create columns in the Log sheet, for example:
    • Timestamp
    • Product ID
    • Name
    • Location
    • Current Stock
    • Threshold
    • Status (for the RAG agent output)
    • Error Code or Notes if you want extra observability
  4. Map the RAG agent output to the Status column.

This gives you a growing log of every low stock alert, what the AI recommended, and when it happened.


8. Add error handling with Slack alerts

Sometimes the RAG agent might fail, or the Google Sheets append might hit an error. To avoid silent failures, the template includes a Slack alert path.

  1. Add a Slack node configured for sending messages.
  2. Set your Slack credentials in n8n and select them in the node.
  3. Choose a channel such as #alerts.
  4. Configure the workflow so that:
    • If the RAG Agent node fails, the error route goes to this Slack node.
    • If the Append Sheet node fails, its error route also goes to this Slack node.
  5. Include details in the Slack message, such as:
    • Which node failed
    • The product ID or name
    • Any error message returned by the node

This ensures your operations team is immediately notified when something goes wrong in the automation.


Best practices for tuning this workflow

Index and data management

  • Use descriptive Pinecone index names such as low_stock_discord so it is easy to understand what each index stores.
  • Implement a retention policy. Periodically prune old or irrelevant vectors to control cost and keep searches fast.

Choosing and tuning embedding models

  • Start with text-embedding-3-small for a good balance of cost and performance.
  • Experiment with other embedding models if you need better semantic recall for your data.
  • Remember that larger models can be more accurate but will usually cost more.

Optimizing chunk sizes

  • If your payloads are mostly structured fields, consider splitting text on field boundaries rather than fixed character counts.
  • Keep chunks large enough to hold meaningful context but small enough to respect token limits and keep queries efficient.

Security and observability

  • Protect your webhook with a secret token or signature validation so only trusted systems can send events.
  • Use n8n credentials storage for API keys (OpenAI, Anthropic, Pinecone, Google, Slack) and set appropriate usage limits.
  • Log timestamps, error codes, and possibly latency in Google Sheets or another store so you can monitor performance.

Example use cases for low stock alerts with n8n

  • E-commerce: When SKUs fall below a threshold, automatically post a clear message to a Discord or Slack channel where the purchasing team works.
  • Retail chains: Aggregate low stock events from multiple stores, then use the RAG summaries to build a weekly digest of recurring shortages.
  • Manufacturing: Combine part inventory signals with historical incidents so the agent can suggest preventive orders before production is affected.

Extending the template: Discord, reorders, and dashboards

Send alerts directly to Discord

  • Add a Discord webhook node after the RAG Agent.
  • Paste your Discord webhook URL and map the agent’s status text to the message body.
  • Use a dedicated channel like #low-stock-alerts for your operations team.

You can run Slack and Discord alerts in parallel if different teams prefer different tools.

Automate reorder actions

  • After the RAG agent, add an HTTP Request node that calls your purchasing or ERP API.
  • Use the agent’s recommendation (for example, “reorder 50 units”) as input to the API payload.
  • Include safeguards like minimum and maximum reorder quantities or manual approval steps if needed.

Build dashboards from the log

  • Feed the Google Sheet into a BI or dashboard tool to visualize:
    • Most frequently low-stock SKUs
    • Locations with recurring issues
    • Lead times between low stock and reorder
  • Alternatively, sync the data to an analytics database and build real time dashboards.

Security and cost considerations

Because this workflow uses embeddings and vector storage, it is important to manage both security and cost carefully.

  • Cost control:
    • Limit how long you keep vectors in Pinecone

Scrape LinkedIn Jobs to Google Sheets with n8n

Scrape LinkedIn Jobs to Google Sheets with n8n + Bright Data

Building a reliable stream of hiring signals from LinkedIn is highly valuable for recruiting, sales, and market intelligence. This guide explains how to implement a production-ready LinkedIn job scraping workflow using Bright Data’s Dataset API, orchestrated with n8n, and persisted in Google Sheets.

The result is a repeatable automation that collects fresh job postings, cleans and normalizes the data, then appends structured records to a Google Sheet for downstream analysis or outreach.

Why automate LinkedIn job scraping with n8n and Bright Data?

LinkedIn job posts are a strong indicator of hiring intent, organizational growth, and budget availability. Manually monitoring these signals is not scalable. Automating the process offers several advantages:

  • Timeliness – capture new roles within hours of posting, not days.
  • Consistency – maintain an always-on pipeline instead of ad hoc searches.
  • Data quality – apply repeatable cleaning and normalization logic.
  • Extensibility – easily route the same data into CRMs, Slack, or other systems.

By combining Bright Data’s dataset snapshots with n8n’s workflow engine and Google Sheets as a lightweight data store, you get a robust yet accessible solution for LinkedIn job scraping.

Architecture overview

The workflow centers on a simple pattern: accept user-defined search parameters, request a dataset snapshot from Bright Data, wait for processing to complete, then fetch and transform the results before writing them to Google Sheets.

High-level workflow steps

  1. A user submits search criteria in n8n (location, keyword, country).
  2. n8n triggers a Bright Data dataset snapshot via HTTP POST.
  3. The workflow periodically polls Bright Data for snapshot progress.
  4. Once ready, n8n retrieves the snapshot data in JSON format.
  5. Custom JavaScript in a Code node cleans and flattens the job records.
  6. Normalized rows are appended to a Google Sheet, one job per row.

This pattern is easy to adapt: you can change filters, extend the transformation logic, or plug the cleaned data into additional systems.

Prerequisites and credentials

Before assembling the workflow, ensure the following components and credentials are available:

  • Bright Data API key for authorization against the Dataset API.
  • n8n instance (cloud or self-hosted) with access to:
    • HTTP Request node
    • Wait node
    • If node
    • Code node
    • Google Sheets node
  • Google account connected to n8n using OAuth2 for Google Sheets access.

Bright Data authorization header

All Bright Data API calls must include a Bearer token in the Authorization header:

Authorization: Bearer YOUR_BRIGHT_DATA_API_KEY

Configuring the Bright Data Dataset API

The workflow uses Bright Data’s Dataset API to request and retrieve LinkedIn job data. You will primarily interact with three endpoints:

  • Trigger: https://api.brightdata.com/datasets/v3/trigger
  • Progress: https://api.brightdata.com/datasets/v3/progress/{{snapshot_id}}
  • Snapshot: https://api.brightdata.com/datasets/v3/snapshot/{{snapshot_id}}?format=json

Example POST body for discover dataset

The Bright Data trigger endpoint accepts a JSON array of query objects. You can adjust filters such as time range, job type, and remote options to refine your dataset.

[  {  "location": "New York",  "keyword": "Marketing Manager",  "country": "US",  "time_range": "Past 24 hours",  "job_type": "Part-time",  "experience_level": "",  "remote": "",  "company": ""  }
]

Leaving some fields blank broadens the search, which is useful for exploratory prospecting. For more targeted streams, define specific keywords, locations, or time windows.

Detailed n8n workflow design

The following section walks through each node and its role in the automation, from capturing inputs to persisting cleaned records.

1. Form Trigger – capture user search parameters

Start with a trigger mechanism in n8n that collects the search criteria. This is often implemented using a form or a webhook that accepts parameters such as:

  • Job Location (e.g. “New York”)
  • Keyword (e.g. “Marketing Manager”)
  • Country (2-letter code, e.g. “US”)

These values are then injected into the JSON payload that n8n sends to Bright Data’s trigger endpoint.

2. HTTP Request – trigger a dataset snapshot

Next, configure an HTTP Request node to initiate the snapshot generation:

  • Method: POST
  • URL: https://api.brightdata.com/datasets/v3/trigger
  • Headers: include the Authorization header with your Bearer token.
  • Body: JSON array with the search parameters as shown above.

The response from this call contains a snapshot_id. Store this value in the workflow context, since it will be used for progress polling and final data retrieval.

3. Wait and poll – monitor snapshot progress

Bright Data may take some time to prepare the dataset. To handle this gracefully, implement a polling loop using the Wait and HTTP Request nodes.

  • Use a Wait node to pause execution for a defined interval, typically 1 to 3 minutes.
  • After the pause, use an HTTP Request node to call:
    https://api.brightdata.com/datasets/v3/progress/{{snapshot_id}}
  • Inspect the returned status field using an If node.

Continue polling while status == "running". Once the status differs from running, the snapshot is ready to be fetched.

4. HTTP Request – fetch the completed snapshot

When the snapshot is complete, use another HTTP Request node to download the data in JSON format:

  • Method: GET
  • URL: https://api.brightdata.com/datasets/v3/snapshot/{{snapshot_id}}?format=json
  • Headers: include the same Authorization header.

The response contains an array of job posting objects. These will be passed to a Code node for transformation and normalization.

5. Code node – clean and flatten job data

Raw job records often contain nested objects and HTML-formatted descriptions. A small JavaScript routine inside an n8n Code node can standardize these fields and prepare them for tabular storage.

Typical transformations include:

  • Stripping HTML tags from job descriptions.
  • Flattening nested objects such as job_poster and base_salary.
  • Normalizing whitespace and removing HTML entities.

Example Code node logic:

// Helper function to strip HTML tags
function stripHtml(html) {  return html  .replace(/<[^>]+>/g, '')  .replace(/ /g, ' ')  .replace(/&[a-z]+;/g, '')  .replace(/\s+/g, ' ')  .trim();
}

return items.map(item => {  const data = item.json;  if (data.job_poster) {  data.job_poster_name = data.job_poster.name || '';  data.job_poster_title = data.job_poster.title || '';  data.job_poster_url = data.job_poster.url || '';  delete data.job_poster;  }  if (data.base_salary) {  data.salary_min = data.base_salary.min_amount || '';  data.salary_max = data.base_salary.max_amount || '';  data.salary_currency = data.base_salary.currency || '';  data.salary_period = data.base_salary.payment_period || '';  delete data.base_salary;  }  if (data.job_description_formatted) {  data.job_description_plain = stripHtml(data.job_description_formatted);  }  return { json: data };
});

This approach keeps the workflow transparent and easy to extend. You can add additional mappings or normalization rules as needed.

6. Google Sheets node – append normalized rows

Finally, connect the cleaned data to Google Sheets:

  • Select the appropriate Google Sheets account via OAuth2.
  • Choose the target spreadsheet and worksheet.
  • Use the Append operation so each job posting is added as a new row.

Map the flattened fields to your sheet columns. Typical mappings include:

  • job_title
  • company_name
  • job_location
  • salary_min, salary_max, salary_currency, salary_period
  • apply_link
  • job_description_plain
  • job_poster_name
  • timestamp or ingestion time

With this setup, Google Sheets becomes a simple but effective UI for browsing, filtering, and annotating job leads.

Google Sheets template structure

To accelerate deployment, prepare a Google Sheet that already contains the most relevant columns, plus room for additional attributes from Bright Data.

Recommended columns include:

  • job_title
  • company_name
  • job_location
  • job_description_plain
  • salary_min
  • salary_max
  • apply_link
  • job_poster_name
  • timestamp

You can always extend the schema with additional columns if Bright Data exposes more fields that are useful for your specific use case.

Best practices for a robust LinkedIn job scraping pipeline

To operate this workflow reliably and at scale, consider the following operational and design best practices.

Search and filtering strategy

  • Use shorter time_range values such as “Past 24 hours” or “Past Week” to focus on fresh openings and reduce noise.
  • Leave optional filters blank when you want to explore broader markets or identify emerging employers in a segment.
  • Gradually tighten filters (job_type, experience_level, remote) once you understand the volume and quality of results.

Rate limiting and polling behavior

  • Respect Bright Data rate limits by spacing out snapshot triggers and progress checks.
  • Adjust the Wait node interval if you encounter throttling or want to optimize API usage.
  • Consider adding basic backoff logic if you operate at higher volumes.

Advanced workflow logic in n8n

  • Introduce scoring or prioritization logic to flag high-intent roles (for example seniority, company size, or location).
  • Branch the workflow to send targeted alerts to Slack, email, or a CRM when certain conditions are met.
  • Use additional n8n nodes to deduplicate entries or track which postings have already been processed.

Troubleshooting and security considerations

As with any production automation, monitoring and secure handling of credentials are critical.

  • 401 / 403 errors: verify that the Bright Data API key is valid and that the Authorization header uses the correct Bearer token format.
  • Empty or sparse results: broaden the keyword or time_range, and relax filters such as job_type or experience_level.
  • Rate limit responses: increase the Wait polling interval or implement exponential backoff in your workflow design.
  • Data privacy: avoid storing sensitive PII in plain text, restrict access to the Google Sheet, and rotate API keys on a regular schedule.

Key use cases for automated LinkedIn job scraping

Once the workflow is in place, it can support multiple teams and objectives:

  • Job seekers: monitor newly posted roles in your target geography or function and track application status directly in a sheet.
  • Sales teams: identify organizations that are actively hiring as a proxy for growth, new initiatives, or fresh budget allocation.
  • Recruiters and agencies: centralize new job postings, then enrich and segment them for tailored outreach to candidates.

Next steps and implementation resources

To deploy this workflow end-to-end:

  1. Prepare or copy a Google Sheets template with the relevant columns.
  2. Configure your Bright Data API key and connect it to n8n via the HTTP Request nodes.
  3. Connect your Google account to n8n using OAuth2 and configure the Google Sheets node.
  4. Import or recreate the n8n workflow, then customize filters, scoring, and routing logic as required.

If you would like access to the exact n8n workflow JSON, the template sheet, or support with customizing filters and prioritization logic, get in touch:

Email: Yaron@nofluff.online

For a visual walkthrough and additional implementation tips, refer to the creator’s YouTube channel and LinkedIn content, which provide detailed demonstrations of the workflow in action.

Start your automated job stream now – connect Bright Data and n8n, push results into Google Sheets, and react faster to real-time hiring signals.

Automate Tenant Screening with n8n & Vector Search

Automate Tenant Screening with n8n & Vector Search

Modern tenant screening involves large volumes of unstructured data, from application forms to reference letters and free-text notes. This workflow template shows how to operationalize that process with n8n, vector embeddings, and an AI agent, so that every application is processed consistently, summarized reliably, and logged in a structured, searchable format.

Business case for automated tenant screening

Manual tenant vetting is slow, subjective, and difficult to audit. For property managers and landlords handling multiple units or portfolios, an automated pipeline provides measurable advantages:

  • Scalability – Process large volumes of applications without a linear increase in manual effort.
  • Consistency – Apply the same decision criteria and summary structure across all applicants.
  • Traceability – Maintain structured, searchable records that support audits, internal reviews, and dispute resolution.

The n8n workflow described below, named “Tenant Screening Summary”, is designed for automation professionals who want to combine LLM capabilities with vector search in a compliant and repeatable way.

Solution architecture overview

The workflow connects intake, enrichment, retrieval, and reporting into a single automated pipeline. At a high level, it:

  1. Receives tenant application data via a secure webhook.
  2. Splits long text into manageable chunks for embedding.
  3. Generates embeddings using a dedicated text-embedding model.
  4. Stores and indexes vectors in Pinecone for semantic retrieval.
  5. Uses a vector-store tool to provide contextual documents to an AI agent.
  6. Lets an LLM-based agent compose a structured screening summary.
  7. Appends the final output to Google Sheets for record-keeping.

Core n8n components in the workflow

  • Webhook node – Entry point that accepts tenant application payloads via HTTP POST.
  • Text Splitter node – Segments long-form text into overlapping chunks optimized for embedding.
  • Embeddings node – Integrates with Cohere or an equivalent provider to convert text into vector representations.
  • Pinecone node – Handles vector insertion and similarity queries against a dedicated index.
  • Vector-store Tool / Query – Exposes Pinecone search as a tool that the AI agent can call when it needs context.
  • Memory – Maintains short-term conversational context for the agent within the workflow execution.
  • Chat Model (Hugging Face) – LLM used to generate natural-language summaries and recommendations.
  • Agent – Orchestrates tools, memory, and the chat model to produce the final tenant screening summary.
  • Google Sheets node – Persists the structured summary in a spreadsheet for compliance, reporting, and follow-up.

Detailed workflow execution

1. Intake: Receiving tenant applications

The process begins with the Webhook node, which is configured to accept POST requests from your application portal or CRM. The incoming JSON payload typically includes:

  • Applicant identification (name, contact information).
  • Employment details and income information.
  • Previous rental history and references.
  • Credit notes or score summaries.
  • Free-form responses, comments, or attached narrative descriptions.

This raw data is passed downstream for preprocessing and enrichment.

2. Preprocessing: Splitting long text for embeddings

Long narrative fields, such as reference letters or detailed employment histories, are routed to the Text Splitter node. The objective is to create chunks that are:

  • Short enough to be efficiently embedded and processed.
  • Overlapping enough to preserve local context across boundaries.

A commonly effective configuration is a chunkSize of around 400 tokens with an overlap of 40 tokens. This balance helps maintain semantic continuity while controlling cost and latency.

3. Vectorization: Generating text embeddings

Each chunk produced by the Text Splitter is passed to the Embeddings node. In this template, Cohere is used as the embedding provider, although OpenAI or other high-quality embedding APIs can be substituted as long as the vector dimensions match your Pinecone index configuration.

The embeddings node returns high-dimensional vectors for each text chunk. These vectors capture the semantic meaning of the content and form the basis for similarity search in the vector database.

4. Storage: Inserting vectors into Pinecone

The generated embeddings are written to Pinecone using a dedicated index, for example:

  • tenant_screening_summary – the index that stores all tenant-related chunks.

Each vector is stored alongside metadata such as:

  • Applicant ID or unique application reference.
  • Document type (e.g., reference, employment, credit note).
  • Timestamps or other relevant attributes.

This metadata is critical for filtering and grouping results during retrieval, especially when multiple applicants or document types are stored in the same index.

5. Retrieval: Querying the vector store as a tool

When the workflow reaches the analysis phase, the AI agent needs contextual information to generate a robust summary. This is achieved by configuring a vector-store tool that queries Pinecone for the most relevant chunks.

For example, if the agent is prompted to “Summarize this applicant’s risk factors”, it performs a similarity search against the tenant_screening_summary index using the applicant’s data and any internal prompts as the query. The most relevant chunks are returned to the agent and injected into the prompt as contextual documents.

6. Reasoning: Agent-driven summary generation

The Agent node orchestrates three elements:

  • The chat model (Hugging Face LLM) that generates natural-language outputs.
  • The vector-store tool that retrieves context from Pinecone.
  • A short-term memory buffer that maintains context within the workflow execution.

Using a well-designed prompt, the agent composes a structured Tenant Screening Summary that typically includes:

  • Overall recommendation (approve, conditional, or decline).
  • Key employment and income details.
  • Rental history highlights and reference insights.
  • Identified red flags, such as prior evictions, criminal history, or inconsistent information.
  • Suggested next steps or follow-up actions.

The quality and reliability of this output depend heavily on the prompt and the relevance of retrieved chunks, which is why prompt engineering and index configuration are important design steps.

7. Persistence: Logging results to Google Sheets

Finally, the workflow writes the structured summary to a Google Sheets spreadsheet. The Google Sheets node is configured to append a new row per application, typically including:

  • Applicant identifiers.
  • Summary fields (recommendation, risk factors, key facts).
  • Timestamps and any internal notes or reviewer comments.

This creates a durable, audit-ready log that can be used for compliance, reporting, and collaboration across property management teams.

Design considerations and implementation best practices

Data privacy, security, and regulatory compliance

Tenant data is inherently sensitive, often containing personal identifiers, financial information, and potentially criminal history. When deploying this workflow:

  • Store only data that is strictly necessary for screening decisions.
  • Use encryption at rest and in transit wherever supported, especially in your vector store and storage layers.
  • Restrict access to n8n, Pinecone, and Google Sheets to authorized service accounts and users.
  • Ensure alignment with applicable regulations such as GDPR, CCPA, and local rental laws.

Chunking strategy for optimal retrieval

Chunking has a direct effect on retrieval quality and cost. Consider the following guidelines:

  • Start with approximately 400 tokens per chunk and 40 tokens of overlap for narrative text.
  • Adjust sizes based on empirical testing with real application data.
  • Ensure that each chunk is semantically meaningful, for example by splitting at logical paragraph boundaries when possible.

Choosing and tuning the embeddings provider

The quality of semantic search is largely determined by the embedding model. When selecting a provider such as Cohere or OpenAI:

  • Confirm that the embedding dimensions match your Pinecone index configuration.
  • Test with representative samples, including edge cases like very short or very long answers.
  • Monitor retrieval relevance and iterate on model choice or parameters if necessary.

Vector store configuration and metadata usage

Properly configured vector indices are essential for reliable retrieval:

  • Align Pinecone index dimension with the embedding model output.
  • Use metadata fields such as applicant ID, document type, and date to filter results for a specific application.
  • Consider namespace separation if you manage multiple properties, regions, or customer accounts.

Prompt engineering for consistent summaries

To obtain predictable, structured summaries from the agent, design prompts that clearly specify the required output format and evaluation criteria. A conceptual prompt might look like:

Summarize the following applicant's information. Provide:
- One-line recommendation: Approve / Conditional / Decline
- Key facts: employment status, monthly income, rental history
- Red flags: criminal records, evictions, inconsistent info
- Suggested next steps

Context: {{retrieved_chunks}}

For production use, you can extend this with concrete examples (few-shot prompting) and stricter formatting guidelines, then align the Google Sheets mapping with the defined structure.

Operational usage and real-world scenarios

Once configured, this tenant screening workflow can support several operational scenarios:

  • High-volume property management – Process hundreds of applications across multiple properties without saturating staff capacity.
  • Audit-ready documentation – Maintain consistent, structured summaries that can be referenced during compliance checks or legal disputes.
  • Standardized risk assessment – Apply uniform evaluation criteria across teams, locations, and time periods.

Monitoring, quality control, and iteration

As with any AI-driven workflow, ongoing monitoring is essential:

  • Periodically review generated summaries for accuracy, completeness, and potential bias.
  • Implement a human-in-the-loop review process during the initial deployment phase.
  • Capture reviewer feedback and outcomes, then use this data to refine prompts, chunking strategies, and filters.
  • Maintain a version history of prompt templates and model choices for traceability.

Troubleshooting and optimization tips

  • Irrelevant retrieval results – Check that your Pinecone index dimensions match the embedding model, verify that metadata filters are correctly applied, and confirm that the correct namespace or index is used.
  • Inconsistent or low-quality summaries – Tighten the prompt, introduce few-shot examples, and ensure that the agent is always provided with the most relevant retrieved chunks.
  • Missing or misaligned fields in Google Sheets – Validate that the agent output keys match the expected column mapping in the Google Sheets node and adjust the parsing logic if necessary.

Security checklist for production deployments

  1. Protect webhook endpoints using authentication tokens, IP allowlists, or both.
  2. Store API keys and credentials as environment variables or in a secure secret manager, never directly in workflow definitions.
  3. Regularly audit access permissions for n8n, Pinecone, and Google Sheets, and restrict them to the minimum required roles.

Conclusion

By combining n8n, semantic embeddings, a vector database, and an AI agent, you can implement a robust, scalable tenant screening pipeline that reduces manual effort and enforces consistent decision-making. Whether you manage a small portfolio or operate as a large property management organization, this approach enables high-volume, standardized tenant evaluation with clear audit trails.

Practical next steps

  1. Deploy the webhook endpoint and connect it to your tenant application form or CRM to ingest a small set of sample applications.
  2. Configure a test Pinecone index, generate embeddings for the sample data, and validate retrieval quality.
  3. Iterate on the agent prompt, run end-to-end tests, and compare the generated summaries with human reviewer assessments.

Call to action: Ready to operationalize this workflow in your environment? Reach out to our team for expert implementation support or download the n8n workflow template and start customizing it for your tenant screening process today.

Loot-box Probability Calculator with n8n

Loot-box Probability Calculator with n8n

Follow the story of a game designer who turns confusing loot-box math into a clear, automated system using an n8n workflow, vector search, and an AI agent that logs and answers probability questions on demand.

The designer, the angry players, and the missing math

By the time Mia opened her inbox that Monday morning, she already knew what she would find.

Her studio had just rolled out a new gacha system in their mobile RPG. The art was beautiful, the animation felt great, and the sound effects were perfect. Yet the support tickets all sounded the same:

  • “What are my chances of getting at least one rare after 20 pulls?”
  • “How many pulls do I need for a 90% chance at a legendary?”
  • “Is there a pity system or not? How does it really work?”

Mia was the lead systems designer. She knew the drop rates. She could scribble the formulas on a whiteboard. But every time a new event launched, she found herself manually calculating probabilities in a spreadsheet, copying formulas, double checking exponents, and trying to translate all of it into language players and product managers would understand.

She kept thinking the same thing: this should not require a late-night spreadsheet session every single time.

What she needed was a loot-box probability calculator that could explain the math, stay consistent with the official rules, and be easy to plug into chatbots, dashboards, or internal tools. Most of all, she wanted something reproducible and auditable, so nobody had to wonder how she got to a number.

The discovery: an n8n template built for loot-box math

One afternoon, while searching for ways to connect their game backend with a more flexible automation layer, Mia stumbled on an n8n template for a loot-box probability calculator.

It promised exactly what she had been trying to hack together by hand:

  • A webhook endpoint to accept probability questions or raw playtest logs
  • Text splitting and embedding generation using Cohere, so she could feed in design docs and rules
  • A Pinecone vector store to index and search those rules and past logs
  • An AI agent using OpenAI that could read the rules, parse a question, compute the probability, and explain it clearly
  • Google Sheets logging so every question and answer was stored for analytics and review

Instead of another fragile spreadsheet, this was an automated, explainable workflow. If she could wire it into her tools, anyone on the team could send a question and get a trustworthy answer in seconds.

Rising tension: when loot-box questions never stop

Before she adopted the template, Mia’s week looked like this:

  • Product managers asking, “Can we say 40% or 45% chance in the event banner?”
  • Community managers pinging her for “player friendly” explanations every time a patch note mentioned drop rates.
  • Analysts needing a clean log of all probability assumptions for compliance and internal reviews.

Every answer required the same pattern: figure out the math, find the latest rules, interpret any pity system or guarantees, then translate all of it into clear language. She knew that a small mistake in a formula or a misread rule could damage player trust.

That pressure is what pushed her to test the n8n loot-box probability calculator template. If it worked, she could move from manual math and ad-hoc explanations to a structured system that combined deterministic formulas with AI-powered explanations.

How Mia wired the loot-box calculator into her workflow

Mia decided to walk through the n8n template step by step and adapt it to her game. Instead of treating it as a dry checklist, she imagined how it would feel as a player or teammate sending questions to an automated “loot-box oracle.”

Step 1 – The Webhook as the front door

First, she configured the Webhook node. This node would receive incoming POST requests with either:

  • A direct probability query, or
  • Raw event logs or design notes to store for later reference

For a typical question, the payload looked like this:

{  "type": "query",  "p": 0.02,  "n": 20,  "goal": "at_least_one"
}

That single endpoint became the front door for everyone who needed an answer. Support, analytics, internal tools, or even a game UI could send questions there.

Step 2 – Splitting design docs and creating embeddings

Mia’s loot-box system had plenty of edge cases, like event-only banners, rotating pools, and a pity system that guaranteed a legendary after a certain number of pulls. She wanted the AI agent to respect those rules.

To do that, she wired in the Splitter and Embeddings nodes:

  • The Splitter broke long texts, such as design docs or conversation transcripts, into smaller chunks.
  • The Embeddings node used Cohere to convert each chunk into a vector embedding.

These embeddings captured the meaning of her rules. Later, the AI agent could search them to understand specific details, like whether an open pool had a pity system or how guarantees stacked over time.

Step 3 – Storing and querying rules with Pinecone

Next, she connected to Pinecone as a vector store.

Every chunk of rule text or log data was inserted into a Pinecone index through the Vector Store Insert node. When a new question came in, a Vector Store Query node would search that index to retrieve the most relevant pieces of information.

This meant that the AI agent never had to guess how the game worked. It could always ground its reasoning in the official rules, such as:

  • Whether certain banners had higher legendary rates
  • How pity counters reset
  • What counted as a “rare” or “legendary” in each pool

Step 4 – Memory and the AI agent as the “explainer”

Now Mia wanted the system to handle follow-up questions, like a player asking:

  • “Ok, what about 50 pulls?”
  • “How many pulls for 90% then?”

To support that, she enabled a Memory buffer inside the workflow. This memory stored recent interactions so the context of a conversation would not be lost.

Then she configured the Agent node using an OpenAI chat model. The agent received:

  • The parsed input from the webhook
  • Relevant documents from Pinecone
  • Recent context from the memory buffer

Its job was to:

  1. Interpret the question (for example, “chance of at least one success” vs “expected number of legendaries”)
  2. Apply the correct probability formulas
  3. Format a human friendly explanation that Mia’s team could show to players or stakeholders

Step 5 – Logging everything to Google Sheets

Finally, Mia wanted a clear audit trail. If someone asked, “How did we get this number for that event?” she needed to show the exact question, the math, and the answer.

She connected a Google Sheets node and configured it so that every incoming request and every agent response was appended as a new row. Over time, that sheet became:

  • A log of all probability queries
  • A dataset for analytics and tuning
  • A simple way to review edge cases and refine prompts

The math behind the magic: core loot-box probability formulas

Although the workflow used an AI agent for explanations, Mia insisted that the underlying math be deterministic and transparent. She built the system around a few core formulas, which the agent could reference and explain.

  • Chance of at least one success in n independent trials:
    1 - (1 - p)^n
  • Expected number of successes in n trials:
    n * p
  • Expected trials until first success (geometric distribution mean):
    1 / p
  • Negative binomial (trials to reach k successes, mean):
    k / p

For example, when a colleague asked about a legendary with a single-pull drop rate of p = 0.01 over 50 pulls, the workflow produced:

1 - (1 - 0.01)^50 ≈ 1 - 0.99^50 ≈ 0.395

About 39.5% chance of getting at least one legendary in 50 pulls. The agent then wrapped this in a plain language explanation that anyone on the team could understand.

The turning point: sending the first real queries

With the template configured, Mia was ready to test it with real questions instead of hypothetical ones.

She opened a REST client and sent a webhook POST request to the n8n endpoint:

{  "type": "query",  "single_pull_prob": 0.02,  "pulls": 30,  "question": "What is the chance to get at least one rare item?"
}

Within seconds, the agent responded with something like:

{  "result": "1 - (1 - 0.02)^30 = 0.452",  "explanation": "About 45.2% chance to get at least one rare in 30 pulls."
}

She checked the math. It was correct. The explanation was clear. The request and response were logged in Google Sheets, and the agent had pulled relevant notes on how the “rare” tier was defined from her design documentation stored in Pinecone.

For the first time, she felt that the system could handle the repetitive probability questions that had been eating her time for months.

What Mia needed in place before everything clicked

To get to this point, Mia had to prepare a few essentials. If you follow her path, you will want the same prerequisites ready before importing the template.

  1. An n8n instance, either cloud hosted or self hosted
  2. An OpenAI API key for the chat model used by the agent
  3. A Cohere API key for generating embeddings, or an equivalent embedding provider
  4. A Pinecone account and index for vector storage
  5. A Google account with Sheets API credentials to log all requests and responses

Once she had these, she set credentials in n8n for each external service, imported the workflow JSON template, and tweaked:

  • Chunk sizes in the Splitter node, based on how long her design documents were
  • Embedding model settings, balancing accuracy with token and cost considerations

How she kept the calculator robust and trustworthy

Mia knew that even a powerful workflow could mislead people if inputs were messy or rules were unclear. So she added a layer of practical safeguards and best practices around the template.

Input validation and edge cases

  • She validated that probabilities were in the range (0, 1] and that the number of pulls was a nonnegative integer.
  • For pity systems, she modeled guarantees explicitly. For example, if a legendary was guaranteed at pull 100, she treated probabilities as piecewise, with a separate logic for pulls below and above that threshold.

Cost control and caching

  • She watched embedding and chat token usage, since those could add up in a live system.
  • For frequent or identical queries, she cached results and reused them instead of recomputing every time.

Explainability and transparency

  • Every response included the math steps, which were logged to Google Sheets.
  • Designers and analysts could review those steps to verify the agent’s reasoning or adjust formulas if needed.

Security and data handling

  • She avoided sending any personally identifiable information to embedding or LLM providers.
  • Where sensitive data might appear, she filtered or anonymized fields in n8n before they reached external APIs, in line with the studio’s data policy.

When things broke: how she debugged the workflow

Not everything worked perfectly on the first try. During setup, Mia hit a few common problems that you might encounter too.

  • Webhook not firing
    She discovered that the incoming requests were not using POST or that the URL did not match the one n8n generated. Fixing the method and endpoint path solved it.
  • Embeddings failing
    A missing or incorrect Cohere API key caused errors. In other cases, the input text was empty because an earlier node did not pass data correctly. Once she fixed the credentials and ensured nonempty chunks, embeddings worked reliably.
  • Vector store errors
    Pinecone complained when the index name in the workflow did not match the one in her account or when she exceeded her quota. Aligning the index configuration and checking quotas resolved this.
  • Agent making incorrect statements
    When the agent occasionally made loose approximations, she tightened prompt engineering and, for critical calculations, added a Function node inside n8n to compute probabilities deterministically. The agent then focused on explanation, not on inventing math.

Beyond the basics: how Mia extended the template

Once the core calculator was stable, Mia started to see new possibilities. The template was not just a one-off tool, it was becoming part of the game’s analytics and UX.

  • She exposed an API endpoint to the game UI so players could see live probability estimates per pull or per banner.
  • For larger scale analytics, she experimented with sending logs to a data warehouse such as BigQuery instead of, or in addition to, Google Sheets.
  • She added player specific modifiers, like bonuses or pity counters, stored in a database and read by the workflow. The agent could then factor in a specific player’s state when answering questions.
  • Her analytics team used the log data to run A/B tests and track how changes to drop rates affected player behavior over time.

The resolution: from late-night spreadsheets to a reliable system

Months later, Mia hardly touched her old probability spreadsheets.

Support teams could hit the webhook, get a clear answer, and paste the explanation into responses. Product managers could sanity check event banners by sending a quick query. Analysts had a full history of all probability questions and answers in a single place.

The n8n loot-box probability calculator template gave her exactly what she needed:

  • A repeatable and auditable way to answer loot-box questions
  • Deterministic math combined with AI assisted explanations
  • A workflow that was easy to extend with new rules, pools, or systems

If you design or analyze gacha systems, or even if you are a curious player who wants clear answers, this setup can turn opaque probabilities into transparent, shareable insights.