
Fetch All HubSpot Contacts with n8n
Automating how you pull contact data from HubSpot into your other tools can remove a lot of manual effort and keep your systems in sync. In this tutorial you will learn, step by step, how to use an n8n workflow template to fetch all HubSpot contacts with the HubSpot node configured to getAll: contact.
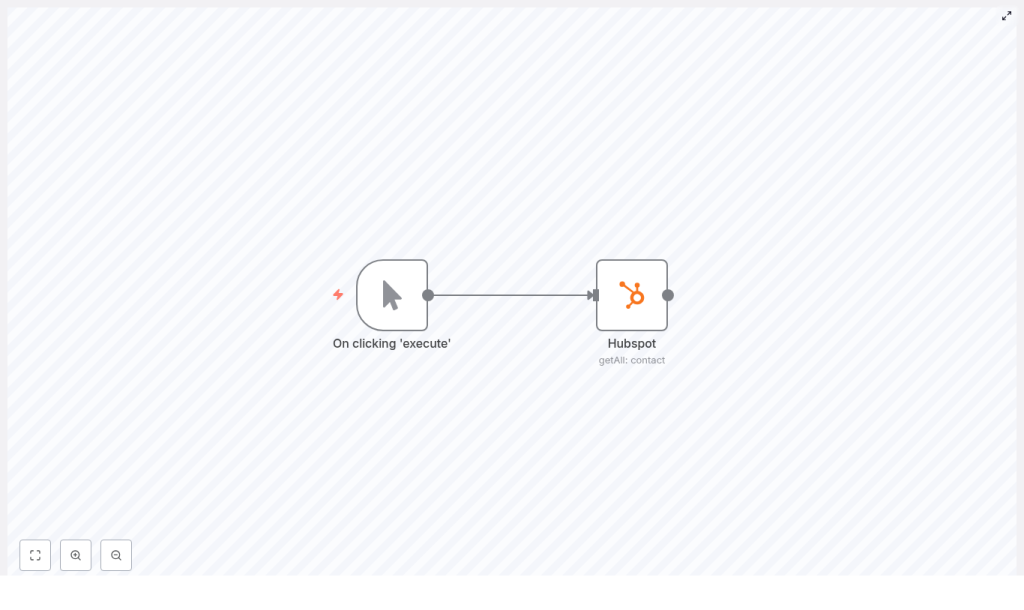
The workflow starts with a simple Manual Trigger, then calls HubSpot, handles pagination for you, and prepares the data for export or further processing.
Learning goals
By the end of this guide you will be able to:
- Understand why automating HubSpot contact exports with n8n is useful
- Configure a basic n8n workflow to fetch all HubSpot contacts
- Use the HubSpot node with the
getAlloperation and handle pagination - Test and inspect the returned contact data in n8n
- Extend the workflow to export, filter, enrich, or back up contacts
- Apply best practices for performance, reliability, and security
Why automate fetching HubSpot contacts?
Having a single, consistent view of your contacts is essential for marketing, sales, and reporting. If data is copied manually or inconsistently, you risk duplicates, outdated information, and incomplete analytics.
Using n8n to automate contact retrieval from HubSpot helps you:
- Keep downstream tools up to date without manual exports
- Avoid duplication and data drift across systems
- Enable near real-time reporting and dashboards
- Build repeatable backups of your contact database
Typical automation scenarios include:
- Exporting HubSpot contacts to Google Sheets or a database
- Filtering and enriching contacts before they reach your CRM or data warehouse
- Scheduling regular or incremental syncs for analytics and backups
What you will build in n8n
You will build a minimal but practical workflow template that:
- Starts with a Manual Trigger (you can later switch to a schedule)
- Uses the HubSpot node to getAll contacts
- Relies on n8n to handle HubSpot pagination and fetch every contact
- Prepares you for next steps like exporting, filtering, or enriching the data
The same pattern can be reused for scheduled syncs, daily backups, or feeding a custom CRM.
Prerequisites
Before you start building the workflow, make sure you have:
- An n8n instance (cloud or self-hosted)
- A HubSpot account with either:
- API key (deprecated, not recommended for new setups), or
- Private app access token (recommended)
- HubSpot credentials set up in n8n so the HubSpot node can authenticate
Key concepts before you build
Manual Trigger vs Schedule Trigger
In n8n, a Manual Trigger lets you run a workflow on demand from the editor. It is ideal for development, testing, and one-off exports. A Schedule Trigger runs the same workflow automatically at intervals, such as every hour or once a day. You can start with a Manual Trigger, then later swap it for a Schedule Trigger when you are confident in the workflow.
The HubSpot node and the getAll operation
The HubSpot node is n8n’s integration with the HubSpot API. When you set:
- Resource:
contact - Operation:
getAll
you are telling n8n to retrieve contacts from HubSpot. With Return All set to true, n8n automatically manages HubSpot’s paged responses and keeps requesting more pages until all contacts are returned.
Handling pagination and large datasets
HubSpot does not send all contacts in a single response. Instead it returns them in pages. The HubSpot node in n8n can:
- Fetch every page when Return All is
true - Limit the number of contacts per run when Return All is
falseand alimitis set
For smaller or moderate datasets, Return All = true is simple and effective. For very large accounts or performance-sensitive workflows, you may choose to work in batches by setting a limit and running the workflow multiple times or using incremental sync logic.
Step-by-step: build the workflow in n8n
Step 1: Add a trigger node
- Open your n8n editor and create a new workflow.
- Add a Manual Trigger node from the nodes panel.
Use the Manual Trigger while you are building and testing. Once the workflow behaves as expected, you can replace it with a Schedule Trigger to automate the process.
Step 2: Add and configure the HubSpot node
- Drag a HubSpot node onto the canvas.
- Connect the Manual Trigger node to the HubSpot node.
- Open the HubSpot node settings and configure:
- Resource:
contact - Operation:
getAll - Return All:
true - Credentials: choose your HubSpot credential (API key or private app token)
- Resource:
This configuration tells n8n to call the HubSpot Contacts API, use your stored credentials, and automatically follow all pages until every contact is retrieved.
Step 3: Test the HubSpot node
- Click Execute Node on the HubSpot node, or run the workflow from the top right.
- Wait for the execution to complete. The node will output an array of contact objects.
- Inspect one or more items in the node output. Look for fields such as:
emailfirstnamelastnamelifecycle stagecompanyor related properties
Verifying the available properties now will make it easier to map them later to spreadsheets, databases, or other tools.
Working with large datasets and pagination
HubSpot enforces limits on how many records are returned in a single call. The HubSpot node in n8n abstracts this for you.
- Return All = true n8n automatically:
- Requests the first page of contacts
- Follows the pagination cursor or offset that HubSpot returns
- Loops through until no more pages are available
- Outputs a single combined list of all contacts
- Return All = false You specify a limit:
- n8n fetches only that number of contacts per run
- You can process data in smaller batches for performance or rate limit reasons
If you are working with very large HubSpot accounts, consider combining batching with incremental syncs based on a “last modified date” property to avoid repeatedly exporting unchanged data.
Practical next steps after fetching contacts
Once the HubSpot node is returning contacts correctly, you can extend the workflow. Below are common patterns you can add as additional nodes.
1. Export contacts to Google Sheets
- Add a Set node after the HubSpot node to flatten the contact object. Map only the fields you need, for example:
emailfirstnamelastnamelifecycle stage
- Add a Google Sheets node.
- Use operations like “Create Row” or “Update Row” depending on your use case.
- Map the fields from the Set node to the appropriate spreadsheet columns.
This gives you a live or regularly updated sheet of all HubSpot contacts that can be shared across teams.
2. Load contacts into a database
- After the HubSpot node, optionally use a Set node to shape the data into the schema your database expects.
- Add a database node such as PostgreSQL or MySQL.
- Use an Insert or Upsert operation.
- Choose a unique key, often the contact’s email or HubSpot contact ID.
- Configure the query or upsert key to avoid duplicates.
This pattern is useful when you want to maintain a CRM mirror or a data warehouse table for reporting.
3. Filter and enrich contacts
- Add an IF node or Function node after the HubSpot node to filter contacts. Examples:
- Only include contacts with a lifecycle stage of “Marketing Qualified Lead”.
- Exclude contacts without an email address.
- For enrichment, call an external API or another system:
- Add an HTTP Request node to hit an enrichment API.
- Merge the new data back into each contact record.
Filtering and enrichment let you build smarter automations, such as sending only high quality leads to sales tools or personalization engines.
Example workflow: export all contacts to CSV
If your goal is a simple CSV export of every HubSpot contact, you can build a short workflow like this:
- HubSpot node
- Resource:
contact - Operation:
getAll - Return All:
true
- Resource:
- Set node Normalize the output by selecting and renaming fields to a flat structure, for example:
emailfirstnamelastnamecompany
- Spreadsheet File node
- Configure it to create or append to a CSV file.
- Map the Set node fields to CSV columns.
- Optional: Storage or delivery
- Use a Google Drive or S3 node to store the CSV in cloud storage.
- Use the Email node to send the CSV as an attachment.
This gives you a repeatable backup and an easy way to hand off contact data for reporting or offline analysis.
Error handling and retry strategy
To make your workflow more reliable, add basic error handling and logging.
- Node-level retry Enable retries on the HubSpot node to automatically handle transient network issues or temporary HubSpot errors.
- IF node for validation Add an IF node that checks whether the response contains the expected data. If the response is incomplete or malformed, route the execution to an error branch.
- Error logging In the error branch you can:
- Write error details to a Google Sheet or database table.
- Send a notification to a Slack channel or email address.
These patterns help you detect issues early and keep a record of any failed runs.
Best practices for HubSpot contact automations
- Use private app tokens Prefer HubSpot private app tokens over deprecated API keys for better security and more granular scopes.
- Respect rate limits Avoid running full exports too frequently. Use incremental sync strategies when possible, such as filtering by a last modified date field.
- Keep workflows modular Separate your workflow into logical stages:
- Fetch (HubSpot node)
- Transform (Set, Function, IF nodes)
- Load (Google Sheets, database, CSV, etc.)
This improves readability and makes it easier to reuse parts of the workflow.
- Protect sensitive data Mask or encrypt sensitive contact fields when storing them outside HubSpot, especially in logs, spreadsheets, or external systems.
Troubleshooting common issues
- No contacts returned
- Check that the correct HubSpot credentials are selected in the node.
- Verify that the credential has the necessary API scopes to read contacts.
- Missing or unexpected fields
- Inspect the HubSpot node output in n8n to see exactly which properties are returned.
- Remember that HubSpot schemas can vary between accounts based on custom properties and configuration.
- Partial responses or intermittent errors
- Check HubSpot rate limit headers and logs.
- Consider adding short delays between requests or reducing frequency of full exports.
- Ensure node-level retries are configured for transient errors.
Security considerations
Handling HubSpot tokens and contact data safely is essential.
- Store HubSpot tokens only in n8n credentials, never in plain text within nodes.
- Limit credential scopes to only what the workflow requires.
- Restrict who can access these credentials within your n8n instance.
- Rotate tokens periodically and review workflow execution logs for unusual activity.
Use cases and automation ideas
Once you have a reliable “fetch all contacts” workflow, you can build many automations on top of it:
- Daily or weekly backup of contacts to a data lake or cloud storage
- Sync HubSpot contacts to an in-house CRM for custom sales workflows
- Send Slack or email notifications when new Marketing Qualified Leads appear
- Run enrichment pipelines to append firmographic or behavioral data before sales outreach
Recap and next steps
In this tutorial you learned how to:
- Set up a Manual Trigger workflow in n8n
- Configure the HubSpot node to
getAllcontacts with automatic pagination - Inspect and validate the returned contact data
- Extend the workflow to export contacts to CSV, Google Sheets, or databases
