
Create an iCalendar Invite and Email It Automatically with n8n
Picture this: you just scheduled a meetup, and now you are stuck in calendar-invite purgatory, copying dates, pasting Zoom links, and praying you did not typo the time zone. Again.
Good news, you do not have to live like that. With a tiny but mighty n8n workflow, you can generate an iCal .ics file and email it out automatically. No more repetitive clicking, no more “wait, which time is correct?” messages, just a neat invite landing in everyone’s inbox.
In this guide, we will walk through a simple 3-node n8n workflow that:
- Creates an iCalendar
.icsevent file - Attaches it to an email
- Sends it using your SMTP provider
All of that with a single manual trigger. Your future self will be very grateful.
Why bother automating iCal invites in n8n?
Besides protecting your sanity, there are some very practical reasons to let n8n handle calendar invites for you:
- Save time – Stop manually creating individual calendar events and emails. Let the workflow do it in one go.
- Consistent formatting – iCal
.icsfiles play nicely with Google Calendar, Outlook, Apple Calendar, and most other calendar apps. - Highly flexible – Add event descriptions, locations, reminders, recurrence rules, and more. You can even plug this into other systems like CRMs or form tools.
In short, you get fewer repetitive tasks and more time for everything else you actually want to do.
What this n8n workflow actually does
The workflow is intentionally simple, so you can understand it at a glance. It uses just three nodes:
- Manual Trigger – Lets you start the workflow with a click from the n8n editor, great for testing or one-off runs.
- iCalendar – Generates an
.icsfile that contains your event details. - Send Email – Sends an email via SMTP and attaches that freshly created
.icsfile.
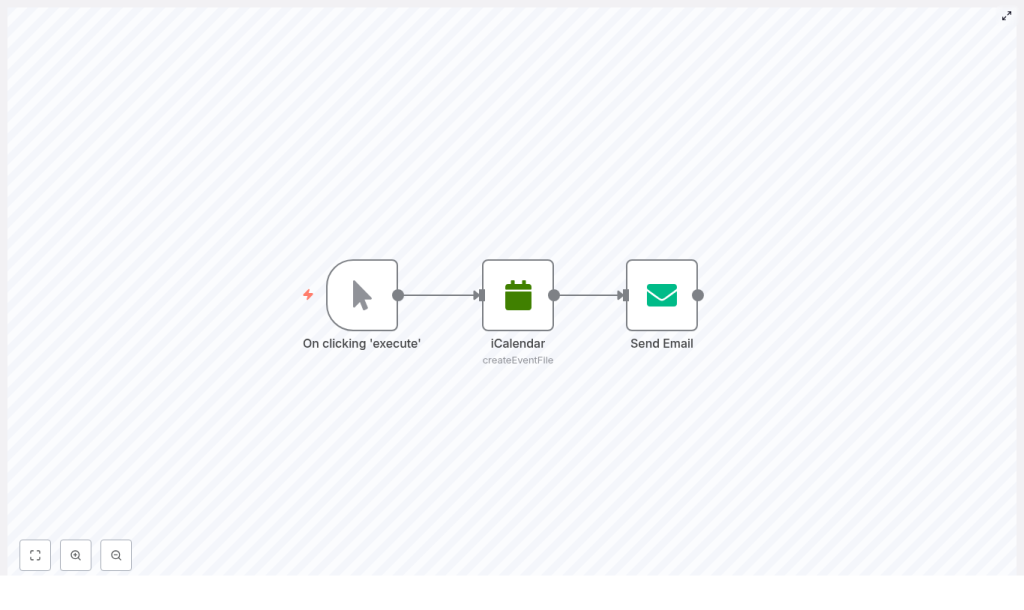
Visually, you get a simple chain:
Manual Trigger → iCalendar → Send Email
The iCalendar node outputs a binary file, which the Send Email node picks up as an attachment. That is the secret sauce that turns “just an email” into “proper calendar invite.”
Before you start: what you need
Set yourself up with the basics first:
- An n8n instance, either cloud or self-hosted.
- SMTP credentials for your email provider, such as Gmail, Outlook, or any SMTP-compatible service.
- Basic familiarity with n8n, like how to add nodes and execute a workflow from the editor.
Once you have those, you are ready to build.
Quick overview: how to build the workflow
We will go through each node in detail, but here is the high-level game plan:
- Add a Manual Trigger node so you can start the workflow on demand.
- Configure an iCalendar node to create the
.icsevent file. - Configure a Send Email node, attach the generated
.ics, and send it via SMTP.
Now let us put it together step by step.
Step 1 – Add and name the Manual Trigger node
Start a new workflow in n8n and add a Manual Trigger node.
This node does exactly what it sounds like: when you click “Execute workflow” in the editor, it fires. Perfect for testing and for workflows you want to trigger by hand.
Give it a descriptive name, for example:
On clicking 'execute'
That way, when you revisit the workflow later, you will remember what kicks it off.
Step 2 – Create the event with the iCalendar node
Next, add an iCalendar node and connect it to the Manual Trigger node.
In the iCalendar node settings:
- Set the Operation to
createEventFile.
This tells n8n that you want to generate an event as an .ics file. Now fill in the key fields:
- Title – The event name, for example
n8n Community Meetup. - Start – Event start time in ISO format, for example
2021-06-11T15:30:00.000Z. - End – Event end time in ISO format.
- Additional fields (optional) – Add extra details such as:
- Location
- Description
- Reminders
- UID
- Timezone
- Recurrence rules (RRULE)
Here is an example configuration for a meetup:
<Title>: n8n Community Meetup
<Start>: 2021-06-11T15:30:00.000Z
<End>: 2021-06-11T16:15:00.000Z
<AdditionalFields.description>: "Join us for an n8n community meetup to share projects and tips."
When this node runs, it outputs a binary .ics file in the node data. That binary output is what you will attach in the next step.
Step 3 – Attach and send with the Send Email node
Now add a Send Email node and connect it after the iCalendar node.
Configure it with your email details:
- SMTP credentials – Select or create an SMTP credential in n8n for your provider, such as Gmail or Outlook.
- To – The recipient email address. For testing, send it to yourself first.
- Subject – For example:
n8n Community Meetup 🚀 - Text – The body of the email. Something like:
Hey,

We are excited to invite you to the n8n community meetup!

With this email you will find the invite attached.

Looking forward to seeing you at the meetup!

Cheers,
Team
The crucial part is the attachment setting:
- Attachments – Set this to
data(or the correct binary property name from the iCalendar node).
The iCalendar node usually outputs the binary file under a property like data or file, depending on your setup. Make sure the Send Email node is pointing to that exact property so it knows what to attach.
Run the workflow and confirm everything works
Time for the satisfying part.
- In the editor, click the Manual Trigger node and hit Execute.
- Check the inbox you used in the To field.
- Verify that:
- The email arrived successfully.
- The
.icsfile is attached. - Opening the
.icsin your calendar app shows the correct title, start and end times, and description.
If everything looks good, you have just automated the most annoying part of scheduling.
Common issues and how to fix them
If something misbehaves, here are the usual suspects and how to deal with them.
- No attachment in the email
Check that:- The iCalendar node is actually outputting binary data.
- The Send Email node Attachments setting is pointing to the correct binary property, typically
data.
- Email fails to send
- Test your SMTP credentials outside n8n if possible.
- Double-check the SMTP host, port, and TLS/SSL options.
- For Gmail, make sure you have enabled app access or created an app-specific password.
- Calendar app refuses the .ics file
- Open the
.icsfile in a text editor. - Confirm it contains valid
VCALENDARandVEVENTsections. - Ensure your timestamps are in UTC or include proper timezone information.
- Open the
Level up: advanced n8n iCal tricks
Once the basic workflow is working, you can start making it smarter and more dynamic.
- Use expressions and other nodes
Pull event data from sources like Google Sheets, Airtable, or a form submission node, then use expressions in the iCalendar node to fill in title, time, and description automatically. - Add attendees in the iCal event
Use the attendee fields in the iCalendar node’s Additional Fields. Some calendar apps will interpret these and send built-in invitations to those attendees. - Schedule recurring events
Need a weekly training or monthly check-in? Use RRULEs in the iCal node to define recurrence rules. - Bulk invites
Loop over a list of recipients and:- Create personalized
.icsfiles per attendee, or - Reuse a single event and add multiple attendee entries in the iCal data.
- Create personalized
This is where the workflow stops being “just a shortcut” and starts feeling like your personal scheduling assistant.
Real-world use cases for this workflow
Here are some practical ways to put this n8n iCal template to work:
- Webinars and online events – Automatically send calendar invites after someone registers via a form.
- Hiring and interviews – Trigger an invite when an interview is scheduled in your internal tool.
- Training sessions – Batch-generate invites for recurring training and email them to all participants.
If you already have a process where you think “I keep sending the same calendar invite over and over,” this workflow probably fits.
Security best practices
Even simple automations deserve good security habits:
- Store SMTP credentials in n8n Credentials
Never hardcode usernames or passwords directly in workflow fields. Use n8n’s credential manager instead. - Sanitize user input
If event titles or descriptions include user-supplied text, sanitize or validate it first to avoid potential injection issues.
Wrapping up
With just three nodes – Manual Trigger, iCalendar, and Send Email – you can fully automate the creation and distribution of calendar invites in n8n. It is a small workflow with a big impact on your day-to-day efficiency.
Use this as a starting point, then connect it to forms, CRMs, or other calendar systems to build more advanced automations. You can also export your workflow JSON and reuse it across different environments if you want a consistent setup everywhere.
Next steps: try the template
Ready to retire manual calendar invites? Spin up this workflow in your n8n instance and customize it for your own events. If you get stuck or want to adapt it for a specific use case, reach out, ask questions, and keep iterating until it fits your automation stack perfectly.
