Automate HR Leave Approvals with n8n & Teams

Automate HR Leave Approvals with n8n & Microsoft Teams

Automating leave approvals is one of the fastest ways to modernize HR operations. By combining n8n, MySQL, and Microsoft Teams Adaptive Cards, you can replace manual email chains with a structured, auditable workflow that delivers approval requests directly to managers where they already work.

This guide explains the end-to-end workflow design, how the nodes interact, and how to deploy a production-ready leave approval process using n8n and Teams. It is written for automation professionals, HR IT owners, and architects who want a robust, extensible pattern for HR approvals.

Business case for automating leave approvals

Traditional leave approval processes often rely on email or spreadsheets, which introduces several challenges:

  • Slow response times as managers overlook or lose track of requests.
  • Poor auditability because decisions and timestamps are scattered across inboxes.
  • Inconsistent data when HR systems are updated manually and out of sequence.

By orchestrating approvals through n8n and Microsoft Teams you gain:

  • Real-time notifications to managers using Adaptive Cards with clear actions.
  • Structured data flows that can be logged, monitored, and audited.
  • Consistent routing logic based on an authoritative employee-to-manager mapping stored in MySQL.

The result is a secure, traceable, and scalable leave approval process that fits well into a broader HR automation strategy.

Workflow overview

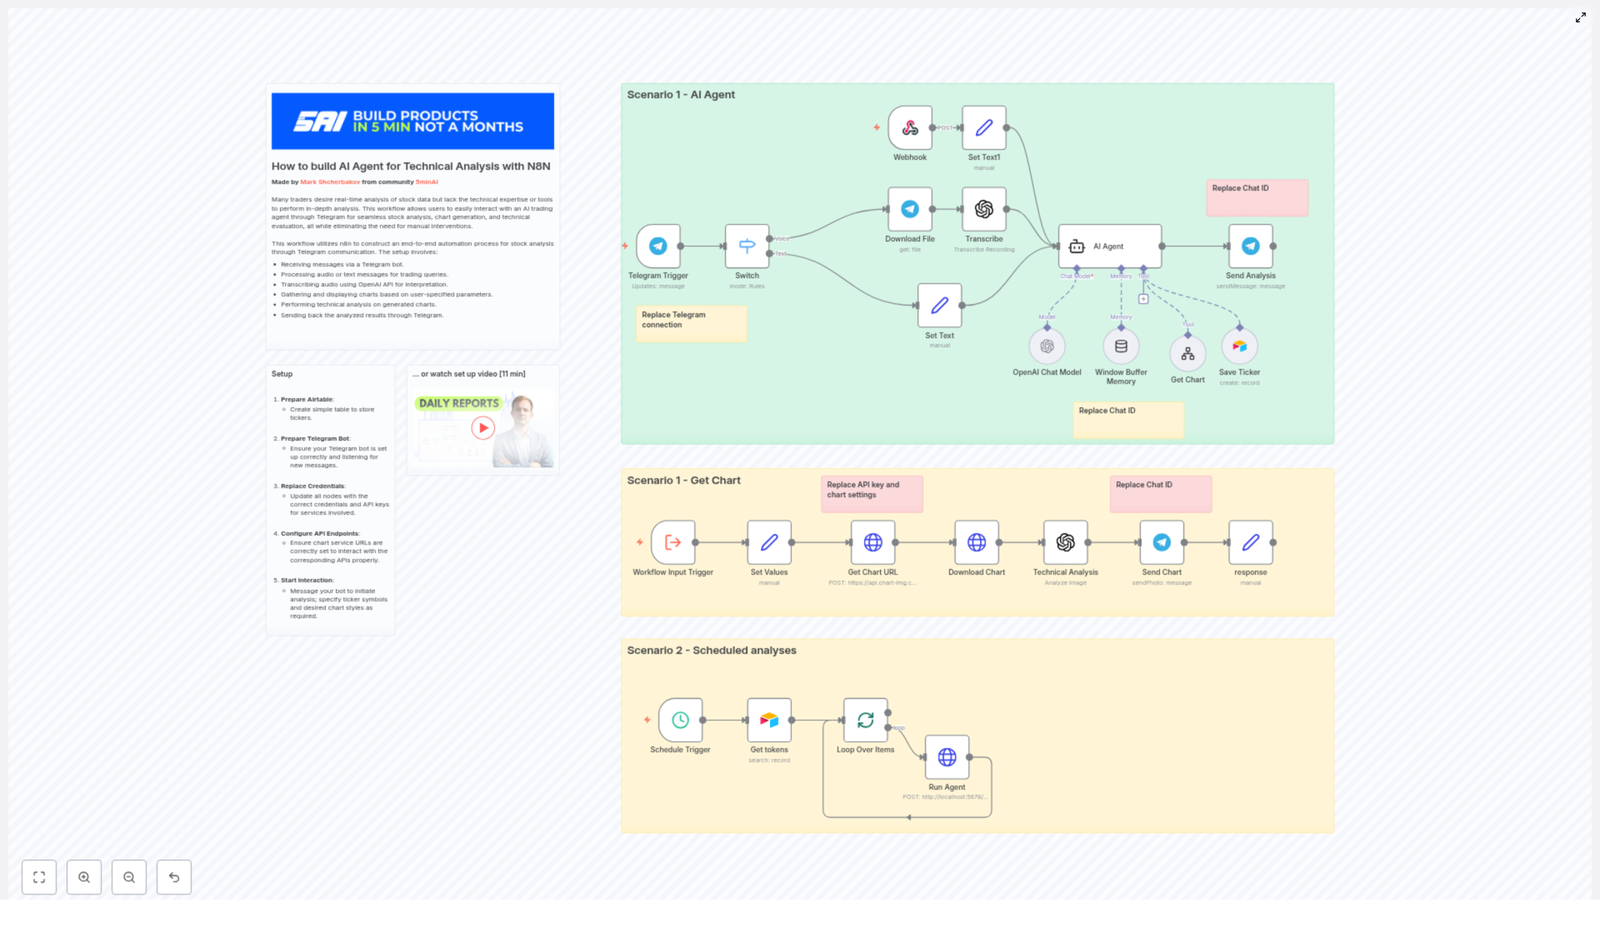
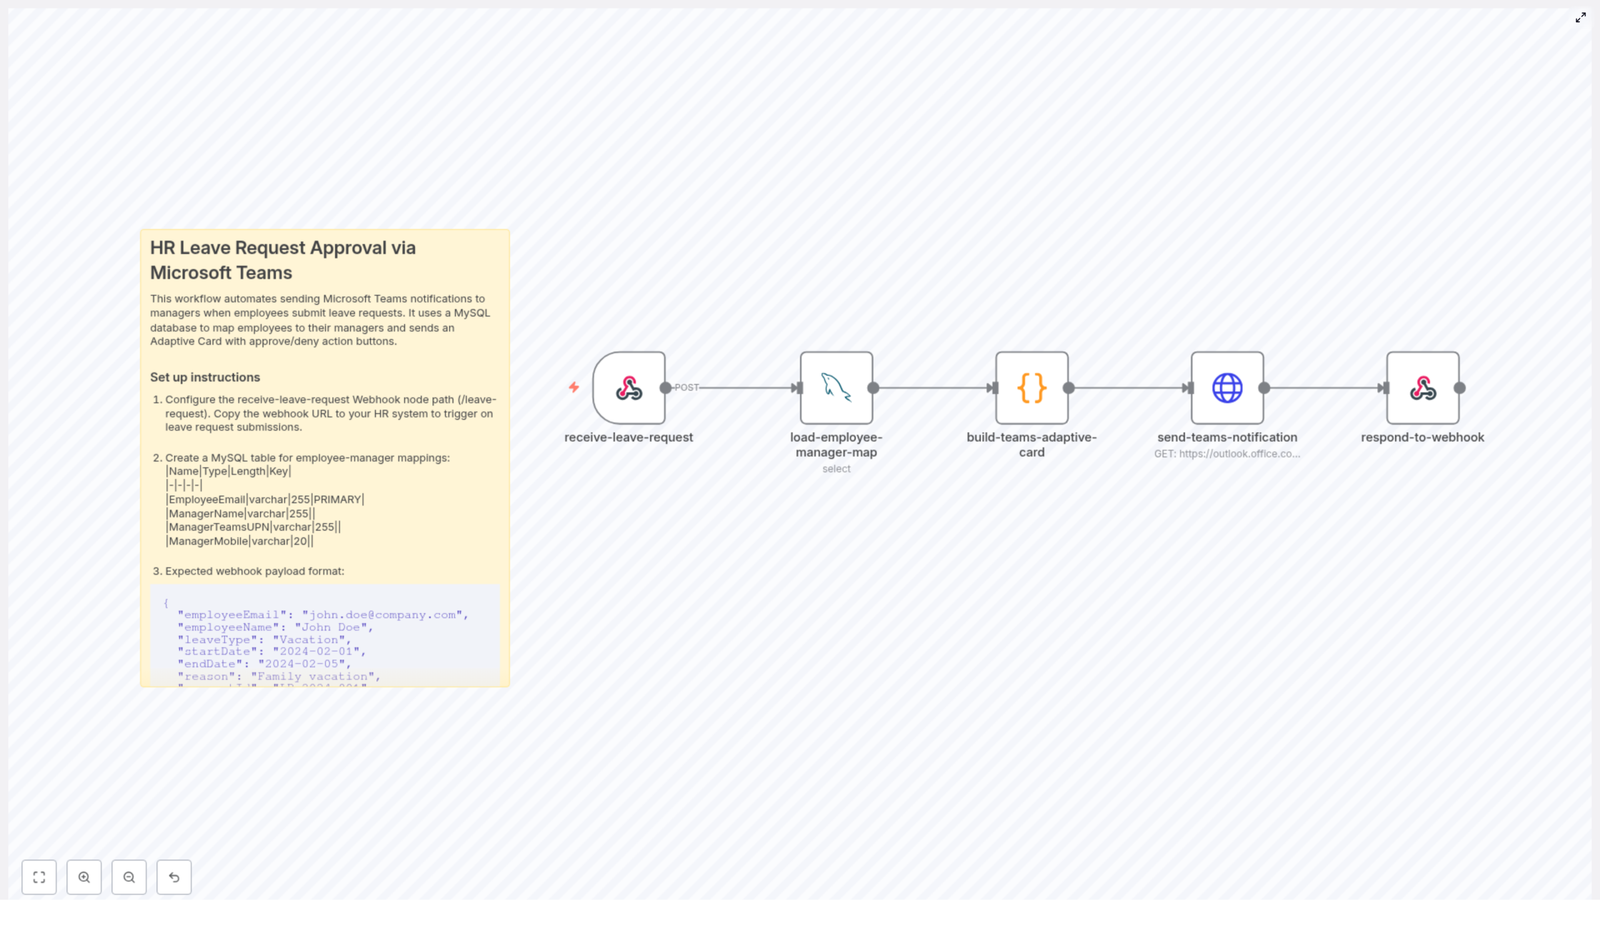
At a high level, the workflow performs the following steps:

  1. Receives a leave request as a JSON payload via an n8n Webhook.
  2. Looks up the corresponding manager details in a MySQL mapping table.
  3. Builds a Microsoft Teams Adaptive Card that includes all relevant leave details and actions.
  4. Sends the Adaptive Card to a Teams channel or connector using an HTTP Request node.
  5. Returns a structured JSON response to the calling HR system using Respond to Webhook.

This pattern is flexible enough to extend to multi-level approvals, calendar integration, and additional notification channels.

Key n8n components in the workflow

The template relies on a small set of core nodes, each with a clear responsibility:

Webhook node

  • Acts as the public entry point for your HR system.
  • Receives JSON payloads via HTTP POST.
  • Triggers the downstream workflow that handles routing and notifications.

MySQL node

  • Queries a mapping table that links employees to managers.
  • Retrieves fields such as:
    • EmployeeEmail
    • ManagerName
    • ManagerTeamsUPN
    • ManagerMobile
  • Ensures that routing logic is centralized and easy to maintain.

Code node

  • Transforms the inbound request and manager data into Adaptive Card JSON.
  • Constructs the card layout, including:
    • Employee name and email.
    • Leave type and date range.
    • Reason for leave.
    • Action buttons such as Approve, Deny, and View Details.
  • Optionally builds mention entities using the manager’s Teams UPN so Teams can notify the correct user.

HTTP Request node

  • Sends the Adaptive Card payload to a Teams Incoming Webhook or connector URL.
  • Handles HTTP response codes and bodies so you can log or react to posting errors.

Respond to Webhook node

  • Returns a clean JSON response to the calling HR system.
  • Confirms that the notification was dispatched.
  • Echoes back a requestId or correlation ID for tracking.

Input format: sample webhook payload

Your HR system initiates the process by sending a POST request to the n8n webhook endpoint. A typical payload looks like this:

{  "employeeEmail": "john.doe@company.com",  "employeeName": "John Doe",  "leaveType": "Vacation",  "startDate": "2024-02-01",  "endDate": "2024-02-05",  "reason": "Family vacation",  "requestId": "LR-2024-001",  "notifyHrGroup": false
}

You can adapt these fields to match your HRIS schema as long as the workflow is updated accordingly.

Implementation guide: building the workflow in n8n

1. Create and configure the webhook endpoint

Start by adding a Webhook node in n8n:

  • Set the HTTP method to POST.
  • Define the path as /leave-request or another route appropriate for your environment.
  • Copy the generated URL and configure your HR system or middleware to send leave requests to this endpoint.

For production environments, ensure the webhook is exposed securely, for example behind an API gateway or with appropriate authentication controls.

2. Design the employee-manager mapping in MySQL

Create a dedicated mapping table to keep routing logic externalized from the workflow logic. A typical schema is:

  • EmployeeEmail (varchar(255), PRIMARY)
  • ManagerName (varchar(255))
  • ManagerTeamsUPN (varchar(255))
  • ManagerMobile (varchar(20))

Name the table, for example, hr_employee_manager_map. The n8n MySQL node will query this table using the employeeEmail from the webhook payload to retrieve the manager’s identity and Teams UPN.

3. Generate the Adaptive Card payload

Next, use a Code node to construct the JSON for the Teams Adaptive Card. Typical best practices include:

  • Display key request details prominently:
    • Employee name and email.
    • Leave type (for example, Vacation, Sick, Unpaid).
    • Start and end dates.
    • Reason or comments from the employee.
    • Request identifier (requestId).
  • Add action buttons, such as:
    • Approve
    • Deny
    • View Details for a link back to your HR portal.
  • Optionally include a mention of the manager using ManagerTeamsUPN so Teams sends a targeted notification.

The Code node can also normalize or validate data, for example formatting dates or truncating long text fields before they are presented in the card.

4. Send the card to Microsoft Teams

Use an HTTP Request node to push the Adaptive Card to Microsoft Teams:

  • Set the method to POST.
  • Use the Teams Incoming Webhook URL or connector URL as the endpoint.
  • Set the content type to application/json.
  • Paste or reference the JSON generated by the Code node as the request body.

If you are targeting a specific channel or group, configure the corresponding webhook. When using mentions, ensure that the payload includes the required mention entities and that the ManagerTeamsUPN maps to a valid Azure AD user.

5. Return a response to the calling system

Finally, use the Respond to Webhook node to close the loop with your HR system:

  • Return a JSON object that confirms dispatch, for example:
    {  "status": "queued",  "requestId": "LR-2024-001",  "message": "Leave approval notification sent to manager."
    }
    
  • Include the original requestId or any correlation key your HR system expects.
  • Ensure the response is sent quickly to avoid timeouts on the caller.

Security, privacy, and compliance

Because leave data is personal information, treat this workflow as part of your broader HR security posture.

  • Access control: Restrict access to the n8n instance and the MySQL database using strong credentials, network segmentation, and least-privilege roles.
  • Input validation: Sanitize and validate all incoming webhook payloads to prevent injection, malformed JSON, or unexpected field values.
  • Webhook security: Protect your Teams Incoming Webhook URLs, rotate them if there is any suspicion of exposure, and avoid sharing them in code repositories.
  • Audit logging: Log key events such as requestId, timestamps, manager identity, and decision status in a dedicated audit table or external logging system.
  • Regulatory compliance: If you operate under frameworks such as GDPR or CCPA, ensure data retention, access, and export policies align with your legal obligations.

Extending the workflow: advanced scenarios

The base pattern is intentionally simple, but it can be extended to support more complex HR processes.

Multi-level and conditional approvals

  • Implement two-tier approvals where the manager approves first, then HR reviews and confirms.
  • Route responses from the Adaptive Card into separate branches in n8n, for example one path for manager approval and another for HR validation.

Calendar and scheduling integration

  • On approval, call calendar APIs to create tentative out-of-office events or update team schedules.
  • Use additional n8n nodes or HTTP requests to integrate with Microsoft 365 or other calendar systems.

Additional notification channels

  • Use the ManagerMobile field to send SMS or push notifications to managers who are not active in Teams.
  • Integrate with other collaboration tools if your organization uses multiple communication channels.

Business rules and validation

  • Add auto-reject rules for overlapping leave, insufficient leave balance, or blackout dates.
  • Implement these rules in the Code node or delegate to an external rule engine or service.

Localization and UX improvements

  • Render Adaptive Cards in the manager’s preferred language based on profile data or configuration.
  • Adjust formatting, labels, and date formats to align with local conventions.

Troubleshooting and diagnostics

Issue: No notification appears in Teams

  • Inspect the response from the HTTP Request node for HTTP status codes or error messages.
  • Verify that the Teams Incoming Webhook URL is valid and has not been rotated.
  • Test the webhook with a simple text payload to confirm connectivity, then reintroduce the Adaptive Card payload to isolate formatting issues.

Issue: Manager mention is not working

  • Teams mentions require a correct schema and a valid Azure AD identifier or UPN.
  • Confirm that ManagerTeamsUPN maps to an active user in your tenant.
  • Check that the Adaptive Card payload includes the correct mention entities structure.

Issue: Webhook returns an error to the HR system

  • Review the n8n execution logs for errors in downstream nodes.
  • Ensure the Respond to Webhook node is always reached and that it returns a response quickly.
  • If the workflow performs long-running operations, consider an asynchronous pattern: acknowledge receipt immediately, then process the request in the background.

Operational best practices

  • Validate early: Check incoming payloads at the start of the workflow and return descriptive error messages to the HR system when required fields are missing or invalid.
  • Keep mappings in sync: Update the hr_employee_manager_map table regularly, for example via a nightly sync job or direct HRIS integration, to avoid routing errors.
  • Use environment variables: Store secrets such as Teams webhook URLs and database credentials in n8n environment variables instead of hard-coding them in Code nodes.
  • Test end-to-end: Validate the full flow in a development environment with realistic sample data before enabling it in production.

Conclusion and next steps

By connecting n8n, MySQL, and Microsoft Teams, you can implement a lightweight but powerful framework for HR leave approvals. Adaptive Cards give managers a clear, actionable interface, while n8n handles routing, logging, and extensibility. The result is faster approvals, better visibility, and a strong foundation for broader HR automation initiatives.

To get started, configure the webhook endpoint, set up the hr_employee_manager_map table, and adapt the Adaptive Card layout to match your HR portal and branding. You can then iterate with advanced features such as multi-level approvals, calendar integration, and custom business rules.

Call to action

Deploy this workflow in your development n8n environment, connect it to your HR system, and validate the full approval loop with test requests. You can then refine the Adaptive Card design and routing logic before moving to production. If required, you can also generate a ready-to-import n8n workflow JSON tailored to your organization’s specific fields and approval policies.

Icypeas Bulk Email Search with Google Sheets

Icypeas Bulk Email Search with Google Sheets using n8n

The day Clara hit her limit

By 9:30 a.m., Clara already had a headache.

As the growth marketer at a fast‑moving B2B startup, she lived inside Google Sheets. Her sales team expected fresh contact lists every week, perfectly enriched with verified email addresses. Her tools were simple: a spreadsheet, a coffee mug, and a lot of copying and pasting into different email lookup tools.

It was slow, repetitive, and fragile. One wrong paste, one missed column, and a whole campaign could bounce.

On this particular morning, Clara stared at a sheet with hundreds of rows of leads: first names, last names, company names. She needed to run bulk email lookups, keep a record of what she had sent, and notify the team when the job was submitted. Doing this manually would burn her entire day.

There had to be a better way.

Discovering a different path: n8n and Icypeas

Clara had heard about n8n, an automation tool that could connect almost anything with anything. She also had an Icypeas account that she used occasionally for batch email search. What she did not have was a smooth bridge between her Google Sheet and Icypeas.

That changed when she found an n8n workflow template specifically built for Icypeas bulk email search with Google Sheets.

The promise was simple but powerful:

  • Read contact rows from a Google Sheet
  • Generate a secure HMAC signature for the Icypeas API
  • Submit a bulk email search request to Icypeas in a single automated POST
  • Send a Slack notification as soon as the job is submitted
  • Let Icypeas process the job and deliver downloadable results via dashboard and email

If this worked, Clara could turn a painful, error‑prone routine into a repeatable workflow. So she decided to build the automation into her day.

Setting the stage: what Clara needed before she started

Before she could hit “Execute workflow,” Clara needed a few pieces in place. The template made it clear that she would need:

  • An Icypeas account with:
    • API Key
    • API Secret
    • User ID

    All of these were available in her Icypeas profile.

  • An n8n instance, either cloud or self‑hosted
    • If self‑hosted, she would have to enable the crypto module so n8n could generate the HMAC signature properly.
  • Google account credentials configured in n8n so the Google Sheets node could read her contact list.
  • A Slack workspace plus a webhook or credentials in n8n to send notifications to her team when a bulk search job was submitted.

With those boxes checked, she was ready to design the sheet that would feed everything.

Rising action: turning a simple sheet into an automated workflow

Designing the Google Sheet

Clara opened a new spreadsheet and carefully set up the headers. The workflow template was strict about this part. The first row needed to contain exactly these column names:

  • firstname
  • lastname
  • company

Every row below would hold a contact: first name, last name, and company name. No extra formatting, no merged cells. She knew that the Read Sheet Rows node in n8n would pull these fields and pass them directly to the code node that would generate the Icypeas API signature.

Her spreadsheet was now more than just a list. It was about to become the starting point of a fully automated bulk email search pipeline.

Triggering the workflow on her own terms

Inside n8n, Clara dropped in a Manual Trigger node. She liked the idea of being in control at first, running the workflow on demand whenever she had a new batch of leads ready.

The template hinted that she could later swap this for a Cron node if she wanted the process to run nightly or hourly. That would come later. For now, she wanted to see everything that happened.

Teaching n8n to read her contacts

Next, she added a Google Sheets node to read the sheet rows.

She pointed it to the correct document and tab, then made sure the node was configured to read the header row and output JSON objects with the keys:

  • firstname
  • lastname
  • company

She ran the node once in test mode and saw the preview: each row from her sheet was now a neat JSON object. That data would soon be transformed into a bulk request payload for Icypeas.

The technical turning point: generating a secure Icypeas signature

The real tension in Clara’s setup came at the point where security met automation. Icypeas required an HMAC signature for each request, which meant she had to generate a signature that matched the exact method, URL, and timestamp that Icypeas expected.

One typo in the signature logic, and the request would fail with an authentication error. This was the part she was most nervous about.

The Code node that holds everything together

She added a Code node in n8n, connected it to the Google Sheets node, and pasted in the template logic. It looked like this:

// Replace these with your Icypeas credentials
const API_KEY = "PUT_API_KEY_HERE";
const API_SECRET = "PUT_API_SECRET_HERE";
const USER_ID = "PUT_USER_ID_HERE";

// HMAC signing helper
const genSignature = (url, method, secret, timestamp = new Date().toISOString()) => {  const Crypto = require('crypto');  const payload = `${method}${url}${timestamp}`.toLowerCase();  return Crypto.createHmac('sha1', secret).update(payload).digest('hex');
};

// Build request payload and signature
const apiUrl = 'https://app.icypeas.com/api/bulk-search';
const data = $input.all().map(x => [x.json.firstname, x.json.lastname, x.json.company]);
$input.first().json.data = data;
$input.first().json.api = {  timestamp: new Date().toISOString(),  secret: API_SECRET,  key: API_KEY,  userId: USER_ID,  url: apiUrl,
};
$input.first().json.api.signature = genSignature(apiUrl, 'POST', API_SECRET, $input.first().json.api.timestamp);
return $input.first();

She paused to internalize what was happening here:

  • The code built a data array for batch search, turning each spreadsheet row into a small array of [firstname, lastname, company].
  • It defined the Icypeas bulk search endpoint at https://app.icypeas.com/api/bulk-search.
  • It created an api object with:
    • timestamp
    • secret
    • key
    • userId
    • url
  • Then it used genSignature to generate an HMAC SHA‑1 signature based on the method, URL, and timestamp.

One thing the template warned her about was crucial:

  • Never share the API secret publicly.
  • If running n8n self‑hosted, she needed to enable the crypto module under Settings > General > Additional Node Packages so the code node could use require('crypto').

To keep things secure, Clara decided not to hard‑code her credentials. Instead, she used n8n credentials and environment variables, then referenced them in the code node. That way, if anyone saw her workflow, her secrets would not be exposed.

Sending the bulk email search to Icypeas

With the signature logic in place, it was time for the moment of truth: sending the bulk request.

Configuring the HTTP Request node

Clara added an HTTP Request node and connected it to the Code node. This node would send the actual bulk email search request to Icypeas.

She configured it carefully:

  • Method: POST
  • URL: expression {{$json.api.url}}
  • Body (form fields):
    • task = email-search
    • name = something meaningful like Test or a campaign name
    • user = {{$json.api.userId}}
    • data = {{$json.data}}
  • Headers:
    • X-ROCK-TIMESTAMP = {{$json.api.timestamp}}
    • Authorization header: she created a Header Auth credential in the HTTP node:
      • Name: Authorization
      • Value (expression): {{ $json.api.key + ':' + $json.api.signature }}

Using the Header Auth credential meant the Authorization header would always be formatted exactly as Icypeas required. No manual string concatenation, no risk of missing a colon or space.

Adding Slack into the loop

Clara’s sales team lived in Slack, so she wanted them to know the moment a bulk search job was fired off. She added a Slack node after the HTTP Request node.

In the message field, she used the example from the template:

Bulk search request sent. Response: {{ JSON.stringify($json).slice(0,1000) }}

She pointed it at the team’s #lead-gen channel and customized the text slightly to match her style. Now, whenever n8n sent a bulk request to Icypeas, the team would see the response snippet directly in Slack, including any useful status or error information.

Resolution: from chaos to a clean pipeline

With everything wired up, Clara took a deep breath and clicked “Execute workflow.”

The Manual Trigger fired. The Google Sheets node read her contacts. The Code node generated the data array and HMAC signature. The HTTP Request node sent the payload to Icypeas. A second later, her Slack channel lit up:

“Bulk search request sent. Response: {…}”

It worked.

How Icypeas delivered the results

The Icypeas bulk job did not finish instantly, and that was expected. The template reminded her that Icypeas runs bulk jobs asynchronously. After processing, she would:

For the first time, Clara did not have to babysit a browser tab or manually track which contacts had already been processed. The workflow and the dashboard handled it for her.

When things go wrong: how Clara handled issues

Over the next few weeks, Clara iterated on the workflow and occasionally ran into problems. The troubleshooting guidance built into the template helped her fix them quickly.

  • Invalid signature or authentication errors
    Whenever she saw these, she double‑checked:
    • That her API key and secret were correct
    • That the signature generation code matched Icypeas expectations for method, URL, and timestamp format
  • Empty results
    If a job returned no data, she inspected her Google Sheet:
    • Were the headers exactly firstname, lastname, company?
    • Did each row contain valid names and company values?
  • Crypto module errors on self‑hosted n8n
    On a colleague’s self‑hosted instance, they had to enable the Crypto package under Settings > General > Additional Node Packages and then restart n8n. After that, require('crypto') worked correctly in the Code node.
  • HTTP 4xx/5xx responses
    Whenever Icypeas responded with a 4xx or 5xx status code, she:
    • Checked the HTTP Request node’s response body inside n8n
    • Looked at the Slack message payload for clues

Security and best practices Clara adopted

As the workflow became part of her daily operations, Clara tightened up security and reliability.

  • She stored sensitive values like the API key and API secret in n8n credentials or environment variables instead of hard‑coding them in the Code node.
  • She limited access to the Google Sheet and Icypeas account so only the right team members could see or modify them.
  • She logged requests and responses where helpful, but always redacted secrets in logs and Slack messages.
  • As volumes grew, she kept an eye on Icypeas rate limits and terms of service to avoid pushing the system too hard.

How she improved the workflow over time

Once the core pipeline was stable, Clara started to experiment.

  • Scheduling with Cron
    She replaced the Manual Trigger with a Cron node so the workflow ran automatically at night, processing any new leads added during the day.
  • Writing results back to a database or sheet
    After downloading results from Icypeas, she added extra n8n steps to parse the files and write enriched contacts back into another Google Sheet or a CRM database.
  • Splitting large sheets
    For very large lists, she built logic to split the sheet into multiple batch requests to avoid timeouts and keep each bulk job manageable.

What began as a simple automation to avoid copy‑paste had become a reusable template that her whole team could rely on.

Why this n8n + Icypeas workflow changed Clara’s workday

Looking back, the benefits were clear:

  • She could submit many email lookups in a single request instead of running them one by one.
  • She reduced manual copy/paste and the risk of human error.
  • Slack notifications gave her a real‑time audit trail of when bulk jobs were sent and what responses came back.
  • The workflow fit perfectly into her existing Google Sheets‑based contact process, so she did not have to change how the team collected leads.

Try Clara’s path: your next steps

If you want to recreate Clara’s journey and automate bulk email search with n8n and Icypeas, you can follow the same pattern:

  1. Prepare a Google Sheet with headers firstname, lastname, company.
  2. Import the n8

Customer Feedback Sentiment Workflow (n8n + OpenAI)

Customer Feedback Sentiment Workflow: n8n + OpenAI + Google Sheets

Customer feedback is one of the most valuable data sources for product, support, and CX teams, yet it is often underutilized because analysis is manual and time-consuming. This n8n workflow template automates sentiment analysis at scale by sending form submissions to OpenAI, storing structured results in Google Sheets, and notifying teams via Slack.

This article provides a comprehensive, expert-level walkthrough of the workflow: its architecture, the key n8n nodes involved, how to configure each integration, and advanced customization options that align with automation best practices.

Business case: Why automate sentiment analysis in n8n

Collecting feedback is straightforward; operationalizing it is not. Automating sentiment analysis with n8n, OpenAI, and Google Sheets enables teams to:

  • Distinguish positive, neutral, and negative feedback at scale without manual tagging
  • Identify critical issues quickly and route them to the correct team or channel
  • Monitor sentiment trends over time using spreadsheets or downstream BI tools
  • Reduce manual classification work and accelerate response times for at-risk customers

By embedding this workflow into your feedback intake process, you create a continuous, low-friction loop from customer input to actionable intelligence.

Workflow overview and architecture

The Customer Feedback Sentiment Workflow template connects a customer feedback form to OpenAI, Google Sheets, and Slack in a single automated pipeline.

High-level flow

The end-to-end architecture follows this sequence:

Form Submission (n8n Form Trigger)OpenAI Sentiment ClassifierMerge DataAppend to Google SheetsSlack Notification

Each stage is implemented as an n8n node, which can be extended or replaced based on your stack and governance requirements.

Key nodes in the template

  • formTrigger (Customer Feedback Form Trigger) – Captures incoming feedback from a form and initiates the workflow.
  • openAi (OpenAI Sentiment Classifier) – Sends the feedback text to OpenAI and receives a sentiment classification.
  • merge (Merge Form Data and Sentiment) – Combines the original form payload with the sentiment result into a single item.
  • googleSheets (Append Feedback to Google Sheets) – Appends a new row containing all relevant fields to a target spreadsheet.
  • slack (Slack Notification) – Publishes a notification to a Slack channel when new feedback is processed.
  • StickyNote nodes – Provide in-workflow documentation and implementation notes for easier maintenance.

This modular design allows you to swap destinations (for example, from Google Sheets to a database) or add branching logic with minimal changes.

Step-by-step setup in n8n

The template is designed to be deployed in minutes. The following steps assume you already have an n8n instance running and basic familiarity with credential management.

1. Import the workflow template

  1. In n8n, open the workflow editor.
  2. Use Import from JSON and paste the template JSON content for the Customer Feedback Sentiment Workflow.
  3. Save the workflow with a meaningful name and enable it when configuration is complete.

2. Configure Google Sheets integration

Google Sheets acts as your structured feedback repository and analytics source.

  • Create or identify a target spreadsheet that will store feedback records.
  • In n8n, add a Google Sheets OAuth2 credential with access to that spreadsheet.
  • Open the googleSheets node in the workflow and:
    • Assign the OAuth2 credential you created.
    • Replace the sample documentId with the ID of your own sheet.
    • Verify or adjust the sheetName as needed.

3. Map columns for structured storage

Ensure the Google Sheets schema matches the fields produced by the workflow. A typical column layout is:

  • Timestamp
  • Category
  • Sentiment
  • Entered by
  • Customer Name
  • Contact
  • Customer Feedback

In the googleSheets node, confirm that each mapped field aligns with these columns or your chosen schema. Consistent mapping is critical for downstream reporting and analytics.

4. Add and secure OpenAI credentials

The openAi node is responsible for sentiment classification.

  • Create an OpenAI credential in n8n and:
    • Provide your OpenAI API key.
    • Optionally include an organization ID if required by your account.
  • Attach this credential to the openAi node.
  • Confirm the model and prompt configuration (details below) meet your accuracy and cost requirements.

5. Customize the customer feedback form

The workflow is triggered by a form submission via the formTrigger node (Customer Feedback Form Trigger). Configure it to match your existing or planned feedback form:

  • Define fields such as:
    • Name
    • Category (for example, Bug, Feature Request, Billing)
    • Your feedback (free-text field)
    • Contact (email or other preferred channel)
  • Adjust webhook settings if you connect an external form tool or embed n8n’s form endpoint.

Any changes to field names should be reflected in the OpenAI prompt and downstream mapping nodes.

6. Configure Slack notifications

To keep teams informed in real time, the slack node sends a message whenever new feedback is processed.

  • Set up a Slack credential in n8n with the appropriate scopes.
  • In the slack node:
    • Specify the target channel name or channel ID.
    • Customize the notification text to include key fields such as sentiment, category, and a short excerpt of the feedback.

7. Test the end-to-end workflow

Before enabling the workflow in production:

  • Submit a test entry through the form trigger.
  • Verify that:
    • A new row is appended in Google Sheets with all expected fields.
    • A Slack message appears in the configured channel.
    • The sentiment output from OpenAI is correctly merged and displayed.

Once validated, enable the workflow and monitor initial runs to confirm stability and performance.

OpenAI prompt design and optimization

The default implementation uses a straightforward prompt to classify sentiment from the feedback text:

Classify the sentiment in the following customer feedback: {{ $json['Your feedback'] }}

While this works as a starting point, production-grade sentiment workflows benefit from more structured outputs and explicit instructions.

Best practices for sentiment prompts

  • Return structured JSON – Ask the model to respond with a JSON object, for example:
    {"sentiment":"positive|neutral|negative","score":0.92}
  • Standardize labels – Instruct the model to use consistent single-word labels such as Positive, Neutral, or Negative to simplify routing logic.
  • Support multiple languages – If you receive feedback in several languages, include instructions for language detection or clarify that sentiment should be evaluated in the original language.

Example of an improved JSON prompt

Classify the sentiment of the following customer feedback. Return ONLY a JSON object with keys: sentiment (Positive|Neutral|Negative), score (0-1):

Feedback: "{{ $json['Your feedback'] }}"

Using this pattern makes it significantly easier to parse the response in n8n and map fields directly into Google Sheets or decision nodes.

Advanced customizations and extensions

Once the base workflow is operational, automation professionals can extend it to support more complex routing, analytics, and compliance requirements.

1. Urgency detection and routing

For high-impact feedback, route issues to specialized channels or ticketing systems. Common enhancements include:

  • Detecting negative sentiment combined with critical keywords such as refund, broken, or unauthorized.
  • Branching the workflow so that high-priority items:
    • Trigger alerts in a dedicated Slack channel, or
    • Create support tickets in tools like Jira or Zendesk.

This approach turns passive feedback collection into an active incident detection mechanism.

2. Embeddings for clustering and trend analysis

Beyond simple sentiment labels, you can use OpenAI embeddings to capture semantic meaning and cluster similar feedback entries. Typical use cases:

  • Group related complaints to identify recurring product issues.
  • Generate topic clusters for roadmap planning or release retrospectives.
  • Feed embeddings into analytics pipelines for large-scale trend detection.

Store embeddings alongside the raw feedback in a database or data warehouse for downstream analysis.

3. Sentiment scoring for granular analytics

Instead of just categorical labels, instruct the model to return a numeric sentiment score, for example:

  • Range from -1 to 1, where negative values indicate negative sentiment.
  • Range from 0 to 100 for dashboards and executive summaries.

Numeric scores enable more nuanced trend lines and thresholds, such as triggering alerts when average sentiment drops below a defined level.

4. Anonymization and PII handling

If feedback may contain personally identifiable information, integrate privacy controls directly into the workflow:

  • Add a preprocessing node that redacts or hashes names, emails, or IDs before writing to Google Sheets or sending data to external APIs.
  • Store sensitive data in a restricted system while only non-identifiable context is used for sentiment analysis.

This pattern improves compliance with internal policies and regulatory requirements without sacrificing analytical value.

Operational best practices for this n8n workflow

To run this sentiment analysis pipeline reliably at scale, consider the following operational guidelines.

  • Monitor OpenAI costs – High-volume feedback streams can generate significant API usage. Consider:
    • Using lower-cost models where appropriate.
    • Batching less critical submissions.
    • Applying sampling for non-critical channels.
  • Validate model outputs – Implement checks that confirm the response matches the expected format and labels. If parsing fails, fall back to a default value like Unknown or re-queue the item.
  • Manage data retention – Large spreadsheets degrade over time:
    • Archive older entries periodically to a separate sheet or external storage.
    • Export long-term data to systems like BigQuery or a data warehouse for advanced analytics.
  • Secure credentials – Use n8n’s credential store for all API keys and OAuth details:
    • Restrict who can view or modify credentials.
    • Avoid embedding keys directly in node parameters or shared templates.

Security and privacy considerations

Sending customer feedback to third-party services such as OpenAI requires careful handling of security and privacy.

  • Minimize PII – Remove or mask personally identifiable information when possible before sending text to external APIs.
  • Transparency – Update your privacy policy to inform customers that feedback may be processed by third-party services for analytics and quality improvement.
  • Credential protection – Store all secrets in encrypted form within n8n and limit edit permissions on production workflows.

Aligning the workflow with your organization’s security standards ensures that automation does not compromise data protection.

Troubleshooting common issues

If the workflow does not behave as expected, start by checking the following areas:

  • No rows added to Google Sheets – Confirm:
    • Google Sheets credentials are valid and authorized.
    • The documentId and sheetName are correct.
    • Column mappings in the googleSheets node align with your actual sheet structure.
  • OpenAI-related errors – Verify:
    • The API key and organization ID (if used) are correct.
    • The selected model is available and not rate-limited.
    • The prompt is properly formatted and interpolated, especially the {{ $json['Your feedback'] }} reference.
    • n8n logs for error messages from the OpenAI node.
  • Missing Slack notifications – Check:
    • Slack credentials and scopes are configured correctly.
    • The channel name or ID is valid, and the app is invited to that channel.
    • There are no conditional branches preventing the Slack node from executing.

Deploy this sentiment workflow in your stack

Automated sentiment analysis transforms unstructured customer feedback into a reliable operational signal. With this n8n template, you can:

  • Capture feedback through a simple form trigger.
  • Classify sentiment using OpenAI in real time.
  • Persist structured results in Google Sheets for reporting.
  • Alert teams via Slack when new feedback arrives.

To get started, import the Customer Feedback Sentiment Workflow into your n8n instance, connect Google Sheets, add your OpenAI API key, and run a few test submissions to validate the pipeline.

Call-to-action: Import the Customer Feedback Sentiment Workflow into n8n now, test it with a sample feedback submission, and subscribe to our newsletter to receive more advanced automation strategies, patterns, and n8n templates.


Template credit: n8nBazar – provided as an editable automation you can adapt to your specific requirements.

Sync Google Sheets to Salesforce with n8n

Sync Google Sheets to Salesforce with n8n: A Step-by-Step Learning Guide

Automating data entry between Google Sheets and Salesforce is one of the most practical ways to save time and reduce errors. In this guide, you will learn how to use an n8n workflow template that:

  • Reads rows from a Google Sheet
  • Checks Salesforce for existing Account records
  • Creates missing Accounts and avoids duplicates
  • Upserts Contacts in Salesforce using Email as the external ID
  • Sends Slack notifications for each upserted Contact

What you will learn

By the end of this tutorial, you will be able to:

  • Explain how a Google Sheets to Salesforce sync works in n8n
  • Configure nodes that read, search, merge, and deduplicate data
  • Set up Salesforce Account creation and Contact upsert logic
  • Add Slack notifications for visibility and tracking
  • Apply best practices for field mapping, rate limits, and error handling

Why automate Google Sheets to Salesforce with n8n?

Many teams keep leads, sign-ups, or customer lists in Google Sheets. Manually copying that data into Salesforce takes time and often introduces mistakes. An automated workflow in n8n helps you:

  • Onboard contacts and accounts faster
  • Keep field mapping consistent across imports
  • Prevent duplicate Accounts and Contacts
  • Improve data quality and reduce manual errors
  • Get automatic Slack notifications for better traceability

How the n8n workflow template works

At a high level, the workflow follows this pattern:

  1. Trigger the workflow (manually or on a schedule)
  2. Read rows from a Google Sheet
  3. Search Salesforce for Accounts that match each company
  4. Separate new companies from existing Accounts and remove duplicates
  5. Create missing Salesforce Accounts
  6. Attach the correct Account ID to each contact row
  7. Upsert Contacts in Salesforce using Email as the external ID
  8. Notify a Slack channel when a Contact is upserted

Next, we will walk through the workflow node by node, in the order you would configure and understand it inside n8n.

Step-by-step walkthrough of the n8n workflow

Step 1: Trigger the workflow (Manual Trigger or schedule)

The template starts with a Manual Trigger node. This lets you run the workflow on demand while you are learning and testing.

Once you are confident the sync works correctly, you can replace the Manual Trigger with a Cron node to run the workflow on a schedule, for example every hour or every night.

Step 2: Read data from Google Sheets

The next node is a Google Sheets node configured to read rows from a specific sheet and range. Typical required columns include:

  • Company Name
  • First Name
  • Last Name
  • Email

In n8n, you set the Sheet ID and range (for example, Sheet1!A:D). Each row from the sheet becomes an item in the workflow that will be processed downstream.

Step 3: Search Salesforce for matching Accounts

For every row read from Google Sheets, the workflow uses a Salesforce node to search for an Account whose Name matches the Company Name from the sheet.

This is done with a SOQL query. The template uses an expression that safely escapes single quotes so that company names like O'Reilly Media do not break the query:

=SELECT id, Name FROM Account WHERE Name = '{{$json["Company Name"].replace(/'/g, '\\\'')}}'

Result:

  • If Salesforce finds a match, the Account data (including Id) is returned.
  • If no Account is found, the result is empty for that row and the company is treated as new.

Step 4: Separate new companies from existing Accounts

After the search, the workflow needs to split the data into two paths:

  • Rows where an Account already exists in Salesforce
  • Rows where the company is not yet in Salesforce

The template uses a Merge or remove-key-matches style node to compare the Google Sheet rows with the Salesforce search results. This creates a branch that contains only the rows where no matching Account was found. Those rows represent new companies that require Account creation.

Step 5: Remove duplicate companies before creating Accounts

It is common for a sheet to contain multiple contacts from the same company. If you create an Account for every row, you might end up with duplicates in Salesforce.

To avoid this, the workflow includes a deduplication step for the “new companies” branch. This step:

  • Compares rows based on the Company Name field
  • Keeps only one row per unique company
  • Prevents multiple Account records for the same company when there are several contacts in the sheet

Step 6: Create Salesforce Accounts for new companies

Now that you have a unique list of new companies, the workflow uses a Salesforce node to create an Account record for each one.

In this node you typically map:

  • Name in Salesforce to Company Name from the sheet

After the Account is created, the node outputs the new Account data, including the Id. The workflow then passes this data forward and ensures that the Account Name and Id are available for linking contacts later.

Step 7: Attach Account data to existing companies

For rows where an Account already existed in Salesforce, the workflow needs to merge the Account information with the original row from Google Sheets.

This is handled by a Merge node that combines:

  • The Salesforce Account data (including Id)
  • The original row data from the Google Sheet

After merging, an If node checks whether the Id field is present. If it exists, the workflow renames this field to Account ID (or similar) so that the Contact upsert step has a clearly labeled field for AccountId.

Step 8: Combine new and existing Account data for Contacts

At this point you have:

  • Newly created Accounts with their Ids
  • Existing Accounts that were found in Salesforce, also with their Ids

The workflow now merges these paths so that every contact row from the sheet has an associated Account ID. This merged data becomes the final payload that will be used to create or update Contacts in Salesforce.

Step 9: Upsert Salesforce Contacts by Email

With Account IDs attached, the workflow uses a Salesforce node configured for an upsert operation on the Contact object.

The key configuration is:

  • externalId: Email
  • externalIdValue: the Email value from the sheet
  • Other mapped fields typically include:
    • FirstName from First Name
    • LastName from Last Name
    • Email from Email
    • AccountId from the merged Account ID field

Upserting by Email has two benefits:

  • If the Contact does not exist, Salesforce creates it.
  • If a Contact with that Email already exists, Salesforce updates it instead of creating a duplicate.

Step 10: Send Slack notifications for each Contact upsert

After a successful Contact upsert, the workflow uses a Slack node to post a message to a chosen channel, for example #general.

This message can include information such as the contact’s name, email, and Account, which gives your team real-time visibility into new or updated records.

Best practices for this Google Sheets to Salesforce automation

1. Field mapping and data validation

Reliable imports depend on clean and complete data. Before the upsert step, consider adding:

  • A Set node to ensure required fields like Email and Last Name are present
  • A Function or Set node to normalize emails (for example, trim spaces and convert to lowercase)

Validating and normalizing data early reduces failed upserts and keeps your Salesforce records consistent.

2. Handling Salesforce rate limits and large imports

Salesforce enforces API usage limits. If your Google Sheet contains many rows:

  • Process data in smaller batches instead of all at once
  • Insert short delays between batches to avoid hitting limits
  • Consider using the Salesforce Bulk API with n8n for large-scale imports

n8n provides batching features and supports the Salesforce Bulk API, which is ideal for big data loads.

3. Dealing with ambiguous or duplicate company names

The template matches Accounts using the Company Name field. This is simple but can cause collisions, for example:

  • Acme vs Acme Inc.

For more accurate matching, you can:

  • Use additional fields or heuristics, such as email domain matching
  • Leverage Salesforce duplicate rules to catch potential conflicts

4. Error handling and logging

Production-grade workflows should handle failures gracefully. In n8n, you can add error-handling branches that:

  • Capture failed Account or Contact upserts
  • Write error details to a separate Google Sheet
  • Send alert emails or post error messages to a dedicated Slack channel
  • Log the row data and API responses for easier troubleshooting

Advanced ways to extend the template

Once the basic sync works, you can enhance the workflow further:

  • Map additional Salesforce fields such as industry, phone, or lead source by extending the create and upsert nodes
  • Use a Merge node to attach metadata, for example an import batch ID or import date
  • Replace the Manual Trigger with a Cron node for fully automated scheduled syncs
  • Experiment with a two-way sync where Salesforce updates are written back to the Google Sheet

Testing checklist before going live

Before using this automation in production, walk through this checklist:

  • Run tests with a small sample Google Sheet and a Salesforce sandbox environment
  • Add duplicate rows to the sheet and confirm that Account deduplication works as expected
  • Verify that Contacts are linked to the correct AccountId after Account creation
  • Simulate API errors or invalid data to confirm your retry and error-handling nodes behave correctly

Frequently asked questions

Do I have to trigger the workflow manually every time?

No. The template uses a Manual Trigger for easy testing, but you can switch to a Cron node to run the sync automatically on a schedule.

How does the workflow prevent duplicate Contacts?

The Salesforce Contact node uses an upsert operation with Email as the external ID. If a Contact with that Email already exists, Salesforce updates it instead of creating a new record.

What if my Google Sheet has multiple contacts from the same company?

The workflow deduplicates new companies by Company Name before creating Accounts. This way, only one Account is created for each unique company, even if multiple contacts share that company name.

Can I add more fields from Google Sheets to Salesforce?

Yes. You can edit the Salesforce nodes in n8n to map additional fields as long as those fields exist in your Salesforce configuration and are available in your Google Sheet.

Conclusion and next steps

This n8n workflow template gives you a structured, maintainable way to sync Google Sheets to Salesforce. It handles key tasks such as:

  • Reading and preparing data from Google Sheets
  • Creating Accounts only when needed
  • Upserting Contacts by Email to avoid duplicates
  • Sending Slack notifications for better visibility

The workflow is flexible and can be extended with custom field mappings, bulk import strategies, and richer notification or logging logic.

To get started, clone the template, test it against a Salesforce sandbox, and iterate on the mappings and logic to match your data model. If you need help customizing the flow, refining deduplication, or adding bulk support, you can reach out to automation specialists for guidance.

Call to action: Try this Google Sheets to Salesforce workflow in n8n today, or contact us for a custom integration service tailored to your Salesforce setup.

Asana to Notion Sync Workflow (n8n Guide)

Asana to Notion Sync Workflow (n8n Guide)

Synchronizing tasks from Asana into Notion helps teams keep planning, documentation, and execution aligned in one place. In this guide you will learn how to use an n8n workflow template that listens for Asana task events and then creates or updates corresponding pages in a Notion database.

This tutorial is written as a teaching guide. We will start with the learning goals, then explain the key concepts, and finally walk step by step through each node in the workflow.

What you will learn

By the end of this guide, you will be able to:

  • Explain why syncing Asana tasks into Notion can improve your project management setup
  • Understand how an n8n workflow reacts to Asana webhooks in real time
  • Configure each node in the Asana to Notion sync template
  • Map Asana tasks to Notion database pages and avoid duplicates using Asana GIDs
  • Handle creates vs updates, deadlines, and notifications reliably
  • Apply best practices for performance, reliability, and security

Why sync Asana tasks into Notion?

Many teams use Asana as the main task tracker but rely on Notion for:

  • Project documentation
  • Planning boards and roadmaps
  • Cross-team visibility and reporting

Without automation, keeping both tools aligned usually means manual copying or constant switching. A reliable Asana to Notion sync workflow helps you:

  • Keep Asana tasks visible in Notion without manual duplication
  • Maintain a searchable, consolidated project database in Notion
  • Reduce context switching between tools while keeping them in sync

Concepts you need to know first

Asana GID (Global ID)

Every Asana task has a unique identifier called a GID. The workflow uses this GID as the key to match each Asana task with a Notion page. Storing the GID in Notion is essential to prevent duplicates and to know which page to update later.

Asana webhooks and triggers

Asana can send webhooks to an external URL whenever something changes, for example when a task is created or updated. In n8n, the Asana Trigger node receives those webhook events and starts the workflow automatically.

Notion databases and properties

The workflow writes into a Notion database. Each row in that database is a Notion page, and each column is a property, such as:

  • Title (task name)
  • Asana GID (number property)
  • Deadline (date property)
  • Status or other metadata

The template assumes you have a property in Notion dedicated to storing the Asana GID as a number. The name can be something like Asana GID.

n8n workflow structure

The workflow follows a typical pattern:

  1. React to an external event (Asana webhook)
  2. Normalize and deduplicate the incoming data (unique GIDs)
  3. Fetch complete task details from Asana
  4. Find existing matching pages in Notion
  5. Decide whether to create or update
  6. Write data to Notion and send notifications

High level workflow overview

At a high level, the Asana to Notion sync template performs these actions:

  1. Receives webhooks from Asana when tasks are created or updated (Asana Trigger)
  2. Extracts and deduplicates Asana task GIDs from the webhook payload
  3. Fetches full task details from Asana for each GID
  4. Looks up existing Notion database pages by Asana GID
  5. Decides if each task should be created as a new page or used to update an existing page
  6. Creates new Notion pages for new tasks, or updates pages for existing tasks
  7. Validates required fields, sets deadline properties when available, and sends notifications

Next, we will walk through each node in the workflow and explain how to configure it in n8n.

Step by step: configuring the n8n Asana to Notion workflow

Step 1 – Asana Trigger node

Goal: Receive real-time events when Asana tasks are created or updated.

What it does: The Asana Trigger node listens for webhook events from Asana. Whenever a matching event occurs, it passes the event payload into the workflow as input items.

Key configuration points:

  • Webhook ID: Configure the correct webhookId that Asana uses for this trigger.
  • Resource: Choose the target resource such as a specific project or workspace.
  • Credentials: Use Asana API credentials (Personal Access Token or OAuth) that have permission to read tasks and manage webhooks.
  • Public URL: Your n8n instance must be reachable by Asana. Use a public URL or a tunnel (for example ngrok) during development.

Once configured, create or update a task in Asana and confirm that the Asana Trigger node receives the event in n8n.

Step 2 – Extract Unique GIDs (Function node)

Goal: Build a clean, deduplicated list of Asana task GIDs from the webhook payload.

Asana can send multiple events for the same task in a single webhook delivery. If you process each event separately, you might try to create or update the same task several times. To avoid this, the Function node loops through all incoming items and collects only unique task GIDs where the resource type is task.

Typical logic inside the Function node:

const gids = [];
for (item of items) {  const gid = parseInt(item.json.resource.gid);  if (!gids.includes(gid) && item.json.resource.resource_type === 'task') {  gids.push(gid);  }
}

In the actual workflow, this logic is wrapped so that the node outputs items that each represent one unique Asana task GID. This keeps the rest of the workflow simpler and prevents duplicate processing.

Step 3 – Fetch Asana Task node

Goal: Retrieve full details for each Asana task GID.

At this point, you have a list of unique GIDs. The Asana node is used to call the Asana API and load complete task data such as:

  • Task title or name
  • Due date or deadline
  • Assignee
  • Other relevant fields you plan to map to Notion

Configuration tips:

  • Set the node to the Asana node type.
  • Use the get operation.
  • Provide the Asana task ID from the previous node, which is the GID.
  • Optionally enable continueOnFail so the workflow continues even if one task fails to load, for example due to permissions or a deleted task.

Step 4 – Lookup Notion Pages (Notion database query)

Goal: Find out which Asana tasks already have a corresponding Notion page.

The workflow now has a collection of fully loaded Asana tasks. To avoid creating duplicates, it needs to check whether a Notion page already exists for each Asana GID.

How it works:

  • The workflow builds a compound filter that includes all Asana GIDs it wants to check.
  • It then uses the Notion node to query the target database for pages where the GID property matches any of those values.

Node configuration:

  • Use the Notion node with the operation databasePage – getAll.
  • Supply the ID of the target Notion database.
  • Provide a JSON filter that searches the number property you use for Asana GID, for example:
    • Property name: Asana GID
    • Property type: number
  • Use a compound filter so that all relevant pages can be fetched in a single query, which is more efficient than querying per item.

Step 5 – Map Actions (Function node)

Goal: Decide for each Asana task whether to create a new Notion page or update an existing one.

This Function node compares two sets of data:

  • The list of Asana tasks from the Fetch Asana Task node
  • The list of Notion pages that already contain an Asana GID from the Lookup Notion Pages node

For each Asana task, it checks whether there is a Notion page with the same GID. Based on that, it adds properties to the item:

  • action – set to "Create" if no Notion page exists, or "Update" if a matching page was found
  • database_id or pageId – when updating, this stores the ID of the existing Notion page that should be modified

The output of this node is a list of items, each clearly marked with what the workflow should do next.

Step 6 – Determine Action (If node)

Goal: Split the workflow into two branches: one for creating pages and one for updating them.

The If node reads the action property created in the previous step. It then routes each item to the correct branch:

  • True branch: Items where action equals "Create" go to the Create Notion Page node.
  • False branch: Items where action equals "Update" go to the Update Notion Page node.

This branching keeps the logic clear and makes it easier to maintain the workflow.

Step 7a – Create Notion Page node

Goal: Create a new Notion database page for Asana tasks that do not already exist in Notion.

In this node, you map Asana task fields to Notion properties. Typical mappings include:

  • Asana task name → Notion Title property
  • Asana GID → Notion Asana GID number property
  • Other Asana fields → Notion properties such as status, project, or tags (depending on your database schema)

Important: Always set the Asana GID property on the new Notion page. This is what allows future runs of the workflow to find the correct page and prevents duplicate pages from being created for the same task.

Step 7b – Update Notion Page node

Goal: Update existing Notion pages when the corresponding Asana task changes.

For items that have action = "Update", the workflow already knows the pageId of the Notion page to modify. The Notion node is configured to:

  • Use the update operation on databasePage
  • Receive the pageId from the previous Function node
  • Update fields such as title, deadline, status, or any other properties that should stay in sync with Asana

This keeps the Notion database aligned with changes in Asana, such as renaming tasks or adjusting due dates.

Step 8 – Validate Required Fields and Set Notion Deadline

Goal: Only set or update the Notion deadline when Asana provides a valid date.

Sometimes Asana tasks will not have a due date, or the date may be removed later. You typically do not want to overwrite a Notion date property with invalid data. To handle this, the workflow uses an If node to:

  • Check whether the Asana task includes a deadline or due date
  • Only pass items with a valid date to the node that updates the Notion date property

This step ensures that required fields are present and avoids accidentally clearing or corrupting your Notion data.

Step 9 – Send Notification node

Goal: Provide visibility into what the sync workflow is doing.

The final node sends a notification summarizing the actions taken, for example:

  • Which tasks were created in Notion
  • Which pages were updated
  • Any relevant metadata such as deadlines or status changes

This node can be configured to send an email, a Slack message, or another internal notification. It is also useful for auditing and monitoring the health of the sync process.

Configuring Asana and Notion credentials in n8n

Asana credentials

  • Create a Personal Access Token in Asana or set up OAuth.
  • Add these credentials in n8n under the Asana credential type.
  • Ensure the token has permission to:
    • Read tasks in the relevant projects or workspaces
    • Register and manage webhooks if you create webhooks from n8n

Notion credentials

  • Create a Notion integration in your Notion workspace.
  • Share the target database with this integration so it has access.
  • Store the Notion integration token in n8n credentials under the Notion credential type.
  • Verify that the integration has read and write access to the database you are syncing.

Once both credentials are set up, test each node individually in n8n to confirm that Asana and Notion calls work correctly.

Best practices for a reliable Asana to Notion sync

  • Idempotency: Always store the Asana GID in a dedicated Notion property. This is the key to avoiding duplicate pages and safely rerunning the workflow.
  • Batch lookups: Use compound filters to fetch all relevant Notion pages in a single query instead of one query per task. This reduces API calls and improves performance.
  • Rate limits: Both Asana and Notion enforce API rate limits. If you expect high volumes of task changes, implement strategies such as retries, exponential backoff, or queueing to avoid hitting those limits.
  • Partial failures: Use continueOnFail on non-critical nodes and add error handling paths. Consider sending notifications or logging entries when some items fail while others succeed.
  • Logging and monitoring: Add a dedicated logging or notification node that records sync statistics, failures, and unusual events. You can send these to email, Slack, or an observability tool.

Troubleshooting common issues

Webhook is not firing

If the workflow is not starting when Asana tasks change, check the following:

  • Confirm that your n8n endpoint is publicly accessible.
  • Verify that the webhookId in the Asana Trigger node is valid.
  • Check in Asana that the webhook is correctly registered and not disabled.
  • During development, use a tunnel such as ngrok to expose your local n8n instance.

Duplicate Notion pages are created

Duplicates usually indicate a problem with the Asana GID mapping in Notion. Review the following:

Notion Alert Sync with n8n, SIGNL4 & Slack

Notion Alert Sync with n8n, SIGNL4 & Slack

This reference guide describes a complete Notion – n8n – SIGNL4 – Slack integration for incident alerting and synchronization. The workflow ingests alerts via webhook, classifies their status, updates a Notion database, pushes notifications into SIGNL4 and Slack, and keeps incident resolution states in sync across tools.

1. Solution overview

The workflow turns Notion into a central incident repository, uses SIGNL4 for mobile on-call escalation, and leverages Slack for team visibility. n8n acts as the orchestration layer that:

  • Accepts incoming alert webhooks from external monitoring systems
  • Normalizes and interprets alert status codes and event types
  • Reads and updates incident records in a Notion database
  • Creates and resolves alerts in SIGNL4 using a consistent external identifier
  • Posts human-readable status messages into Slack channels
  • Runs interval-based checks to discover new Notion incidents and finalize resolved ones

The template is designed for operators who want a low-code automation pattern that keeps multiple incident tools consistent without manual copy-paste or ad hoc integrations.

2. Workflow architecture

The n8n workflow is logically split into three main functional areas:

2.1 Incoming webhook and real-time parsing

  • Accepts HTTP POST requests from your monitoring or alerting system
  • Runs a Function node that interprets statusCode and eventType into human-readable states
  • Updates the related Notion page with the latest status description
  • Posts a concise summary to Slack for immediate team awareness

2.2 Interval-based Notion queries and synchronization

  • Uses a timer (Interval) node to run on a fixed schedule
  • Queries Notion for:
    • New incidents that have not yet been sent to SIGNL4
    • Open incidents that should be resolved in SIGNL4 based on Notion state
  • Creates new SIGNL4 incidents for fresh Notion pages
  • Resolves SIGNL4 incidents when Notion indicates that an incident is closed
  • Updates Notion flags (for example Read, Up) to prevent duplicates

2.3 Optional Notion page trigger

  • Uses a Notion trigger node (optional) that fires when a page is added to the incident database
  • Immediately sends the new incident into SIGNL4 without waiting for the next scheduled interval

You can enable or disable the optional trigger depending on whether you prefer real-time or scheduled synchronization from Notion to SIGNL4.

3. Node-by-node breakdown

3.1 Webhook node (incoming alerts)

Role: Entry point for third-party alerts.

  • Trigger type: Webhook (HTTP POST)
  • Endpoint: Configured via the node’s path/ID in n8n
  • Payload: JSON body from your monitoring system, including:
    • body.alert.statusCode
    • body.eventType
    • body.annotation (optional)
    • body.user (optional)

The webhook node forwards the raw payload to the parsing Function node. No transformation should occur here, so downstream nodes can rely on consistent field names.

3.2 Function node: ParseStatus

Role: Normalize SIGNL4-style status codes and event types into readable incident status strings, and determine whether an incident should be considered “Up” (resolved) in Notion.

The node iterates over each input item and enriches its JSON with two new fields:

  • s4Status – human-readable summary, used in Notion and Slack
  • s4Up – boolean flag indicating resolution state

Function code used in the workflow:

// Loop over inputs and add a new field called 's4Status' to the JSON of each one
for (item of items) {  var type = "Status";  if ((item.json.body.alert.statusCode == 2)  && (item.json.body.eventType == 201)) {  type = "Acknowledged";  }  if ((item.json.body.alert.statusCode == 4) & (item.json.body.eventType == 201)) {  type = "Closed";  }  if ((item.json.body.alert.statusCode == 1) & (item.json.body.eventType == 200)) {  type = "New Alert";  }  if ((item.json.body.alert.statusCode == 16) & (item.json.body.eventType == 201)) {  type = "No one on duty";  }  var annotation = "";  if ((item.json.body.eventType == 203) & (item.json.body.annotation != undefined) ) {  type = "Annotated";  annotation = item.json.body.annotation.message;  }  if (annotation != "") {  annotation = ": " + annotation;  }  var username = "System";  if (item.json.body.user != undefined) {  username = item.json.body.user.username;  }  var data = type + " by " + username + annotation;  item.json.s4Status = data;  item.json.s4Up = false;  if (type == "Closed") {  item.json.s4Up = true;  }
}
return items;

Behavior details:

  • statusCode and eventType combinations are mapped as follows:
    • statusCode = 2 and eventType = 201Acknowledged
    • statusCode = 4 and eventType = 201Closed
    • statusCode = 1 and eventType = 200New Alert
    • statusCode = 16 and eventType = 201No one on duty
    • eventType = 203 with annotation present → Annotated
  • If an annotation is present, it is appended to the type string with a leading colon.
  • Usernames are taken from body.user.username if available, otherwise default to System.
  • s4Status is constructed as: <Type> by <Username>[: <Annotation>].
  • s4Up is true only when the derived type is Closed. For all other types it is false.

Configuration notes:

  • If your alerting provider uses different numeric codes, adjust the conditional checks accordingly.
  • Use console.log(item.json) inside this node if you need to debug payloads or mapping logic.
  • Be careful with single ampersand operators in the code; they are used here as bitwise operators but effectively act as logical checks with these numeric values. You can convert them to && if you prefer explicit logical operations.

3.3 Notion nodes

The workflow uses multiple Notion nodes to read and update incident pages. These nodes rely on a shared Notion credential configured in n8n.

3.3.1 NotionPageUpdater

Role: Update the Notion incident page that corresponds to the incoming alert.

  • Operation: Update page
  • Key fields:
    • Page ID – typically mapped from the alert payload or a stored external reference
    • Description (or equivalent text property) – set to the s4Status string
    • Optional link back to the monitoring system via an externalEventId or similar field

This node ensures that the Notion record always reflects the latest state parsed from SIGNL4 or the monitoring system.

3.3.2 NotionNewAlertsQuery

Role: Find Notion incidents that have not yet been forwarded to SIGNL4.

  • Operation: Search or List database pages
  • Filter criteria (example):
    • Read = false
    • Up = false

The output of this node is a set of incident pages that are treated as new alerts to be created in SIGNL4. Each resulting page is processed by the SIGNL4 IncidentAlertForNew node.

3.3.3 NotionOpenAlertsQuery

Role: Identify Notion incidents that are currently considered “Up” and need to be reconciled with SIGNL4.

  • Operation: Search or List database pages
  • Filter criteria (example):
    • Up = true
    • Read = true

This node is used in the resolve flow to find incidents that should be resolved in SIGNL4, based on Notion’s state.

3.3.4 NotionMarkRead / NotionFinalizeUpdate

NotionMarkRead

  • Role: After a new Notion incident is sent to SIGNL4, mark it as processed.
  • Typical updates:
    • Set Read = true to avoid re-sending the same incident
    • Optionally store the SIGNL4 incident identifier or timestamp

NotionFinalizeUpdate

  • Role: Clean up or finalize Notion state after a SIGNL4 incident is resolved.
  • Typical updates:
    • Adjust flags to reflect that the incident is fully closed
    • Update status fields or resolution notes

Exact property names depend on your Notion database schema; the template expects at least boolean properties equivalent to Read and Up.

3.4 SIGNL4 nodes

SIGNL4 nodes handle creation and resolution of on-call incidents. All SIGNL4 nodes share a configured SIGNL4 credential in n8n.

3.4.1 IncidentAlert & IncidentAlertForNew

Role: Send incidents into SIGNL4 for on-call notification and escalation.

  • Operation: Create alert
  • Key parameter: externalId set to the Notion page ID

Using the Notion page ID as externalId lets you correlate subsequent status updates and resolve operations back to the same SIGNL4 incident. The template includes two variants:

  • IncidentAlert: Used in the webhook-driven path for alerts that originate from external systems.
  • IncidentAlertForNew: Used in the scheduled Notion scan to create alerts for newly discovered incident pages.

3.4.2 IncidentResolve

Role: Resolve a SIGNL4 incident when Notion indicates that the incident should be closed.

  • Operation: Resolve alert
  • Key parameter: externalId set to the Notion page ID of the incident

This node is called in the resolve flow after NotionOpenAlertsQuery identifies incidents that are ready for closure. It ensures that SIGNL4’s state matches Notion’s resolution state.

3.5 Slack node: NotifySlack

Role: Post concise incident updates into a Slack channel.

  • Operation: Send message
  • Content: Typically uses the s4Status field computed by ParseStatus
  • Destination: Preconfigured Slack channel for incident updates

This node keeps the wider team informed about acknowledgements, closures, annotations, and on-call availability without requiring them to log into Notion or SIGNL4.

4. Execution flows by scenario

4.1 Real-time alert flow (incoming webhook)

Used when an external monitoring system pushes alerts directly to n8n.

  1. Webhook receives the POST request and passes the full JSON payload to the next node.
  2. ParseStatus inspects statusCode, eventType, optional annotations, and user information. It sets:
    • s4Status to a human-readable description
    • s4Up to true if the event represents a closure, otherwise false
  3. NotionPageUpdater updates the relevant Notion page:
    • Writes s4Status into the Description or similar field
    • Optionally includes a link back to the original monitoring event via an externalEventId property
  4. NotifySlack posts the s4Status summary into the configured Slack channel so the team sees the change immediately.

In this flow, SIGNL4 may already be managing the incident, and the webhook updates are primarily used to keep Notion and Slack synchronized with the alert lifecycle.

4.2 Scheduled discovery of new Notion incidents

Used when Notion is the system of record for incident creation and you want SIGNL4 to be notified of new records.

  1. IntervalTimer triggers on a schedule (for example every few minutes) and starts the scan.
  2. NotionNewAlertsQuery retrieves pages with:
    • Read = false
    • Up = false

    These represent new incidents that have not yet been sent to SIGNL4.

  3. For each returned page, IncidentAlertForNew sends an alert to SIGNL4, using the Notion page ID as externalId.
  4. NotionMarkRead then updates each processed page, typically setting Read = true so that the same incident is not re-sent on the next interval.

This pattern ensures idempotent behavior, since already processed incidents are excluded from subsequent queries.

4.3 Scheduled resolve flow

Used to reconcile open incidents between Notion and SIGNL4 and close them when appropriate.

  1. IntervalTimer (which can be the same or a separate timer) triggers the resolve sequence.
  2. NotionOpenAlertsQuery returns pages that match:
    • Up = true
    • Read = true

    These represent incidents that have been processed and are currently considered “Up” or open in Notion.

Automate Appointment Scheduling with n8n & LLMs

Automate Appointment Scheduling with n8n and LLMs

Ever feel like you spend way too much time going back and forth over email just to find a meeting slot that works for everyone? With n8n, Gmail, Google Calendar, and a lightweight LLM-based agent, you can hand that job over to automation.

This workflow template reads your unread emails, figures out which ones are actually about scheduling, checks your calendar for open slots, and replies with a suggested time. It can even ping your team in Slack so everyone stays in the loop.

Let’s walk through what this template does, when it makes sense to use it, and how it all fits together in n8n.

What this n8n scheduling workflow actually does

At a high level, this automation turns your inbox into a smart scheduling assistant. Instead of you manually:

  • Reading every new email
  • Deciding if it is about booking a meeting
  • Checking your Google Calendar
  • Writing a polite reply with a suggested time
  • Letting your team know what was scheduled

the workflow does all of that for you.

Here is the basic flow:

  1. New unread emails in Gmail trigger the workflow.
  2. An LLM or classifier checks if the email is about scheduling.
  3. If it is, Google Calendar is queried for your availability.
  4. An LLM-based scheduling agent writes a natural reply with specific times.
  5. The reply is sent via Gmail, the email is marked as read, and Slack can be notified.

You get faster responses, fewer scheduling headaches, and a much cleaner calendar routine.

When this template is a great fit

This n8n workflow template is especially helpful if you:

  • Receive a lot of inbound emails asking to “hop on a call” or “book a quick meeting”.
  • Use Gmail and Google Calendar as your main tools for communication and scheduling.
  • Want to keep a human tone in replies but do not want to manually craft every email.
  • Need your team to see what has been scheduled, for example via Slack updates.

If that sounds like you, this template can quietly take over a chunk of your daily admin work.

Core building blocks of the workflow

Here is a quick tour of the main n8n nodes and components involved, so you know what is happening under the hood:

  • GmailInboundTrigger – polls for unread emails and starts the workflow.
  • AppointmentClassifier / LLMChatClassifier – decides if the email is an appointment request or something to ignore.
  • CalendarLookup – pulls your Google Calendar events and finds free time slots.
  • SchedulingAgent (LLMChatAgent) – the LLM that writes a context-aware, time-specific reply.
  • GmailSendReply – sends your response back to the original sender.
  • MarkEmailRead – marks the email as read so it is not processed again.
  • SlackNotifier – optionally posts the scheduled or proposed time to a Slack channel.

Now let us dive into how all of this flows together step by step.

How the automation works, step by step

1. Start with the Gmail trigger

The workflow begins with the GmailInboundTrigger node. It regularly checks your Gmail account for new unread emails.

In this node, you will typically:

  • Poll only unread messages.
  • Exclude spam and trash so you are only dealing with real emails.
  • Set a polling interval that fits your use case, for example every 1 or 5 minutes.

Once a new email is spotted, the workflow kicks into gear.

2. Let the classifier decide if it is about scheduling

Not every email that lands in your inbox is a meeting request, so the next step is classification.

An AppointmentClassifier or LLMChatClassifier node looks at the email’s subject and body snippet and returns a label such as is_appointment or discard. Only emails that are classified as appointment-related move on to the scheduling steps.

Helpful tips for accurate classification

  • Feed both the subject and a snippet of the body into the classifier for better accuracy.
  • Always include a safe fallback category like discard, so the workflow does not try to schedule from random messages.
  • During testing, log the classifier output so you can tweak prompts or category definitions if it mislabels messages.

This keeps the rest of the workflow efficient and focused only on real scheduling requests.

3. Check Google Calendar for availability

Once an email is confirmed as a scheduling request, the workflow moves to your calendar.

The CalendarLookup node queries your Google Calendar within a defined time window, for example from yesterday up to one month ahead. It pulls all events and then identifies the free gaps where a meeting could fit.

Key details to get calendar lookups right

  • Use the correct calendar ID, which is often your email address.
  • Make sure your OAuth credentials for Google Calendar are set up correctly.
  • Normalize everything to a consistent timezone before proposing times.
  • Respect buffers between meetings, for example this template uses a 15 minute buffer.

By the end of this step, the workflow knows exactly when you are busy and when you are free.

4. Let the LLM scheduling agent craft the reply

This is where things get smart. The SchedulingAgent (LLMChatAgent) takes in:

  • Sender information
  • Email subject and body
  • Your calendar events and computed availability
  • The current date and time

Using a carefully designed system prompt, the agent writes a natural, polite reply that proposes specific meeting times, respects buffers, and offers alternatives if the requested slot is not free.

Example system prompt for the agent

"You are an email scheduling assistant. Based on the received email, check my availability and propose an appropriate response. Aim to get a specific time, rather than just a day. When checking my availability, make sure that there's enough time in between meetings. If I'm not available, ALWAYS propose a new time based on my availability. When proposing a new time, always leave 15 minutes buffer from previous meeting. Today date and time is: [current ISO time]."

This prompt keeps the agent focused on concrete, bookable times instead of vague “sometime next week” suggestions.

5. Send the reply, clean up, and notify Slack

Once the LLM has drafted the email, the workflow moves into the final actions:

  • GmailSendReply sends the generated response back to the original sender.
  • MarkEmailRead marks the processed email as read so the trigger does not pick it up again.
  • SlackNotifier can send a short summary of the scheduled or proposed time to a Slack channel for visibility.

From the user’s point of view, it feels like you replied personally, but you did not have to lift a finger.

Making the workflow production-ready

Once the basics are in place, you will probably want to harden the workflow a bit so it behaves reliably in real life.

Handling common edge cases

  • Overlapping events – Always compute gaps between events and enforce your buffer time so the LLM does not propose back-to-back meetings.
  • Different meeting lengths – If the email does not specify duration, let the agent ask for it or fall back to a default meeting length.
  • Recurring events – Recurring series can block many slots, so make sure your availability logic respects them properly.

Security and privacy considerations

Because this workflow touches email and calendar data, it is worth paying attention to security:

  • Use OAuth for Gmail and Google Calendar access.
  • Limit token scopes to only what you need. For example, read-only calendar access might be enough for availability checks, while creating events requires write access.
  • Avoid logging sensitive email content in plain text, especially in shared environments.

Choosing models and tuning prompts

The example template uses gpt-4o-mini as the chat model, which is a good balance of cost and responsiveness for this kind of task.

To keep the agent’s behavior predictable:

  • Write clear, deterministic system prompts.
  • Explicitly mention timezones, buffer requirements, and what to do when requested slots are not available.
  • Iterate on the prompt if you notice vague or inconsistent replies.

Testing and debugging your setup

Before you trust the workflow with your real inbox, it is worth spending a bit of time testing.

  1. Run the workflow in a sandbox or test environment with sample emails:
    • Clear, explicit meeting requests
    • Vague “let us catch up” emails
    • Messages with multiple time options
  2. Log intermediate outputs so you can see:
    • How the classifier labels each email
    • What free windows the calendar lookup returns
    • The exact draft the LLM produces
  3. Adjust classifier thresholds, the system prompt, or the calendar time window until things look solid.

Advanced ways to level up this workflow

Automatically create Google Calendar events

If you want to go a step further, you can extend the workflow so that once a time is confirmed, n8n:

  • Creates a Google Calendar event
  • Adds the relevant attendees
  • Includes conferencing details such as a Google Meet link

This turns your workflow into a full scheduling pipeline from email to calendar event.

Use two-way confirmations for extra safety

If you prefer more control, you can implement a short confirmation loop. For example:

  • The LLM proposes 2 or 3 specific times.
  • The sender chooses one in their reply.
  • Only then does the workflow create the event in Google Calendar.

This keeps the human in the loop while still saving you a lot of time.

Personalized templates for your tone of voice

You can also combine small, reusable reply templates with the LLM. Let the model fill in the dynamic pieces such as:

  • Exact times and dates
  • Timezone conversions
  • Polite, context-aware phrasing

This keeps your communication style consistent and professional, while still feeling personal.

Quick troubleshooting checklist

If something feels off, here are some common things to check first:

  • No replies are being sent – Verify that your Gmail OAuth token is valid and that the GmailSendReply node is mapped to the correct messageId.
  • Times appear in the wrong timezone – Make sure $now.toISO() or your node-level timezone settings match your Google Calendar timezone.
  • Classifier mislabels emails – Revisit your classifier prompt or training examples, and add negative examples for messages that should be ignored.

Wrapping up: why this template makes life easier

Automating appointment scheduling with n8n and LLMs is one of those small changes that can have a big impact. You get:

  • Less manual back-and-forth over email
  • Faster, more consistent responses
  • Cleaner calendar hygiene with built-in buffers
  • Better visibility for your team when you connect Slack

Think of this template as a starting point. You can tweak it for different buffer times, multi-attendee scheduling, automatic event creation, or whatever your workflow needs.

Ready to try it out? Import the workflow template into n8n, connect your Gmail and Google Calendar accounts, and send a few test emails to see it in action.

If you want a more customized setup or a guided walkthrough, you can adapt this template further, add extra logic, or build a step-by-step version that matches your exact scheduling style.

Get started now: import the template, connect your accounts, and experiment with a set of sample emails to fine-tune it before going live.

n8n: Create, Attach, and Send Outlook Drafts

n8n: Create, Attach, and Send Outlook Drafts

This reference guide explains how to build an n8n workflow that creates an Outlook draft, downloads an external file, attaches it as binary data, and sends the final HTML email using the Microsoft Outlook node. It is written for users who are already familiar with n8n concepts such as nodes, credentials, and expressions, and who want a precise, implementation-focused walkthrough.

1. Workflow Overview

The workflow automates a complete Outlook email flow inside n8n:

  • Create an Outlook draft email with HTML body content.
  • Download a file (for example, an image) from a public URL using an HTTP Request node.
  • Attach the downloaded file to the draft message in Outlook.
  • Send the prepared draft to one or more recipients.

Core components:

  1. Manual Trigger – Starts the workflow during testing.
  2. Microsoft Outlook (create draft) – Creates the initial draft message.
  3. HTTP Request (download file) – Fetches a file as binary data.
  4. Microsoft Outlook (add message attachment) – Uploads the file as an attachment to the draft.
  5. Microsoft Outlook (send draft) – Sends the draft using its message ID.

2. Prerequisites and Environment

2.1 Required Infrastructure

  • An n8n instance, either cloud-hosted or self-hosted.
  • Access to the Microsoft Outlook node in n8n.

2.2 Outlook Credentials and Permissions

Configure Microsoft Outlook credentials in n8n using OAuth2 with the appropriate Microsoft Graph scopes:

  • Mail.ReadWrite – Required to create and modify drafts and attachments.
  • Mail.Send – Required to send messages.

If your tenant enforces admin consent, ensure that the OAuth2 app has been approved by an administrator before testing the workflow.

2.3 Recommended Knowledge

  • Basic understanding of n8n nodes, including how to configure parameters.
  • Familiarity with expressions in n8n, such as referencing data from previous nodes using {{$node["Node Name"].json[...]}}.
  • Comfort working with binary data in n8n (for example, outputs from HTTP Request configured with responseFormat=file).

3. Workflow Architecture

This workflow is linear and synchronous. Each node depends on the output of the previous one:

  • Manual Trigger Starts the execution manually from the editor.
  • Microsoft Outlook (Create draft) Produces a JSON message object that includes a unique id. This ID is required later for attachment and sending.
  • HTTP Request (Download file) Retrieves a file as binary data and stores it in the item’s binary property (for example, data or file).
  • Microsoft Outlook (Add message attachment) Uses the draft messageId and the binary data from the HTTP Request node to create a message attachment resource.
  • Microsoft Outlook (Send draft) Uses the same messageId to send the draft to the configured recipients.

The critical data flow is the propagation of the message ID and the binary file between nodes using expressions and correct binary property mapping.

4. Node-by-Node Configuration

4.1 Manual Trigger

Purpose: Provide a simple starting point for testing and iterating on the workflow.

Configuration:

  • Node type: Manual Trigger
  • Parameters: No additional configuration required.

When you click Execute Workflow in the n8n editor, the Manual Trigger node initiates the run and passes control to the next node.

4.2 Microsoft Outlook – Create Draft

Purpose: Create an Outlook draft email that will later receive attachments and be sent.

Key parameters:

  • Resource: draft
  • Subject: for example Hello from n8n!
  • Body Content: HTML string, for example <h1>Hello from n8n!</h1>
  • Additional Fields
    • bodyContentType: html

On success, the node returns a JSON representation of the newly created draft. The important field is:

  • id – the unique identifier of the draft message in Outlook.

This id must be referenced by later nodes to attach files and send the draft.

4.3 HTTP Request – Download File

Purpose: Retrieve a file from a remote URL and store it as binary data that can be attached to the Outlook draft.

Key parameters:

  • Method: GET
  • URL: for example https://n8n.io/n8n-logo.png
  • Response Format: file

Setting Response Format to file instructs n8n to store the response body in the binary section of the item instead of json. Typical property names are:

  • binary.data or
  • binary.file

The exact property name depends on your node configuration and version. You should inspect the node’s output in the n8n UI to confirm the key that holds the binary content. The subsequent Outlook attachment node must point to this same binary property.

4.4 Microsoft Outlook – Add Message Attachment

Purpose: Attach the previously downloaded file to the existing draft message.

Key parameters:

  • Resource: messageAttachment
  • Message ID: expression referencing the draft created earlier, for example:
={{$node["Microsoft Outlook"].json["id"]}}
  • Additional Fields
    • fileName: the name that will appear in the email client, for example n8n.png

Binary data mapping:

Ensure the node is configured to read from the correct binary property output by the HTTP Request node. For example, if the HTTP Request node stores the file under binary.data, then the Outlook attachment node must reference data as the binary key.

If the binary property is not correctly mapped, Outlook will not receive the file bytes and the attachment will not be created.

4.5 Microsoft Outlook – Send Draft

Purpose: Send the prepared draft message, including any attachments and HTML body content, to the specified recipients.

Key parameters:

  • Operation: send
  • Message ID: expression referencing the same draft ID, for example:
={{$node["Microsoft Outlook"].json["id"]}}

Recipients configuration:

Configure recipients using the Additional Fields section. Depending on your UI version, this might be:

  • A simple To field where you can enter addresses such as abc@example.com
  • Or a structured toRecipients array that matches the Outlook / Microsoft Graph format.

Ensure that at least one valid recipient address is provided or the send operation will fail.

5. Key Expressions and Data References

The primary expression used in this workflow is the reference to the draft message ID created by the first Microsoft Outlook node:

={{$node["Microsoft Outlook"].json["id"]}}

Usage contexts:

  • Message ID in the Add message attachment node.
  • Message ID in the Send draft node.

If you rename the node that creates the draft, update the expression accordingly, for example:

={{$node["Create Draft"].json["id"]}}

6. Testing and Validation Steps

To verify the workflow end to end:

  1. In the n8n editor, select the Manual Trigger node and click Execute Workflow.
  2. After execution reaches the Create draft node, open its output and confirm that:
    • The node status is successful.
    • The JSON output contains a non-empty id field.
  3. Inspect the HTTP Request node:
    • Verify the node executed successfully.
    • Confirm that the response is stored under binary (for example binary.data).
  4. Check the Add message attachment node:
    • Confirm that it uses the correct messageId expression.
    • Verify that the binary property name matches the HTTP Request output.
    • Ensure the node returns a success status and the attachment metadata.
  5. Inspect the Send draft node:
    • Confirm the send operation completes without errors.
    • Check the recipient mailbox or the sender’s Sent Items folder in Outlook to verify that the message was delivered and includes the attachment.

7. Common Issues and Troubleshooting

7.1 Attachment Not Uploaded or Binary Missing

  • Verify that the HTTP Request node uses Response Format = file. If it uses json, no binary data will be available.
  • Open the HTTP Request node output and confirm the exact binary property name (for example data or file).
  • In the Microsoft Outlook – Add message attachment node, ensure that:
    • The binary property field matches the property name from the HTTP Request node.
    • You have not accidentally referenced a different item or an empty binary key.

7.2 Message ID is Undefined

  • Check that the Create draft node executed successfully and that the JSON output includes an id field.
  • Open the Execution log in n8n, inspect the draft node output, and confirm the correct path to the ID.
  • Ensure the expression references the correct node name. If the node was renamed, update expressions such as:
    ={{$node["Microsoft Outlook"].json["id"]}}

    to match the new name, for example:

    ={{$node["Create Draft"].json["id"]}}

7.3 Authorization or Permission Errors

  • Confirm that the Outlook OAuth2 credentials configured in n8n include the Mail.ReadWrite and Mail.Send scopes.
  • If your organization uses tenant restrictions, ensure that:
    • The OAuth2 app is allowed in the tenant.
    • Admin consent has been granted where required.
  • If credentials were recently updated, re-authenticate them in n8n and re-run the workflow.

8. Best Practices

  • Use descriptive node names. Rename nodes such as Microsoft Outlook to Create Draft, Add Attachment, and Send Draft to reduce confusion when constructing expressions.
  • Iterative testing. Execute the workflow step by step:
    • First, run up to the draft creation and validate the id.
    • Next, add the HTTP Request node and verify the binary output.
    • Then, enable the attachment and send nodes once upstream data is correct.
  • Temporary storage strategy. If you need to reuse attachments beyond a single workflow execution, store them in a secure external system rather than relying solely on in-memory binary data.
  • HTML sanitization. When using user-generated or dynamic HTML in bodyContent, sanitize it before inserting into the email body to reduce the risk of injecting unsafe content.

9. Advanced and Alternative Approaches

Depending on your use case, you may extend the base template with more complex logic.

9.1 Multiple Attachments

To send multiple attachments, you can:

  • Use multiple HTTP Request nodes to download several files, then call the Add message attachment operation once per file.
  • Or, build attachment structures programmatically using a Function node, especially if attachment URLs or metadata are dynamic.

9.2 Dynamic Recipients

If recipients are not static, consider:

  • Constructing the recipients list in a Function node or via data from previous nodes (for example, CRM or database queries).
  • Mapping that list into the toRecipients array expected by Outlook / Microsoft Graph.

9.3 Using Microsoft Graph Directly

For scenarios that require Outlook or Graph features not exposed by the n8n Outlook node, you can:

  • Use an HTTP Request node to call Microsoft Graph API directly.
  • Reuse the same OAuth2 credentials where possible to authenticate requests.

This approach is useful for advanced scenarios but is not required for the basic create-attach-send pattern described here.

10. Security Considerations

  • Credential storage. Store OAuth2 credentials only in n8n’s built-in credentials system. Avoid hardcoding client secrets or tokens in node parameters or Function nodes.
  • Scope minimization. Grant only the scopes necessary for your workflow, such as Mail.ReadWrite and Mail.Send. Avoid broad permissions if they are not needed.
  • Handling sensitive files. Do not log or expose confidential binary content in public logs or external monitoring tools. Limit access to workflow execution data to trusted users.

11. Summary

Using n8n’s Microsoft Outlook node, you can implement a robust email automation pattern that:

Automate GSC Reports with n8n Workflows

Automate Google Search Console Reports with an n8n Workflow

Managing SEO at scale requires reliable, repeatable access to high quality Search Console data. Manually exporting reports is slow, prone to error, and rarely integrated into existing analytics or task management systems. This article presents a reusable n8n workflow template that automates key Google Search Console (GSC) API operations, including URL inspection, performance queries, keyword diagnostics, cannibalization detection, content gap discovery, and performance drop monitoring.

The goal is to transform raw GSC data into structured, prioritized SEO actions that can be consumed by analysts, SEOs, and product teams, using a maintainable, modular n8n setup.

Why automate Google Search Console with n8n?

For organizations handling large websites or multiple properties, automation is essential. Using n8n as an orchestration layer for the Google Search Console API provides several strategic advantages:

  • Operational efficiency – Replace manual exports with scheduled, reproducible workflows.
  • Data reliability – Reduce human error in filtering, segmenting, and aggregating GSC data.
  • Early issue detection – Surface cannibalization, content gaps, and performance drops before they become critical.
  • Actionable output – Translate metrics into clear action items such as rewriting titles, consolidating content, or creating new pages.
  • Integrated reporting – Push results directly into Slack, Google Sheets, BI tools, or ticketing systems.

The workflow template, titled “Product – Google Search Console API Examples”, is designed as a modular toolkit that SEO and data teams can adapt to their own context.

Architecture of the n8n GSC workflow

The workflow is organized into functional groups, each focusing on a specific SEO analysis or monitoring task. These groups share common building blocks such as HTTP Request nodes (for GSC API calls), JavaScript Code nodes (for parsing and enrichment), and optional output nodes (for reporting and notifications).

Core functional modules

  • Inspect URL Uses the Google Search Console URL Inspection API to return indexing, coverage, and status details for a single URL. Ideal for monitoring critical landing pages or troubleshooting indexation issues.
  • Top Performing Pages Queries searchAnalytics by page to compute clicks, impressions, CTR, and average position, then classifies pages and recommends optimization actions.
  • Performance by Devices Breaks down performance by device type (desktop, mobile, tablet) and calculates relative shares of clicks and impressions to support device-specific optimization strategies.
  • Keyword Analysis by Pages Maps queries to landing pages to identify top-performing keywords per URL, highlight underutilized terms, and suggest on-page optimization opportunities.
  • Keyword Cannibalization Detection Groups data by query to identify cases where multiple pages are competing for the same keyword. Provides guidance on consolidation, canonicalization, or restructuring.
  • Content Gap Analysis Identifies high-impression queries with weak rankings, signaling opportunities for new or significantly expanded content.
  • Keyword Opportunities & Emerging Keywords Detects queries ranking between positions 10 and 50, especially those with rising impressions, and assigns priority levels for content or optimization work.
  • Query Performance Drop Detection Compares performance across time periods to flag statistically significant drops in clicks, impressions, or average position for important queries.
  • Keywords Ranking 4-10 Extracts queries where URLs are close to the top of page 1, highlighting “quick win” opportunities where minor adjustments can yield notable gains.
  • Brand Visibility Analysis Segments queries into brand and non-brand groups, then compares CTR and average position. Useful for understanding branded search strength and incremental non-brand opportunity.

Key n8n components and how they work

1. HTTP Request nodes for Search Console queries

The backbone of the workflow is a set of HTTP Request nodes that call the Google Search Console searchAnalytics/query endpoint using POST requests. Each request is configured with a JSON payload that defines:

  • startDate and endDate for the reporting window
  • dimensions such as query, page, device, or date
  • rowLimit to control the maximum number of rows returned

Example payload for a page-level analysis:

{  "startDate": "2025-02-26",  "endDate": "2025-03-26",  "dimensions": ["page"],  "rowLimit": 5000
}

Authentication uses Google OAuth2 credentials configured within n8n. To ensure stable access:

  • Enable the Search Console API in your Google Cloud project.
  • Grant the OAuth client the appropriate scopes for Search Console.
  • Confirm that the authenticated Google account has access to the relevant property in Search Console (for example, sc-domain:your-domain.com).

2. JavaScript Code nodes for parsing and prioritization

Raw GSC API responses are not directly actionable. The workflow uses Code nodes to normalize, enrich, and categorize the data. Typical operations include:

  • Mapping rows into explicit fields such as page, query, clicks, impressions, ctr, and position.
  • Calculating derived metrics such as clickShare and impressionShare across segments.
  • Classifying performance into categories like Star Performer, CTR Opportunity, or Ranking Opportunity based on configurable thresholds.
  • Generating structured recommendations, for example:
    • “Rewrite title tag” for URLs with strong positions but weak CTR.
    • “Content optimization” where rankings are moderate but impressions are high.
    • “Merge similar pages” where cannibalization is detected.
  • Detecting cannibalization by grouping rows by query, then assessing click distribution and variation in average position across competing URLs.

Thresholds and classification logic are intentionally simple to customize, so teams can adapt them to different traffic scales and business priorities.

3. Pagination and aggregation of large result sets

For larger sites, individual queries can return up to tens of thousands of rows. The workflow supports pagination for requests with high rowLimit values (up to 25,000). Paginated responses are combined before analysis so that:

  • Aggregated metrics remain accurate.
  • Cannibalization and content gap calculations are based on complete data rather than partial samples.
  • Severity and prioritization scoring reflects the full query set.

This pattern is particularly important for enterprise environments or properties with extensive long-tail traffic.

Configuration guide

To deploy this n8n GSC workflow template, follow these configuration steps:

  1. Create and configure a Google Cloud project
    • Create a project in the Google Cloud Console.
    • Enable the Google Search Console API.
  2. Set up OAuth 2.0 credentials
    • Create OAuth 2.0 client credentials (typically a Web application).
    • Add your n8n instance’s redirect URI to the OAuth configuration.
  3. Add Google OAuth credentials in n8n
    • In n8n, create a new Google OAuth2 credential.
    • Use the client ID and client secret from the Google Cloud project.
    • Authorize access with a Google account that has the relevant Search Console property rights.
  4. Customize HTTP Request nodes
    • Update all instances of the property identifier, for example replace sc-domain:your-domain.com with your actual domain or URL prefix property.
    • Adjust startDate and endDate to match your analysis windows (daily, weekly, monthly, or custom ranges).
    • Review and adjust rowLimit values according to your data volume and resource constraints.
  5. Tune thresholds in Code nodes
    • Modify impression, CTR, and position thresholds to reflect your site scale. For example, increase an impressions threshold from 100 to 500 or more for large enterprise domains.
    • Adjust logic for what constitutes a “drop” in performance, such as minimum percentage decline or absolute change in clicks or position.
  6. Connect outputs to your preferred destinations
    • Send summarized results to Google Sheets for stakeholder reporting.
    • Post alerts to Slack channels for real-time monitoring.
    • Write to a database or data warehouse for long-term storage and BI integration.
    • Push action items into Jira, Asana, or other project management tools.

Practical automation scenarios

Once configured, the workflow can support a variety of recurring SEO processes.

  • Daily performance monitoring Run the Query Performance Drop Detection segment each morning. If significant declines are identified, automatically notify a Slack channel with key details and recommended next steps.
  • Weekly SEO reporting Schedule exports of Top Performing Pages and Keyword Opportunities & Emerging Keywords to a Google Sheet. This creates a consistent weekly snapshot for stakeholders, including product, content, and leadership teams.
  • Automated SEO action queue Convert generated CTAs such as “Rewrite title tag – very low CTR” or “Merge similar pages” into tasks in Jira or Asana. This ensures that insights from GSC are directly translated into execution work for content and development teams.
  • URL health and indexation monitoring Use the Inspect URL module on a recurring schedule for high value pages. If coverage or indexation issues are detected, trigger alerts for engineering or SEO ops teams.

Best practices for robust GSC automation

To operate this workflow reliably at scale, consider the following best practices:

  • Optimize API usage Combine dimensions where appropriate to reduce the number of API calls. For example, request ["page", "query"] together when you need both dimensions instead of running separate queries.
  • Use appropriate row limits and pagination Set rowLimit in line with your expected data volume and available runtime. For very large properties, consider chunking by date range or segment to stay within time and quota limits.
  • Align thresholds with your domain profile Tailor CTR, impression, and position thresholds to your domain authority, market, and traffic level. What is “high impression” or “low CTR” will vary significantly between sites.
  • Persist processed data Store enriched outputs (including classifications and action items) in a database or data warehouse. This avoids reprocessing the same time windows, supports trend analysis, and enables more advanced BI reporting.

Troubleshooting common issues

If you encounter problems while running the workflow, the following checks typically resolve them:

  • 401 or 403 errors
    • Verify that the OAuth token has the necessary scopes.
    • Confirm that the authenticated Google account has access to the Search Console property.
    • Check that the property identifier (for example sc-domain:example.com) is correct.
  • Empty or missing rows
    • Ensure that the selected date range actually contains data.
    • Confirm that the dimensions are valid for the chosen endpoint and property.
    • Test a shorter, recent date range to verify that the integration is working.
  • Slow or long-running executions
    • Reduce rowLimit or split requests into smaller date ranges.
    • Segment by device or country to limit per-call volume.
    • Review n8n execution limits and schedule heavy jobs during off-peak times.

Extending the workflow template

The template is intentionally modular so that teams can build on top of it as their analytics capabilities mature. Potential extensions include:

  • Predictive modeling Integrate a machine learning model that estimates traffic lift from specific content or on-page changes, informed by historical GSC performance.
  • BigQuery or data warehouse integration Pipe normalized GSC data into BigQuery or another warehouse for large scale historical analysis, cohort studies, and advanced dashboards.
  • Content quality and duplication checks Combine GSC data with content metadata or CMS exports to detect duplicate, thin, or overlapping content that contributes to cannibalization and weak performance.

Conclusion

Automating Google Search Console reporting with n8n moves your SEO practice from reactive reporting to proactive, data-driven optimization. By operationalizing URL inspection, performance segmentation, cannibalization detection, and opportunity identification, this workflow template turns raw API output into a prioritized backlog of SEO tasks that teams can execute consistently.

Next steps

Import the template into your n8n instance, connect your Google OAuth credential, and configure the property and thresholds for your domain. Once scheduled, the workflow will continuously surface insights and action items without manual intervention.

If you require support in tailoring thresholds, setting up Slack alerts, or integrating with Google Sheets and project management tools, reach out to your internal automation team or SEO operations lead to extend and customize the workflow for your specific environment.

Build an AI Trading Agent with n8n

Build an AI Trading Agent with n8n for Technical Analysis

This guide explains how to implement a production-ready AI trading assistant in n8n that:

  • Accepts text or voice requests over Telegram
  • Generates TradingView-style charts through a chart-rendering API
  • Runs automated technical analysis with OpenAI, including image-based analysis
  • Returns structured insights directly in Telegram

The focus is on a clear, reference-style breakdown of the workflow template, including node configuration, data flow, and integration details, so you can adapt or extend the automation for your own trading or analysis workflows.

1. Solution Overview

The n8n workflow acts as an AI trading agent that performs end-to-end technical analysis on demand. A Telegram user sends a ticker symbol and an optional chart style, the system generates a chart using a TradingView-style API, then an image-capable OpenAI model analyzes the chart and returns a technical summary.

The workflow supports:

  • On-demand analysis triggered from Telegram (text or voice)
  • Optional scheduled analysis for stored tickers using Airtable and a Schedule Trigger
  • Strict separation between chart generation, analysis, and messaging for better maintainability

2. Architecture and Data Flow

2.1 High-level process

  1. The user sends a message to a Telegram bot with:
    • A ticker symbol (for example, TSLA, AAPL), and
    • An optional chart style (for example, candle, bar, line, heikinAshi).

    If the style is omitted, the workflow defaults to candle.

  2. The Telegram Trigger node activates the workflow and passes the message payload into n8n.
  3. A Switch node determines whether the incoming message is text or voice:
    • For text, the raw text is used directly.
    • For voice, the audio file is downloaded and then transcribed to text using OpenAI.
  4. An OpenAI Chat Model node acts as the AI agent. It:
    • Parses the user request
    • Extracts the ticker and chart style
    • Ensures only the ticker is passed to the chart-generation tool
  5. The Get Chart (HTTP Request) node calls a TradingView-style chart image API with:
    • symbol (for example, NASDAQ:TSLA)
    • style (for example, candle)
    • Additional parameters such as theme, interval, and technical studies (RSI, Stoch RSI, Volume)

    The API responds with a JSON payload that includes a URL to the generated chart image.

  6. The Download Chart node fetches the chart image URL and exposes the image as binary data within n8n.
  7. The Technical Analysis (OpenAI Image Analyze) node sends the chart image to an image-capable LLM. The model:
    • Extracts candlestick patterns
    • Identifies RSI and Stochastic RSI values
    • Evaluates volume and trend context
    • Describes divergences and key technical signals
    • Outputs a structured, conversational analysis without buy/sell recommendations
  8. Telegram Send nodes return:
    • The chart image
    • The textual analysis
    • directly to the user in Telegram.

  9. Optional: Tickers can be stored in Airtable and processed on a schedule to generate recurring reports via a Schedule Trigger and loop.

2.2 Core components

  • Telegram Trigger – entry point for user messages
  • Switch – branching logic for text vs voice
  • OpenAI (Transcription + Chat) – transcription of voice and intent parsing
  • HTTP Request (Get Chart) – chart image generation
  • Download Chart – binary image retrieval
  • OpenAI Image Analyze (Technical Analysis) – chart interpretation
  • Telegram Send nodes – return chart and analysis
  • Airtable + Schedule Trigger (optional) – recurring analyses for saved tickers

3. Prerequisites and External Services

3.1 Required accounts and credentials

  • Telegram
    • Create a Telegram bot using @BotFather.
    • Obtain the bot token.
  • Chart image API
    • Sign up for a TradingView-style chart image service (for example, Chart-Img or a similar endpoint).
    • Acquire the x-api-key or equivalent API key.
  • OpenAI
    • Get an OpenAI API key.
    • Ensure access to:
      • A model that supports speech-to-text for voice transcription.
      • An image-capable model for chart analysis.
      • A chat model for parsing user intent and orchestrating tool usage.
  • Airtable (optional)
    • Create an Airtable base and table to store tickers for scheduled reports.
    • Obtain an Airtable API key or personal access token.

3.2 n8n environment

Ensure that your n8n instance:

  • Is reachable from Telegram (for webhooks)
  • Can access external HTTP APIs (chart service, OpenAI, Airtable)
  • Has credentials stored securely in the n8n Credentials section, not hard-coded in nodes

4. Node-by-node Breakdown

4.1 Telegram Trigger

Purpose: Start the workflow when a user interacts with the Telegram bot.

  • Configuration:
    • Set the Webhook URL to your n8n endpoint.
    • Provide the Bot Token obtained from @BotFather.
    • Optionally restrict by Chat ID if you want to limit usage to specific chats or groups.
  • Input: Telegram message payload (text or voice).
  • Output: Standardized message object containing:
    • Message type (text or voice)
    • Text content, if present
    • File metadata for voice messages
    • User and chat identifiers

4.2 Switch (Text vs Voice)

Purpose: Route execution depending on whether the Telegram message is text or voice.

  • Configuration:
    • Use the message type or presence of a voice property as the condition.
    • Branch A: direct text handling.
    • Branch B: voice handling with download and transcription.
  • Edge case handling:
    • If the message does not contain recognizable text or voice, you can route to an error handler that sends a friendly response asking the user to resend their request.

4.3 Voice branch: Download File + OpenAI Transcribe

Download File node

  • Purpose: Download the Telegram voice file referenced in the message.
  • Input: File identifier from the Telegram Trigger node.
  • Output: Binary audio data accessible to subsequent nodes.

OpenAI Transcription node

  • Purpose: Convert voice input into text.
  • Configuration:
    • Select the OpenAI transcription model.
    • Map the binary audio data from the Download File node.
  • Output: Text transcript of the user’s spoken request.
  • Notes:
    • If transcription fails or returns empty text, you can detect this and prompt the user to type their ticker instead.

4.4 Text branch: Direct message handling

For text messages, the workflow bypasses transcription and passes the raw text directly to the AI agent (OpenAI Chat Model node). Both branches should converge into a common path that feeds a clean text prompt into the agent.

4.5 OpenAI Chat Model – AI Agent

Purpose: Interpret the user request, extract structured parameters, and orchestrate chart generation.

  • Key responsibilities:
    • Identify the ticker symbol from the user’s message.
    • Identify the requested chart style, if specified.
    • Default the chart style to candle when omitted.
    • Ensure that only the ticker is passed to the Get Chart tool (no extraneous text).
    • Respect a strict prohibition on financial advice.
  • System prompt best practices:
    • Include a greeting and brief explanation of the agent’s capabilities.
    • Define clear parsing rules:
      • Extract ticker and style from free-form text.
      • Normalize style values to supported options (for example, candle, bar, line, heikinAshi).
      • Use candle as the default style when unspecified.
    • Explicitly state:
      • Only the ticker should be sent to the Get Chart tool.
      • The agent must not provide explicit buy, sell, or hold recommendations.

4.6 HTTP Request – Get Chart

Purpose: Request a TradingView-style chart image for the specified symbol and configuration.

  • Method: POST
  • Endpoint: Chart image API URL (for example, Chart-Img endpoint).
  • Headers:
    • x-api-key: your chart API key
    • Any additional headers required by the provider
  • Body parameters (typical):
    • symbol: full symbol with exchange prefix (for example, NASDAQ:TSLA, NYSE:AAPL)
    • style: chart style (for example, candle as default)
    • theme: visual theme (for example, light or dark)
    • interval: timeframe (for example, 1D, 4H, etc., depending on the API)
    • studies: array or list of indicators, such as RSI, Stoch RSI, Volume
  • Expected response:
    • JSON object that includes a predictable property containing the chart URL (for example, url).
  • Best practices:
    • Always include the exchange prefix (for example, NASDAQ: or NYSE:) to reduce ambiguity.
    • Validate that the response contains a non-empty url field before continuing.

4.7 Download Chart node

Purpose: Retrieve the chart image from the URL returned by the chart API and expose it as binary data to the analysis node.

  • Configuration:
    • Use the URL field from the previous HTTP Request node as the target URL.
    • Enable binary data output.
  • Output: Binary image data (for example, PNG or JPG) that can be passed into the OpenAI image analysis node.

4.8 OpenAI Image Analyze – Technical Analysis

Purpose: Perform technical analysis on the chart image using an image-capable LLM.

  • Input:
    • Binary chart image from the Download Chart node.
  • System prompt recommendations:
    • Instruct the model to:
      • Extract numerical RSI values.
      • Extract Stochastic RSI values, including K and D if visible.
      • Identify common candlestick patterns.
      • Describe volume behavior and trend context.
      • Highlight divergences between price and indicators when visible.
    • Require numeric outputs where possible (for example, “RSI approximately 68”).
    • Explain the significance of the values (overbought, oversold, crossovers, divergences) in descriptive terms.
    • Explicitly state:
      • No buy, sell, or hold recommendations.
      • Analysis is informational and educational only.
  • Output:
    • A structured text summary suitable for sending directly to the user via Telegram.

4.9 Telegram Send Chart / Send Analysis

Purpose: Deliver the generated chart image and technical analysis back to the user.

  • Send Chart node:
    • Type: Telegram Send (Photo or Document, depending on your preference).
    • Input: Binary chart image from Download Chart.
    • Optional caption: A short text (for example, “Here is your chart for NASDAQ:TSLA”).
  • Send Analysis node:
    • Type: Telegram Send (Message).
    • Input: Text from the OpenAI Image Analyze node.
    • Include a compliance note that the information is not financial advice.

4.10 Airtable (Save Ticker) and Schedule Trigger (Optional)

Purpose: Support recurring technical analysis for a predefined list of tickers.

  • Airtable node:
    • Stores tickers and any metadata required for scheduling (for example