
Create a Simple Webhook Response with n8n
Overview
This guide explains how to implement a minimal webhook-based HTTP response in n8n using a ready-made workflow template. The workflow listens for an incoming GET request, then returns a basic HTML page styled with Bootstrap. It is designed as a simple, technical example of how to:
- Expose an HTTP endpoint using the Webhook node
- Delegate the HTTP response to a Respond to Webhook node
- Serve an HTML5 page with correct headers and content type
This template is ideal if you want to understand how n8n handles incoming web requests, how response modes work, or how to use n8n as a lightweight web endpoint or form handler.
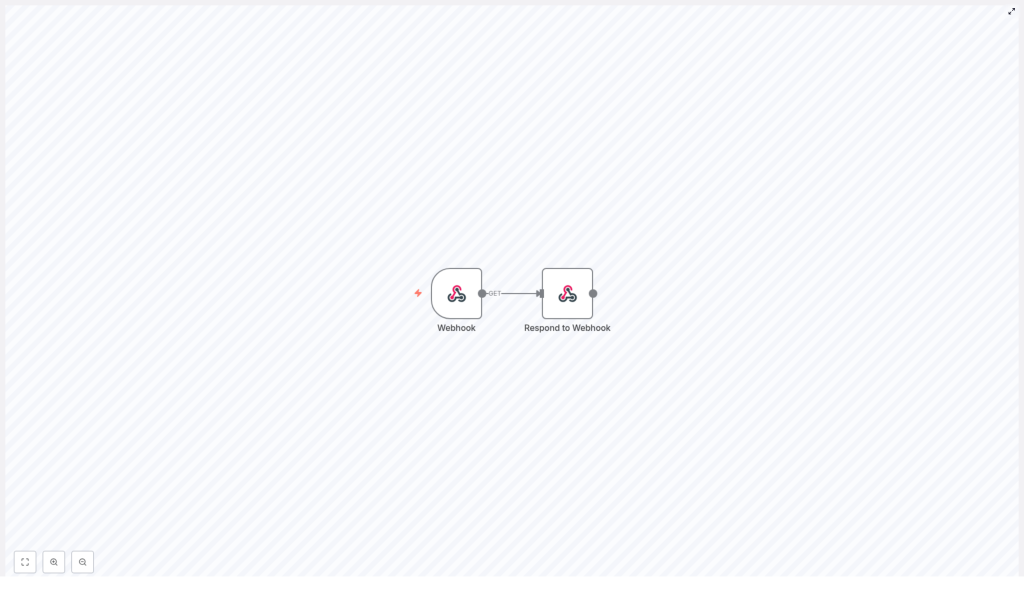
Workflow Architecture
The workflow is intentionally minimal and consists of exactly two nodes connected in sequence:
- Webhook node – receives the incoming HTTP request at a defined path and triggers the workflow.
- Respond to Webhook node – generates and returns the HTTP response, including headers and an HTML body.
The data flow is straightforward:
- A client sends a
GETrequest to the configured webhook URL. - n8n routes the request to the Webhook node based on the path.
- The Webhook node passes control and request data to the next node.
- The Respond to Webhook node constructs the HTTP response and sends an HTML page back to the client.
Because the Webhook node is configured with responseMode = responseNode, it does not respond directly. Instead, it waits for the Respond to Webhook node to explicitly define and send the response. This pattern is recommended whenever you need precise control over headers, status codes, or response bodies.
Node-by-Node Breakdown
1. Webhook Node
The Webhook node is the entry point of the workflow. It exposes an HTTP endpoint that external services or browsers can call.
Core configuration
- Path:
my-form - HTTP Method:
GET(the template is demonstrated with GET requests) - Response Mode:
responseNode
With this configuration, the webhook URL typically follows this pattern:
http://YOUR_N8N_URL/webhook/my-form
The exact URL depends on how your n8n instance is deployed and configured (base URL, SSL, reverse proxy, etc.), but the path segment /webhook/my-form is determined by the node’s Path setting.
Behavior
- The node listens for incoming
GETrequests at the specified path. - When a request arrives, n8n triggers the workflow and passes the request data to the next node.
- Because
responseModeis set toresponseNode, the webhook does not send an automatic response. Instead, it waits for a downstream Respond to Webhook node to finalize the HTTP response.
If no Respond to Webhook node is executed, the client will not receive the intended HTML response. In most setups this results in a timeout or default error, so it is important that the response node is always reached for handled requests.
2. Respond to Webhook Node
The Respond to Webhook node is responsible for returning the actual HTTP response to the caller. In this template, it returns a simple HTML page that includes Bootstrap 5 from a CDN and displays a Hello, world! heading.
Response headers
- Content-Type:
text/html; charset=UTF-8
Setting the Content-Type header to text/html; charset=UTF-8 ensures the browser interprets the payload as HTML and uses UTF-8 encoding. Without this header, some clients might treat the content as plain text or apply incorrect character encoding.
Response body
The response body is a minimal but complete HTML5 document, typically including:
<!doctype html>declaration<html>,<head>, and<body>sections- A link to Bootstrap 5 via a CDN in the
<head>section - A simple layout in the
<body>that renders aHello, world!heading
The exact HTML may vary slightly depending on the template version, but the key idea is:
- Bootstrap is loaded from a public CDN, so no local assets are required.
- The page is valid HTML5 and should render correctly in modern browsers.
- The visible content is a basic greeting, which can be easily replaced or extended.
Because the Respond to Webhook node is invoked after the Webhook node, it has access to the incoming request data if you want to use it for dynamic rendering in more advanced scenarios.
Configuration & Execution Notes
Prerequisites
- A running n8n instance (local or hosted).
- Access to the n8n editor to import or open the template.
- Network access from your client or browser to the n8n webhook URL.
Activating the workflow
- Start your n8n instance.
- Open the workflow template in the n8n editor.
- Ensure the workflow is active. Inactive workflows will not respond to incoming webhooks.
Testing the webhook endpoint
To verify that the webhook and response are working:
- Identify your n8n base URL. For local setups, this is commonly:
http://localhost:5678or a similar URL configured in your environment.
- Combine the base URL with the webhook path:
http://YOUR_N8N_URL/webhook/my-form - Send an HTTP
GETrequest to this URL using:- A web browser
curlor another CLI tool- An API client such as Postman or Insomnia
- If everything is configured correctly, the response will be an HTML page that displays a Hello, world! message.
In a browser, the page should render as a styled HTML document. In tools like curl, you will see the raw HTML output along with the Content-Type: text/html; charset=UTF-8 header.
Common edge cases
- Workflow not active: The webhook URL will not respond as expected. Make sure the workflow is switched to active.
- Incorrect URL or path: If the path is not exactly
my-formor if the base URL is wrong, n8n will not route the request to this workflow. - Missing Respond to Webhook execution: If the flow is modified and the Respond to Webhook node is skipped, the client may experience a timeout or receive a generic error.
Extending the Template
This workflow is intentionally simple so you can use it as a foundation for more advanced automation scenarios. Below are several common extensions that keep the same core pattern but add useful behavior.
Dynamic HTML generation
Instead of returning static HTML, you can:
- Use incoming query parameters or headers to customize the response.
- Inject data from previous nodes into the HTML template, for example using expressions.
- Build conditional sections in the HTML based on request content.
The basic structure remains the same: the Webhook node receives data, intermediate nodes process it, and the Respond to Webhook node composes the final HTML.
Handling POST requests and form submissions
To support form submissions:
- Change or duplicate the Webhook node to accept
POSTrequests. - Configure the form on your web page to submit to the webhook URL.
- Access form fields in the workflow and use them in the response or in downstream integrations.
The template itself shows a GET-based example, but the same response pattern applies to POST and other HTTP methods, as long as the Webhook node is configured accordingly.
Adding security layers
For production use, you will typically want to restrict who can call your webhook endpoint. Common options include:
- Using API keys in headers or query parameters and validating them inside the workflow.
- Placing n8n behind an authenticated reverse proxy.
- Using OAuth or other authentication mechanisms, depending on your environment.
This template does not enforce authentication by default. Any security checks should be added as intermediate steps before the Respond to Webhook node, and unauthorized requests should receive an appropriate HTTP status and message.
Integrating with external systems
Once the basic webhook pattern is in place, you can extend the workflow to:
- Call APIs or databases based on the incoming request.
- Trigger other automations or send notifications.
- Transform data before returning a response or storing it.
The Webhook + Respond to Webhook structure remains the same, but additional nodes are inserted between them to perform business logic or external integrations.
Use Cases for This Pattern
- Interactive web forms: Use the webhook as the backend for simple forms that return immediate feedback or confirmation pages.
- Lightweight APIs: Expose small, custom endpoints that return HTML or JSON without deploying a dedicated web server.
- Static or semi-static content delivery: Serve basic pages or status messages directly from n8n workflows.
Summary & Next Steps
By combining n8n’s Webhook node with the Respond to Webhook node, you can quickly build HTTP endpoints that return fully controlled HTML responses. This simple template shows how to:
- Register a webhook at
/webhook/my-form - Handle
GETrequests - Return a Bootstrap-styled
Hello, world!HTML page with correct headers
Use this as a base to implement more complex web interactions, handle form submissions, or integrate with other systems directly from n8n. Experiment with different response types, dynamic content, and additional nodes to tailor the workflow to your specific automation requirements.
Try the template
Import the template into your n8n instance, activate the workflow, and start customizing the HTML response or request handling logic to fit your use case.
