Automate Reports: N8N JSON-to-HTML Workflow

Automate Reports: N8N JSON-to-HTML Workflow

Ever spent your afternoon copy-pasting data from JSON into a “nice looking” report, only to realize you still have 7 more to go and your coffee is already cold? This n8n JSON-to-HTML workflow is here to save your sanity, your time, and possibly your keyboard.

In this guide, we will walk through what this workflow does, how it helps you turn raw JSON into polished HTML reports, and how to get everything running with minimal effort. You bring the data, n8n and OpenAI handle the formatting.

What This n8n JSON-to-HTML Workflow Actually Does

At its core, this workflow takes structured JSON data and transforms it into a clean, readable HTML report. No more manual formatting, no more fiddling with tags, and no more “why is this list suddenly a giant paragraph” moments.

Here is the basic idea:

  • You feed the workflow JSON data (for example, analytics, summaries, logs, or reports).
  • n8n processes that data and uses OpenAI to help generate well-structured, human-friendly content.
  • The workflow converts everything into HTML so you can easily display it on a web page, email it, or store it as a report.

The result is a repeatable, automated reporting system that runs in the background while you focus on more interesting things than formatting bullet points.

Why Automate JSON-to-HTML Reports With n8n?

Manually turning JSON into something readable is the digital equivalent of sorting rice grains by hand. Technically possible, deeply unfun.

This workflow helps you:

  • Save time by generating reports automatically from your existing data sources.
  • Stay consistent with the same structure and style every time.
  • Reduce errors that creep in when you copy, paste, and format by hand.
  • Scale easily if you need to generate many reports, not just one or two.

If you are already using n8n for automation, this template plugs right into your workflow and turns reporting from a chore into something you barely think about.

What You Need Before You Start

Good news, the requirements list is short and painless:

Required

To use this workflow, you will need:

  • An OpenAI API Key so the workflow can use OpenAI to help generate and format the content.

That is it. Once your OpenAI API key is ready, you are set to plug it into the template and start automating.

Quick Setup Guide: From JSON to HTML in n8n

Let us walk through how to get this JSON-to-HTML workflow template up and running in n8n. No advanced wizardry required.

1. Open the n8n Workflow Template

Start by opening the ready-made template:

View the n8n JSON-to-HTML template

This template is preconfigured so you do not have to build everything from scratch. You simply customize it for your data and use case.

2. Add Your OpenAI API Key

Inside n8n, create or select your OpenAI credentials and paste in your OpenAI API Key. The workflow uses this key to call OpenAI and help generate structured, readable report content from your JSON data.

3. Connect Your JSON Data Source

Next, plug your JSON data into the workflow. This might come from:

  • Another n8n node that fetches data from an API
  • A database query that returns JSON
  • A file, webhook, or any other source you already use in n8n

The workflow will use this JSON as the raw material for your HTML report.

4. Generate the HTML Report

Once your data and OpenAI credentials are set, run the workflow. n8n and OpenAI will:

  • Interpret and organize your JSON data
  • Generate structured content using OpenAI
  • Convert that content into a clean HTML report

You can then send this HTML via email, store it, display it in a dashboard, or pipe it into any other part of your automation.

See It in Action: Video Demo

Prefer watching instead of reading? There is a tutorial that walks you through the process step by step.

Check out the demo on YouTube: Marvomatic YouTube Channel

It is a great way to see how the n8n JSON-to-HTML workflow behaves with real data and how you can adapt it to your own setup.

Tips, Ideas, and Next Steps

Once you have the basic JSON-to-HTML automation running, you can start getting creative with it.

Ways You Might Use This Workflow

  • Automatically generate daily, weekly, or monthly performance reports.
  • Turn API responses into readable summaries for clients or teammates.
  • Create internal dashboards that pull HTML reports from your data pipelines.
  • Send formatted HTML reports via email using other n8n nodes.

Make Your Reports Even Better

  • Tweak the prompts or settings used with OpenAI to match your brand voice or preferred style.
  • Add extra nodes in n8n to filter, sort, or enrich your JSON before it becomes HTML.
  • Combine this workflow with scheduling triggers so reports arrive automatically at set times.

The more you automate, the fewer repetitive tasks you have to do by hand, and the more your future self will thank you.

Support, Contact, and Creator Info

This JSON-to-HTML workflow template is developed by Marvomatic.

You can find more resources, content, and automation ideas here:

For business inquiries or collaboration ideas, feel free to reach out via email: hello@marvomatic.com

Automate Custom Presentation Creation from CSV Leads

Automate Custom Presentation Creation from CSV Leads

What You Will Learn

In this guide, you will learn how to use an n8n workflow template to automatically turn new CSV or XLSX lead lists into personalized Google Slides presentations. By the end, you will understand how the workflow:

  • Detects new lead files in Google Drive
  • Reads and structures lead data in Google Sheets
  • Creates a new presentation from a Google Slides template for each lead
  • Replaces placeholders with real lead data
  • Links each lead to its presentation inside a Google Sheet

This is ideal for sales teams that receive lead lists regularly and want to automate the creation of custom sales decks without manual copy-paste work.

Concept Overview: How the n8n Workflow Works

Before jumping into the step-by-step breakdown, it helps to understand the main building blocks of this n8n automation. The workflow connects three main Google services:

  • Google Drive – to detect and manage incoming CSV or XLSX lead files
  • Google Sheets – to store and organize lead data in a tabular format
  • Google Slides – to generate and customize presentations automatically

At a high level, the workflow follows this sequence:

  1. Watch a specific Google Drive folder for new lead files
  2. Download the file and extract the data
  3. Create a new Google Sheet and append the leads
  4. Read each lead from the sheet
  5. Copy a master presentation template for every lead
  6. Replace placeholders in each presentation with lead-specific values
  7. Store the generated presentation ID back in the sheet

Now let us walk through each part in detail so you can clearly see how the template operates inside n8n.

Step-by-Step: Inside the n8n Workflow Template

Step 1 – Detect New Lead Files in Google Drive

The workflow starts with a Google Drive Trigger node. This node is configured to:

  • Watch a specific folder in your Google Drive where you or your team drop new lead files
  • React whenever a new file is added

As soon as a file appears in that folder, the trigger passes information about the file into the workflow. The next logic checks the file type to ensure it is either a CSV or XLSX file, since those are the formats that contain the lead list.

Step 2 – Download and Parse Lead Data

Once a valid file is detected, the workflow uses its file ID to download the content from Google Drive. From here, the template usually splits into two branches that run in parallel:

  • Create a new Google Sheet to host the lead data
  • Extract the CSV data into structured rows

Create a New Google Sheet

One branch uses a Google Sheets node to create a fresh spreadsheet. The sheet:

  • Is given a timestamped title so you can identify when the leads were imported
  • Starts empty, ready to receive the parsed lead rows

Extract and Structure CSV Content

The other branch focuses on parsing the file data. For CSV files, the workflow:

  • Reads the file content
  • Splits it into rows
  • Uses the first row as headers (for example, Company Name, Contact, Email, etc.)
  • Builds a set of records where each row corresponds to one lead

This structured data is what will eventually be written into the Google Sheet and later used to personalize each presentation.

Step 3 – Merge Parsed Leads into the New Google Sheet

After the CSV data is parsed, the workflow brings the two branches back together. At this point, you have:

  • A new, empty Google Sheet
  • A collection of lead rows extracted from the CSV file

The workflow then uses a Google Sheets append operation to:

  • Write the header row (if needed)
  • Append all lead rows into the sheet

The result is a master list of leads stored in a dedicated Google Sheet that corresponds to the uploaded file.

Step 4 – Prepare Data and Organize Files

With the lead data safely stored, the workflow moves into the preparation phase. Here, it performs two main actions:

  1. Read all lead entries from the newly created Google Sheet
  2. Move the original CSV file for better organization

Read Lead Data from Google Sheets

A Google Sheets node is used to fetch all rows from the sheet. Each row includes the full set of fields for one lead, such as company name, contact name, and other details that will be inserted into the presentation.

Move the Source File to a “Lead List” Folder

To keep your Google Drive organized, the workflow then moves the original CSV (or XLSX) file into a specific folder, often named something like “Lead List”. This helps you:

  • Avoid clutter in the incoming folder
  • Maintain a clear archive of processed lead files

Step 5 – Duplicate the Master Presentation Template

Now that the workflow has a list of leads, it can start generating presentations. For each lead row read from the sheet, the workflow:

  • Takes a master Google Slides presentation template
  • Creates a copy of that template
  • Renames the copy based on the lead’s data

Typically, the file name includes the company name and the current date, for example:

Acme Corp - Sales Deck - 2025-06-01

This ensures every lead gets an individual presentation file that can be easily identified and shared.

Step 6 – Personalize the Presentation Content

Once the template is copied for a specific lead, the workflow updates the content inside the slides. It does this by:

  • Scanning the presentation for text placeholders
  • Replacing those placeholders with values from the lead’s row

For example, if your template uses a placeholder like {COMPANYNAME}, the workflow replaces it with the actual company name from the sheet, such as Acme Corp. You can use similar placeholders for other fields, such as:

  • {CONTACTNAME}
  • {INDUSTRY}
  • {LOCATION}

This step is what turns a generic template into a fully personalized sales presentation tailored to each lead.

Step 7 – Store the Presentation ID Back in the Lead List

To complete the loop, the workflow records information about the generated presentations back into the Google Sheet. For each lead, it:

  • Takes the Google Slides file ID of the newly created presentation
  • Writes that ID into the corresponding row in the sheet

This creates a direct link between each lead and its custom presentation. You or your team can later use that ID to:

  • Open the presentation directly
  • Share it with colleagues or prospects
  • Use it in further automations or reporting

Why Use This n8n Workflow Template?

This n8n template is designed to remove repetitive manual work from your sales process. When set up with Google Drive, Sheets, and Slides, it provides several key benefits.

Time and Effort Savings

  • Automated data entry from CSV or XLSX into Google Sheets
  • No manual copying of lead information into presentations
  • Automatic file handling and organization in Google Drive

Personalized Sales Materials at Scale

  • Create tailored presentations for each lead using placeholders
  • Ensure every deck reflects the lead’s company name and other key details
  • Improve lead engagement with customized content

Clean and Organized Lead Management

  • All lead lists are stored in structured Google Sheets
  • Original CSV files are moved into a dedicated “Lead List” folder
  • Each lead row contains a direct reference to its presentation

How to Start Using This Template

To implement this automated solution, you will need:

  • An n8n instance (self-hosted or cloud)
  • Access to Google Drive, Google Sheets, and Google Slides
  • A Slides presentation template with placeholders like {COMPANYNAME}
  • A dedicated folder in Google Drive where new lead files will be uploaded

Once your accounts and folders are ready, you can import the template into n8n and connect your Google credentials. Then customize:

  • The Drive folder to watch
  • The target “Lead List” folder
  • The ID of your master Slides template
  • The placeholder names that match your lead fields

Quick FAQ

Can this workflow handle both CSV and XLSX files?

Yes. The workflow checks the file type when a new file is added to the folder and only proceeds if it is a CSV or XLSX file.

Do I need to change my Google Slides template?

You need to make sure your template contains text placeholders that match the fields in your lead data, such as {COMPANYNAME}. The workflow then replaces these with real values.

Where are the generated presentations stored?

Each personalized presentation is created in Google Drive. The exact location depends on how the template is configured, and the presentation ID is saved back into the corresponding row in the Google Sheet.

What happens to the original CSV file?

After the data is processed, the workflow moves the original file to a designated “Lead List” folder in Google Drive. This keeps your incoming folder clean and maintains an archive of processed files.

Recap

This n8n workflow template gives you a complete, automated pipeline:

  1. Detect new CSV or XLSX lead files in Google Drive
  2. Download and parse the lead data
  3. Create a new Google Sheet and append all leads
  4. Organize the original file into a “Lead List” folder
  5. Copy a master Google Slides template for each lead
  6. Replace text placeholders with actual lead information
  7. Record each presentation ID back into the lead sheet

With this setup, your sales team can go from raw lead lists to ready-to-use custom presentations in a fully automated way.

Try the n8n Template

If you are ready to streamline your sales workflow and generate customized presentations automatically, start by exploring this n8n workflow template and connecting it to your Google Drive, Sheets, and Slides.

You can review and install the template here:

Automate Pitch Deck Analysis with AI and Airtable

Automate Pitch Deck Analysis with AI and Airtable

Overview

This n8n workflow template automates the end-to-end analysis of PDF pitch decks stored in Airtable. It is designed for venture capital teams, startup accelerators, and investors who need a scalable, repeatable process for extracting structured insights from pitch materials.

The automation performs the following high-level tasks:

  • Polls Airtable for new pitch deck records with attached PDF files
  • Downloads and converts each PDF into page-level images
  • Transcribes the visual content into markdown using an AI vision model
  • Extracts key investment-relevant data points using an AI information extractor
  • Writes structured results and summaries back into Airtable
  • Indexes the content in a Qdrant vector store for semantic search
  • Exposes the indexed content via an AI chatbot using n8n AI Agents

This document-style guide explains the workflow architecture, node-by-node behavior, configuration requirements, and practical considerations for running this automation reliably in production.

Workflow Architecture

At a high level, the workflow can be divided into four main phases:

  1. Ingestion – Detect and download new pitch deck PDFs from Airtable.
  2. Document preparation – Convert PDFs into images, then into markdown text.
  3. Analysis and enrichment – Use AI to extract structured data and summaries, then persist results to Airtable.
  4. Knowledge access – Build a vector store and expose a Q&A chatbot interface over the processed pitch decks.

Each phase is implemented as a series of n8n nodes that pass data through the workflow using the standard items[] structure. The workflow is designed to handle multiple pitch decks asynchronously, so each Airtable record is processed independently as a separate execution path.

Node-by-Node Breakdown

1. Airtable Trigger – Detect New Pitch Decks

Role: Entry point that identifies which Airtable records are ready for processing.

Typical configuration:

  • Trigger type: Polling or event-based trigger for Airtable (depending on your n8n setup).
  • Table: The table that stores pitch decks, typically with columns such as Name and File.
  • Filter: Only records that have:
    • A non-empty Name field, and
    • An attached PDF file in the designated attachment column (for example, File).

The trigger node periodically polls Airtable and outputs items representing each qualifying record. Each item typically contains:

  • The Airtable record ID
  • Company name or pitch deck name
  • Attachment metadata, including the public file URL for the PDF

Scalability note: Since this is a modular polling-based design, you can safely process multiple pitch decks in parallel, subject to your n8n instance’s concurrency limits and Airtable rate limits.

2. HTTP Request – Download the Pitch Deck PDF

Role: Retrieve the PDF file from the URL stored in Airtable.

Typical configuration:

  • Method: GET
  • URL: The file URL from the Airtable attachment field (for example, {{$json["fields"]["File"][0]["url"]}}).
  • Response format: Binary data

The node downloads the pitch deck as binary content and attaches it to the current item. This binary data is passed to downstream nodes for further processing.

Format limitation: The workflow is designed to handle PDF files only. If a deck is uploaded as PPT, PPTX, or another format, it must be converted to PDF before this workflow runs. Non-PDF files can cause conversion failures in later steps.

3. External Conversion – Split PDF into Page Images

Role: Convert the PDF into one image file per page, suitable for processing by an AI vision model.

The workflow uses an external service, such as Stirling PDF, to convert the PDF into a series of high-resolution JPEG images. This service:

  • Accepts the PDF as input
  • Splits it into individual pages
  • Renders each page as a JPEG image
  • Returns all images bundled as a ZIP archive

An n8n node (typically an HTTP Request or a custom integration) sends the binary PDF to the Stirling PDF endpoint and receives the ZIP file as binary output.

Next, a separate node is used to:

  • Extract the ZIP archive
  • Expose each JPEG file as a separate binary item or as an array of binaries on the item

These image files represent the individual pages of the pitch deck, which are then passed to the vision model.

Privacy warning: The conversion service described here is publicly hosted. If you are working with confidential or sensitive pitch decks, you should:

  • Self-host Stirling PDF or an equivalent PDF-to-image service in your own infrastructure, or
  • Use a secure, compliant document conversion solution under your control.

Sending sensitive content to a public third-party service can violate confidentiality or data protection requirements.

4. Vision AI Node – Convert Page Images to Markdown

Role: Perform OCR and layout-aware transcription of each pitch deck page, outputting markdown text.

Each JPEG page is forwarded to an AI vision model node. The node processes the image and returns a markdown representation of the content. The resulting markdown aims to preserve:

  • Headings and section structure
  • Bullet lists and numbered lists
  • Tables, represented as markdown tables
  • Charts and graphics, described in text form where possible
  • Key visual elements that are relevant for understanding the pitch

Depending on how you configure the workflow, the markdown can be:

  • Stored per page (one markdown block per image), or
  • Concatenated into a single markdown document representing the entire pitch deck.

This markdown text becomes the canonical textual representation used in all downstream AI and indexing steps.

5. AI Information Extractor – Derive Key Investment Data

Role: Analyze the markdown transcription and extract structured, investment-focused insights.

An AI information extraction node is configured to behave like an experienced venture capitalist. It receives the full markdown representation of the pitch deck as input and outputs:

  • Key company attributes, such as:
    • Founding year
    • Team size
    • Market traction and key metrics
    • Funding stage
    • Other relevant attributes present in the deck
  • A concise but detailed executive summary of the pitch
  • Flags, caveats, or fact-check indicators where the model is uncertain or data is missing

The output is structured so it can be mapped directly to Airtable fields. For example, you might have columns such as Founding Year, Team Size, Stage, Traction Summary, and AI Summary.

Edge cases:

  • If a specific data point is not present in the deck, the extractor may return an empty value or a clearly marked “unknown” or “not specified” value.
  • Ambiguous or conflicting information can be surfaced via fact-check flags or notes so that analysts can review manually.

6. Airtable Node – Update Record With AI-Generated Report

Role: Persist the extracted data and summary back into the original Airtable record.

Using the Airtable record ID from the trigger step, an Airtable node performs an Update operation on the corresponding record. Typical field mappings include:

  • Executive summary: The narrative summary generated by the AI extractor
  • Founding year: Parsed numeric or text value
  • Team size: Numeric or categorical value
  • Funding stage: Seed, Series A, etc., based on the deck content
  • Traction / metrics: Text or structured fields, depending on your base design
  • Flags / notes: Any fact-check or uncertainty indicators

Once this step completes, Airtable effectively becomes a structured, searchable database of your pitch decks, enriched with AI-generated insights.

7. Qdrant Node – Build a Vector Store for Semantic Search

Role: Index the pitch deck content to enable semantic search and question answering.

The markdown transcription produced earlier is now passed into a Qdrant node. The node:

  • Embeds the markdown text into vector representations using a configured embedding model
  • Writes these vectors into a Qdrant collection
  • Links each vector back to the corresponding pitch deck (for example via record ID or company name)

This vector store enables:

  • Semantic search across all decks, not limited to keyword matching
  • Context retrieval for question answering and AI agents

You can store:

  • One vector per page, or
  • A single vector per deck, or
  • Chunked segments of the markdown for more granular retrieval

The template uses Qdrant to maintain a dedicated collection for pitch decks, which can be queried later by the chatbot or other workflows.

8. AI Agent / Chatbot Node – Pitch Deck Q&A Interface

Role: Provide a conversational interface that allows your team to query any pitch deck in natural language.

Using n8n’s AI Agents, the workflow sets up a chatbot that:

  • Accepts user questions about a specific pitch deck or across multiple decks
  • Uses the Qdrant collection to retrieve semantically relevant content
  • Generates answers grounded in the indexed markdown content

Typical use cases include:

  • “What is the company’s business model?”
  • “How large is their current customer base?”
  • “What are the main risks identified in this deck?”

The chatbot can be exposed to your internal team via an n8n webhook, a UI integration, or other interfaces supported by your n8n setup.

Configuration Notes

Airtable Setup

Before running the template, prepare your Airtable base:

  • Duplicate the provided sample Airtable base referenced by the template.
  • Ensure the table contains at minimum:
    • A Name column for the company or deck name.
    • A File column (attachment type) where you upload the pitch deck PDFs.
  • Add any additional fields you want to populate, such as:
    • Founding Year
    • Team Size
    • Funding Stage
    • Traction
    • AI Summary
    • Flags / Notes

Configure Airtable credentials in n8n and verify that the workflow can read and update records in the relevant table.

File Handling and Formats

  • Upload only PDF pitch decks into the File column. Other formats must be converted manually or via a separate workflow before this template runs.
  • If a record has multiple attachments, ensure you define how the workflow selects the correct file (for example, using the first attachment or a specific naming convention).

External Conversion Service

  • Configure the endpoint URL and parameters for Stirling PDF or your chosen PDF-to-image service.
  • Validate that the service returns a ZIP archive containing JPEG images for each page.
  • Ensure that the ZIP extraction node correctly exposes all pages to the vision model.

For sensitive pitch decks, plan a self-hosted or private deployment of the conversion service to avoid sending documents to a public instance.

AI Model Configuration

  • Vision model: Confirm that the model supports image input and returns markdown output. Configure temperature, max tokens, and any instruction prompts to prioritize faithful transcription.
  • Information extractor: Provide clear instructions to the model to act as a VC-style analyst and return structured JSON or key-value pairs that map cleanly to Airtable fields.
  • Embedding model (for Qdrant): Choose an embedding model that is compatible with Qdrant and suitable for long-form business content.

Error Handling and Edge Cases

While the template focuses on the happy path, you should consider:

  • Missing or invalid files: If the Airtable record has no file or a non-PDF file, the workflow should skip processing or log an error.
  • Conversion failures: If the PDF-to-image service fails, capture the error and optionally write a status field back to Airtable for manual follow-up.
  • AI timeouts or rate limits: For large decks or high throughput, implement retry logic or throttling where necessary.
  • Partial data extraction: If some fields cannot be extracted, ensure the workflow does not fail the entire record update. Instead, store what is available and optionally mark missing fields.

How to Use This n8n Template

  1. Duplicate the sample Airtable base and configure your tables and fields as described above.
  2. Upload your PDF pitch decks into the File column and set company names in the Name column.
  3. Import and configure the n8n template, including Airtable credentials, external PDF conversion endpoint, AI model credentials, and Qdrant connection details.
  4. Trigger the workflow:
    • Manually, for initial testing or batch processing, or
    • Automatically, by enabling the Airtable trigger to listen for new or updated records.
  5. Monitor workflow executions in n8n and verify that:
    • Airtable records are updated with AI-generated summaries and structured data.
    • The Qdrant vector store is populated with entries for each processed pitch deck.
  6. Use the configured Q&A chatbot to interactively query your pitch decks, test typical investor questions, and refine prompts or settings as needed.

Advanced Customization Ideas

  • Additional fields: Extend the information extractor prompt to capture more metrics, such as revenue, growth rate, or sector classification, then map them to new Airtable columns.
  • Multi-stage review: Add nodes that route decks to different reviewers based on stage, geography, or sector extracted from the content.
  • Alerting: Integrate email or Slack notifications when a new deck is processed or when certain criteria are met (for example, “Series B, ARR > $5M”).
  • Versioning: Track multiple versions of a pitch deck by adding a version field and indexing each version separately in Qdrant.

Automate Pitch Deck Analysis with AI and Airtable

Automate Pitch Deck Analysis with AI and Airtable: A Founder’s Story

When Pitch Decks Become a Problem

By the time Lena opened her laptop on Monday morning, her Airtable base already looked like a battlefield.

As an associate at a busy VC fund, she was responsible for the first pass on every incoming startup pitch deck. Dozens of founders sent PDFs each week. Some were polished, some were messy, and all of them demanded attention.

Her process was painfully familiar. Download each PDF. Skim 20 to 30 slides. Manually note the founding year, team size, funding stage, revenue, social links, and a rough summary. Copy key points into Airtable. Repeat. By the time she finished a batch, new decks had already arrived.

She knew she was missing good opportunities, not because the startups were bad, but because she simply did not have enough hours to read every slide with care.

That was the day she decided to try something different. A colleague mentioned an n8n workflow template that automates pitch deck analysis with AI and Airtable. Instead of manually reading every slide, she could let automation and AI do the heavy lifting, then focus on actual decision-making.

Discovering an Automated Pitch Deck Workflow

Lena’s vision was simple. She wanted to drop a PDF pitch deck into Airtable and have everything else just happen:

  • Download and process the PDF automatically
  • Turn slides into readable text, including charts and visuals
  • Extract key startup data into structured Airtable fields
  • Enable an AI chatbot so the team could ask questions about any deck

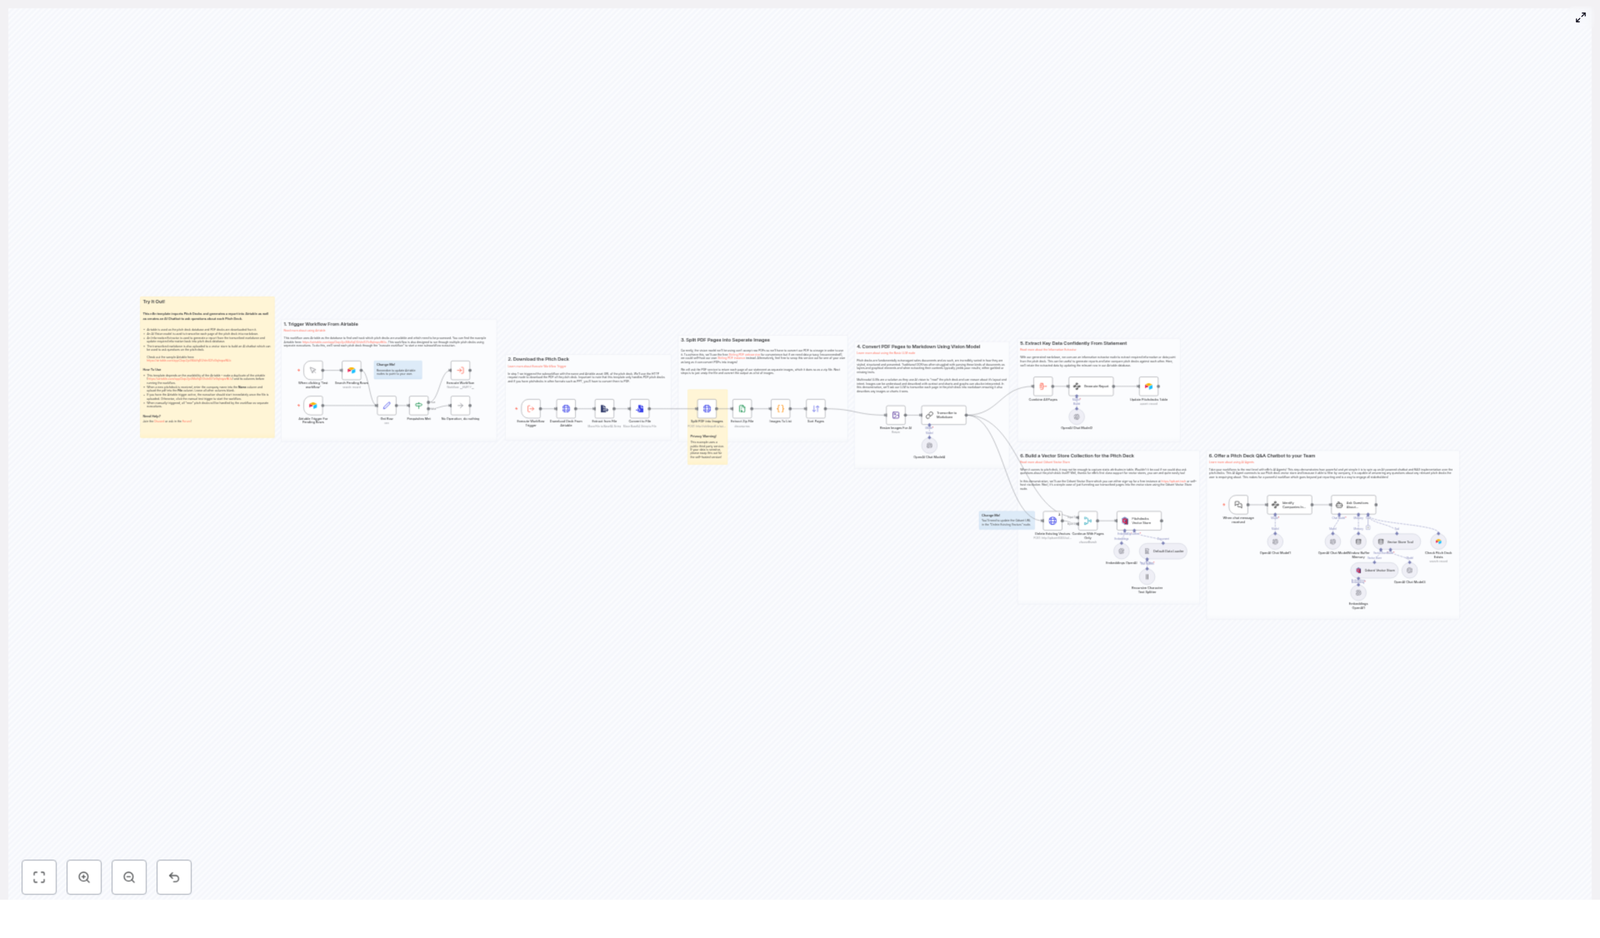
The n8n template she found did exactly that. It connected Airtable, a PDF-to-image service, AI vision models, an information extractor, and a Qdrant vector store into a single automated pipeline.

She decided to wire it into her existing Airtable base and run it on a few test decks. What followed completely changed how her team handled deal flow.

Rising Action: Turning Airtable Into a Trigger

The first piece of the puzzle was getting n8n to know when a pitch deck was ready for analysis.

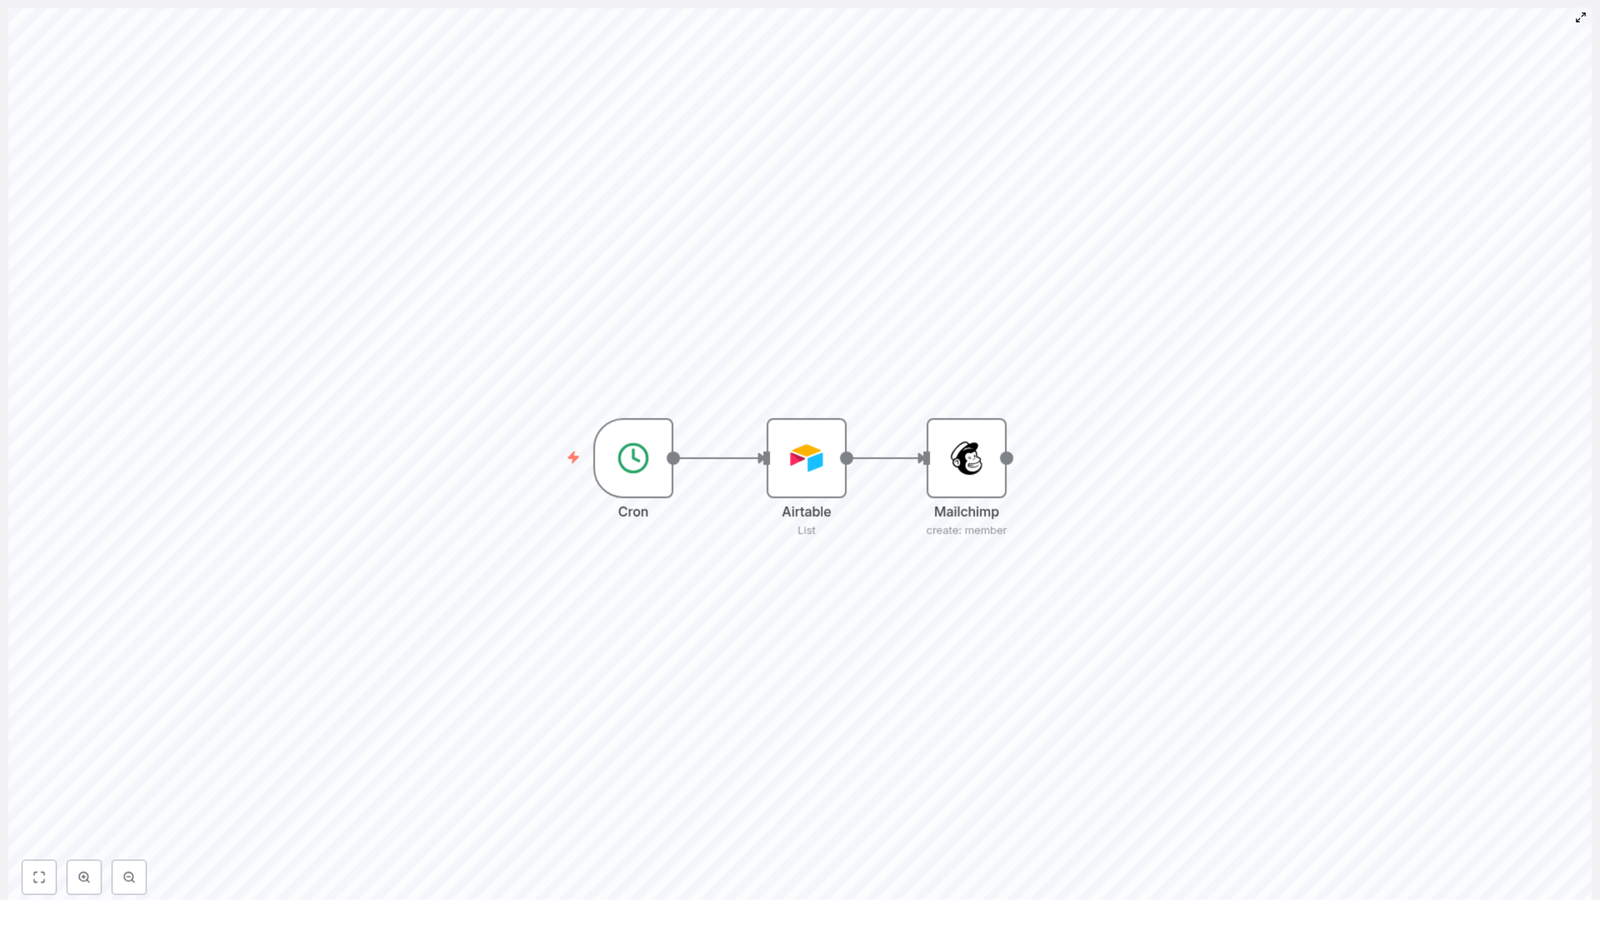
Triggering the Workflow From Airtable

Lena configured the workflow so everything started with Airtable. Her base already had a table where founders submitted their decks, including a File field for the PDF and several empty fields for analysis and executive summaries.

The n8n Airtable trigger searched this table for entries that matched a simple rule:

  • A pitch deck PDF had been uploaded
  • No executive summary or analysis existed yet

Whenever it found a row that met those conditions, the workflow automatically fired. No more manual “start processing” button, no need to track which decks were pending. Airtable itself became the queue.

The Technical Journey Behind the Scenes

Once the trigger found a new deck, the real magic began. Lena watched the first test run in n8n’s execution logs and followed each step, slide by slide.

Step 1: Downloading the Pitch Deck PDF

The workflow started by grabbing the file URL from Airtable. Using an HTTP request node, it downloaded the pitch deck as a PDF.

There was one important limitation. The workflow only supports PDFs. Some founders still sent PPT files, but Lena simply added a reminder in her submission instructions: “Please upload your pitch deck as a PDF.” If a deck arrived in PPT format, they converted it first.

Step 2: Splitting the PDF Into Page Images

Next, Lena saw why the workflow needed a PDF-to-image step. The chosen AI vision model could not read PDFs directly. It needed images.

The workflow sent the PDF to the Stirling PDF webservice. That service split the document into separate pages and converted each page into a JPEG image at 300 dpi. All page images were bundled into a ZIP file.

n8n then:

  • Extracted the ZIP archive
  • Turned the list of images into a structured collection
  • Prepared those images for the next AI step

Privacy Note

As Lena dug deeper, she realized the example template used a public third-party PDF conversion service. That was fine for test decks, but some investor data was sensitive.

For production, the team decided they would eventually self-host the PDF conversion service. That way, all pitch deck pages would stay within their own infrastructure. It was a small but important step to protect founders’ confidential information.

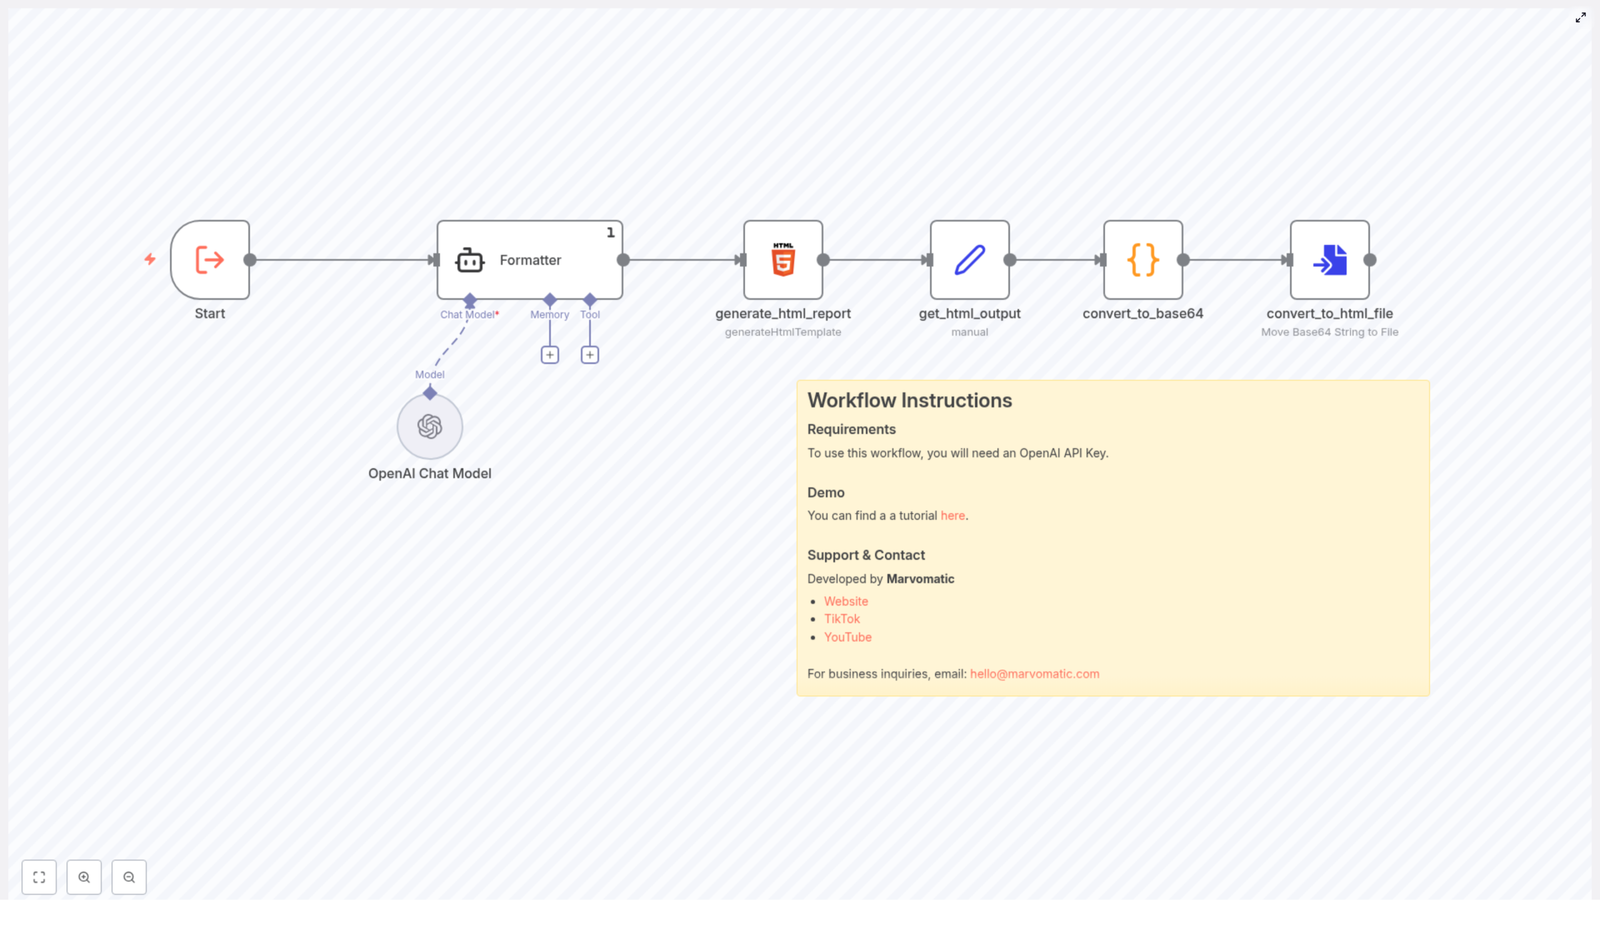
Step 3: Transcribing Slides With an AI Vision Model

Once the images were ready, the workflow resized them and passed them into an AI multimodal language model. This model could interpret both text and visual elements on each slide.

Instead of basic OCR, which often fails on complex layouts, the model produced a clean markdown transcription for every page. It captured:

  • Headings and section titles
  • Body text and bullet points
  • Tables and charts with descriptions
  • Image captions and visual context where relevant

For Lena, this was the turning point. What used to be a static PDF was now a structured markdown document that an AI could understand, search, and summarize.

Step 4: Extracting Key Startup Data Automatically

With the markdown ready, the workflow passed it to an AI Information Extractor. This component was configured to look for specific data points that Lena’s team cared about, such as:

  • Company founding year
  • Team size
  • Funding stage
  • Revenue or traction metrics
  • Social media and website links
  • Other relevant structured fields

The extractor analyzed the markdown and returned a structured dataset. n8n then used this output to update the corresponding Airtable row automatically. Fields that Lena once filled in by hand were now populated within minutes of upload.

No more copying numbers from slide 14 into a spreadsheet. No more missing key metrics because she was tired or distracted.

Step 5: Building a Vector Store for Each Pitch Deck

At this point, the workflow had already saved Lena hours. But the template went one step further.

To enable rich semantic search, the markdown content for each pitch deck was uploaded into a Qdrant vector store. This created an embedding-based representation of the deck, enabling the system to understand meaning rather than just keywords.

Instead of searching for exact phrases, the team could now ask complex questions about the content of any deck.

Step 6: Connecting an AI Chatbot for Pitch Deck Q&A

The final piece was the part Lena’s partners loved most.

The n8n workflow template included an AI chatbot interface that connected directly to the Qdrant vector store. This chatbot could answer natural language questions using only the embedded knowledge from a given pitch deck.

In practice, that meant anyone on the team could ask things like:

  • “What is the startup’s current revenue model?”
  • “How large is their team and where are they based?”
  • “What problem are they solving and who is the target customer?”

The chatbot responded with informed, context-aware answers grounded in the actual slides, not in generic assumptions. It became a shared tool for investors, analysts, and even interns who needed to ramp up quickly on a new company.

The Turning Point: From Manual Chaos to Automated Clarity

After a week of testing, Lena compared her old workflow to the new one powered by n8n, AI, and Airtable.

Before:

  • Download every PDF manually
  • Skim 20 to 30 slides per deck
  • Type key data into Airtable fields
  • Write short summaries from memory
  • Answer partner questions by reopening PDFs

After:

  • Founders upload PDF pitch decks directly into Airtable
  • n8n triggers automatically when a new deck is ready
  • PDFs are converted to images at 300 dpi and transcribed to markdown via an AI vision model
  • An AI Information Extractor pulls out key metrics and updates Airtable
  • The deck’s content is stored in a Qdrant vector database
  • The team uses an AI chatbot to query any deck in natural language

What used to take hours now happened in the background while Lena focused on higher value tasks like founder calls and deep-dive analysis.

How Lena Set Everything Up

Although the workflow felt advanced, getting started was surprisingly straightforward. Here is how she implemented the template in her own environment.

Getting Started With the n8n Template

  • She duplicated the sample Airtable base that matched the template’s structure.
  • She configured her Airtable API keys and other credentials inside n8n.
  • She made sure new pitch decks were uploaded as PDFs into the Airtable File field.
  • She enabled the Airtable trigger so the workflow would run automatically, but also kept the option to run it manually for testing.
  • She viewed the executive summaries and extracted data directly within Airtable, without opening the original PDFs.
  • She shared the AI chatbot interface with her team so they could quickly interact with pitch decks and get deeper insights.

Why This n8n Template Became Essential

As more decks flowed through the system, Lena’s team began to treat the workflow as a core part of their investment process. The benefits were hard to ignore.

  • Automated data extraction removed tedious manual transcription and reduced errors.
  • Structured, AI-enriched data in Airtable made it easier to compare startups and make data-driven decisions.
  • An AI-powered conversational interface gave everyone instant access to pitch deck knowledge without hunting through slides.
  • Open and extendable services like Stirling PDF, OpenAI models, and Qdrant meant the workflow could evolve as their needs changed.
  • Scalability allowed the team to handle many pitch decks asynchronously without overwhelming analysts.

Privacy and Security in the Real World

As the fund grew, so did their responsibility to protect sensitive company information. Lena worked with their technical team to review the workflow’s privacy profile.

The default template uses a third party PDF to image service, which may not be ideal for confidential investor data or stealth startups. For long-term use, they explored:

  • Self-hosting the PDF conversion service so pitch decks never left their environment
  • Locking down API keys and credentials in secure secret managers
  • Defining clear internal policies for how AI outputs were stored and shared

With those safeguards in place, they felt confident using the workflow for real deal flow, not just experiments.

Resolution: A New Standard for Pitch Deck Review

In a few weeks, what started as an experiment became the new default. Lena no longer dreaded Monday mornings. Instead of opening a folder full of PDFs, she opened Airtable and saw neatly structured records, executive summaries, and a chatbot ready to answer questions about any deck.

The n8n workflow template that automates pitch deck analysis with AI and Airtable transformed her role. She spent less time on manual transcription and more time thinking, debating, and deciding. The partners noticed. Founders appreciated faster feedback. The entire deal flow became more efficient.

Whether you are a VC firm, accelerator, angel syndicate, or startup scout, this template offers a practical way to combine low-code automation and advanced AI into a single, repeatable process that scales with your pipeline.

Ready to Transform Your Pitch Deck Processing?

You can follow the same path Lena did:

  • Duplicate the workflow and sample Airtable base
  • Configure your API keys and credentials securely
  • Upload your next batch of pitch decks as PDFs
  • Let n8n, AI vision models, and Qdrant handle the heavy lifting

Then spend your time where it matters most: evaluating the startups, not wrestling with their slides.

Automate E-commerce Post-Purchase Support with SMS Alerts

Automate E-commerce Post-Purchase Support with SMS Alerts

What You Will Learn

In this guide, you will learn how to use an n8n workflow template to automate your e-commerce post-purchase support process. By the end, you will understand how to:

  • Trigger an automation whenever a customer replies to a post-purchase follow-up email.
  • Automatically extract customer and order details from the reply.
  • Create a structured support ticket in Zendesk.
  • Prepare and send an urgent SMS alert to your support team using Twilio.
  • Improve response times, centralize communication, and keep your SLAs on track.

Why Automate Post-Purchase Support?

After a customer completes a purchase, your follow-up communication is critical. Customers may reply with questions about delivery, returns, product usage, or billing. If these replies are missed or delayed, it can quickly impact customer satisfaction.

With an n8n automation workflow, you can:

  • Capture every reply from your post-purchase campaigns.
  • Turn those replies into actionable Zendesk tickets.
  • Alert your support team by SMS when urgent attention is needed.

This creates a reliable, scalable system where no customer query is overlooked.

Overview of the n8n Workflow

The workflow connects four key elements:

  1. Emelia campaigns for post-purchase follow-up emails.
  2. An n8n trigger that listens for customer replies.
  3. Zendesk for ticket creation and tracking.
  4. Twilio for sending SMS alerts to your support team.

At a high level, the automation works like this:

  1. A customer replies to a post-purchase follow-up email.
  2. n8n captures the reply and extracts customer and order information.
  3. A new support ticket is created in Zendesk with full context.
  4. The workflow formats the key ticket details for SMS.
  5. An urgent SMS is sent to the support team, including a direct link to the Zendesk ticket.

Key Concepts Before You Start

Emelia Trigger in n8n

The emelia-trigger node listens for customer replies to your Emelia campaigns. In this workflow, it is configured to react specifically to replies from post-purchase follow-up campaigns. This ensures the automation only runs when a customer responds to those targeted emails.

Data Extraction for Contextual Support

Good support relies on context. The workflow includes a node that pulls structured data from the customer reply and related records, such as:

  • Customer full name
  • Email address
  • Company name
  • Order ID
  • Purchase date
  • Product name

This data is then passed into Zendesk so your agents see everything they need in one place.

Zendesk Ticket Creation

The create-zendesk-ticket node uses the extracted information to automatically open a new ticket. The ticket includes:

  • A clear subject line that identifies the customer and order.
  • A detailed description with order details and the customer reply.
  • Tags, priority, and routing to the correct support group.
  • Custom fields for better categorization and reporting.

SMS Alerts via Twilio

Once the ticket is created, the workflow prepares a concise summary of the most important details, such as:

  • Zendesk ticket ID
  • Customer name
  • Order ID

This summary is used by the send-sms-alert node, which sends a real-time SMS notification to your support team’s phone number using Twilio. The SMS includes a direct link to the Zendesk ticket so the team can respond quickly.

Step-by-Step: How the n8n Workflow Template Works

Step 1 – Capture Customer Replies with the Emelia Trigger

The workflow starts with the emelia-trigger node.

  • It listens for incoming replies from customers who received your post-purchase follow-up email.
  • Whenever a reply is detected, the node passes the message content and metadata into the next step in n8n.

This ensures that every customer response is automatically captured and processed without manual checking of inboxes.

Step 2 – Extract Customer and Order Data

Next, the workflow moves to the extract-customer-data node.

This node gathers all the crucial information needed for support, for example:

  • Customer identity: full name, email address, and company.
  • Order details: order ID, purchase date, and product name.

By structuring this data, the workflow makes it easy to populate the Zendesk ticket fields and provide agents with immediate context.

Step 3 – Automatically Create a Zendesk Ticket

With the customer and order data ready, the workflow triggers the create-zendesk-ticket node.

This node:

  • Creates a new ticket in Zendesk using the extracted customer information.
  • Builds a clear subject line that includes the customer name and order reference.
  • Generates a detailed description that combines:
    • Order information (order ID, purchase date, product name).
    • The content of the customer’s reply.
  • Sets the ticket priority to urgent so it stands out in the queue.
  • Routes the ticket to the correct support group and applies relevant tags and custom fields for efficient handling.

The result is a fully prepared ticket that your support team can act on immediately, without any manual data entry.

Step 4 – Prepare Data for the SMS Notification

After the Zendesk ticket is created, the workflow uses the prepare-sms-data node.

This node formats the key details your team needs to see in an SMS, such as:

  • New ticket ID from Zendesk.
  • Customer name.
  • Order ID or reference.

By preparing this data first, the SMS message stays short, clear, and immediately actionable.

Step 5 – Send an SMS Alert to the Support Team

Finally, the send-sms-alert node sends a real-time text message using Twilio.

The SMS typically includes:

  • The customer’s name and order reference.
  • The Zendesk ticket ID.
  • A direct link to open the ticket in Zendesk.

This alert goes to your support team’s designated phone number, helping them quickly identify urgent post-purchase issues and respond without delay.

Benefits of This n8n Automation Workflow

  • Improved Response Times
    Automated triggers and SMS alerts ensure your support team is notified as soon as a customer replies, which reduces waiting time and increases customer satisfaction.
  • Centralized Ticket Management
    Integration with Zendesk means all customer replies are converted into tickets and stored in a single, organized system that is easy to track and manage.
  • Contextual and Personalized Support
    Detailed extraction of customer and order information gives agents the full context they need, allowing them to provide informed, personalized responses rather than asking the customer to repeat details.
  • Better SLA Compliance
    Marking tickets as urgent and sending SMS escalation alerts helps your team meet service level agreements and maintain consistent response quality.

Quick Recap

To summarize, this n8n workflow template helps you:

  1. Listen for post-purchase email replies with the emelia-trigger node.
  2. Extract key customer and order details using extract-customer-data.
  3. Create a fully detailed, urgent Zendesk ticket via create-zendesk-ticket.
  4. Format ticket and customer information for SMS in prepare-sms-data.
  5. Send an urgent SMS alert to your support team using send-sms-alert with Twilio.

With this setup, you automate the entire path from customer reply to agent notification, which significantly improves the reliability and speed of your post-purchase support.

FAQ

Do I need to know how to code to use this workflow?

No. The workflow is built as an n8n template, so you primarily configure nodes, connect your Emelia, Zendesk, and Twilio accounts, and adjust fields as needed. Most of the logic is already set up for you.

Can I customize the SMS content?

Yes. In the prepare-sms-data and send-sms-alert nodes, you can edit the message format, include additional fields, or change the tone of the alert while still keeping the core details like ticket ID and order ID.

What if I want different priorities for different types of replies?

You can extend the workflow by adding conditions in n8n. For example, you could check for certain keywords in the customer reply and adjust the Zendesk ticket priority or tags accordingly.

Is this workflow scalable?

Yes. The workflow is designed to handle replies at scale. As your number of post-purchase campaigns and customers grows, the automation continues to process each reply and create tickets consistently.

Get Started With the Template

Implementing this end-to-end post-purchase support automation can significantly improve your customer service efficiency and satisfaction. If you want to streamline your e-commerce support workflows with reliable automation and real-time alerts, this n8n workflow template is a powerful starting point.

Ready to automate your post-purchase support? Contact us today to get started and plug this template into your n8n setup.

Automate E-commerce Post-Purchase Support with Zendesk & Twilio

Automate E-commerce Post-Purchase Support with Zendesk & Twilio

Why Post-Purchase Automation Matters

If you run an online store, you already know the sale doesn’t end at checkout. The real relationship with your customer starts after they buy. That is where post-purchase support comes in, and it can make or break whether someone buys from you again.

The problem is, responding to every single reply manually takes time, especially when your campaigns scale. That is where a smart automation workflow using Emelia, Zendesk, Twilio, and n8n steps in. It listens for customer replies, turns them into support tickets, and pings your team instantly so nothing slips through the cracks.

Let us walk through what this template does, when you should use it, and how it makes your life a lot easier.

What This n8n Workflow Template Actually Does

This automated post-purchase support workflow is built to take over the repetitive stuff you should not be doing by hand. In simple terms, it:

  • Listens for customer replies to your post-purchase campaigns in Emelia
  • Pulls out key customer and order details from the reply
  • Creates a fully detailed support ticket in Zendesk
  • Prepares a short, actionable summary for your team
  • Sends an urgent SMS alert via Twilio with a direct ticket link

The result is a support process that feels fast and personal for your customers, without you having to watch your inbox 24/7.

When To Use This Automation

This workflow is perfect if you:

  • Run post-purchase email campaigns with Emelia and get replies like “I have a question about my order”
  • Use Zendesk to manage support conversations
  • Rely on Twilio to send SMS alerts to your team
  • Want to make sure urgent customer messages get seen and handled quickly

If your support team is juggling multiple tools or missing messages because they are buried in email threads, this automation will feel like a breath of fresh air.

How the Workflow Works, Step by Step

Let us break down the main pieces of the template so you can see exactly what is going on behind the scenes.

Step 1 – Trigger on Customer Reply via Emelia

Everything starts the moment a customer replies to your post-purchase campaign in Emelia.

The workflow uses the emelia-trigger node, which is configured to listen for “replied” events from a specific campaign. As soon as Emelia detects that reply, n8n kicks the workflow into action automatically. No inbox refreshing, no manual copy-paste.

Step 2 – Extract Customer and Order Data

Once the trigger fires, the workflow needs context. Who is the customer? What did they buy? What are they asking?

That is where the extract-customer-data node comes in. It pulls out all the important information, such as:

  • Customer full name
  • Email address
  • Company name (if available)
  • Reply content
  • Order ID
  • Purchase date
  • Product name

All of this is turned into structured data that can be passed cleanly into Zendesk. Your support team does not have to guess what the customer is talking about or dig through emails to find the order.

Step 3 – Create a Zendesk Support Ticket

Next, the workflow creates a proper support ticket in Zendesk using the create-zendesk-ticket node.

The ticket is not just a blank shell. It includes a detailed description that bundles together:

  • Customer details, like name and email
  • Order metadata, including order ID, purchase date, and product
  • The original reply text from the customer

This gives your support agents everything they need to respond quickly and professionally. No extra digging, no switching between tools to piece the story together.

Step 4 – Prepare SMS Notification Data

Now that the ticket exists, the workflow gets ready to alert your team.

The prepare-sms-data node gathers and formats the most relevant details for a short, actionable SMS, such as:

  • Zendesk ticket ID
  • Ticket URL
  • Customer name
  • Order ID

This step is all about turning a full support ticket into a quick snapshot that makes sense in a text message.

Step 5 – Send SMS Alert via Twilio

Finally, it is time to nudge your team.

Using the send-sms-alert node connected to Twilio, the workflow sends an urgent SMS to your support team. The message highlights that a new post-purchase reply has come in, includes the ticket link, and signals that it needs prompt attention.

Your team gets an instant heads-up, even if they are away from their desk, which is especially helpful for high-priority customers or time-sensitive issues.

Why This Workflow Makes Your Life Easier

So what do you actually gain from putting this in place? Quite a lot.

  • Speed: Manual ticket creation is gone. Replies turn into tickets automatically, which cuts response times significantly.
  • Accuracy: Customer and order details are extracted and passed along directly, which reduces typos and missing information.
  • Proactivity: SMS alerts make sure urgent messages are noticed quickly, even outside the inbox.
  • Scalability: As your store grows, this workflow handles more replies without you needing to grow the team at the same pace.

In short, you get a smoother process for your team and a faster, more reliable experience for your customers.

Implementing This Automation in Your Stack

This template is a great fit for e-commerce businesses that want to keep their customer service sharp without drowning in manual work. By connecting:

  • Emelia for post-purchase campaign replies
  • Zendesk for structured ticket management
  • Twilio for instant SMS notifications
  • n8n as the no-code automation layer tying it all together

you end up with a seamless, proactive support system that runs quietly in the background.

Once set up, your team gets real-time visibility into customer replies, and you can respond faster, keep customers happier, and protect your brand reputation without adding more tools or complexity.

Wrapping Up

Automating your post-purchase support with this n8n workflow is a simple way to boost both customer satisfaction and internal efficiency. Your customers feel heard quickly, your team spends less time on repetitive tasks, and your support operations become more consistent and reliable.

Instead of worrying about missed emails or delayed responses, you can focus on improving your products and growing your business, knowing that your support process is under control.

Ready To Try It Out?

If you are ready to upgrade your post-purchase experience, this template is a great place to start. Connect Emelia, Zendesk, and Twilio through n8n, plug this workflow into your e-commerce setup, and let automation handle the heavy lifting.

You can work with your platform consultant to get everything connected or explore n8n integrations yourself and customize the flow as needed.

Automate Mailchimp Subscriber Creation from Airtable

Automate Mailchimp Subscriber Creation from Airtable: A Story of One Marketer’s Turning Point

Introduction: When the Email List Became a Problem

Every Monday morning, Julia, a marketing manager at a growing startup, opened two tabs like clockwork: Airtable and Mailchimp. Airtable held a clean list of new signups from events, lead magnets, and website forms. Mailchimp was where the email campaigns lived. Between them sat a tedious ritual that Julia dreaded.

She would copy names, emails, and interests from Airtable, paste them into Mailchimp, double check for typos, and hope she did not miss anyone. By the time she was done, an hour had passed and her coffee was cold. Worse, there were always small mistakes, outdated lists, and missed subscribers who never received the welcome series they had asked for.

One day, after realizing a batch of high-intent leads never made it into Mailchimp, Julia decided that this was the last time manual list updates would cost her conversions. That is when she discovered an n8n workflow template that could automate Mailchimp subscriber creation directly from Airtable.

Rising Action: Discovering n8n and the Airtable-Mailchimp Template

Julia had heard of n8n as a flexible automation tool, but she had never tried building a workflow herself. The promise of a ready-made template that could:

  • Pull users from Airtable
  • Send them into a Mailchimp list
  • Tag them by interest for segmentation

was exactly what she needed.

She clicked into the template and realized that under the surface of her problem was a simple automation story with three characters of its own: the Cron node, the Airtable node, and the Mailchimp node. Together, they could replace her repetitive Monday routine with a reliable, hands-off workflow.

The Core of the Workflow: Three Nodes That Changed Everything

The Cron Node – Ending Manual Check-ins

The first piece of the template was the Cron node. Julia quickly understood its role: it would act like a timer that woke the workflow up at specific intervals. Instead of her logging in every Monday to sync data, the Cron node would quietly trigger the automation on a schedule she defined.

She set it to run daily so that new signups from the previous day would automatically sync to Mailchimp. No more waiting a week, no more forgotten updates.

The Airtable Node – Turning a Table into a Source of Truth

Next, Julia looked at the Airtable node. This was where n8n connected to her Airtable base, specifically to the “Users” table that her team had been using for months. The template was already configured to retrieve the core fields she relied on:

  • Name – for personalization in email campaigns
  • Email – the key identifier for each subscriber
  • Interest – the topic or category that each user cared about

She realized this node was doing what she had been doing manually, only faster and with zero chance of miscopying an email address. Each time the Cron node triggered the workflow, the Airtable node would fetch all the relevant records from the Users table, ready to be turned into Mailchimp subscribers.

The Mailchimp Node – Automatically Creating Subscribers

The final step in the template was the Mailchimp node. This was the part Julia cared about most, because it directly impacted her campaigns.

For each Airtable record, the Mailchimp node would:

  • Create a new list member in the specified Mailchimp audience
  • Use the email and name from Airtable as merge fields, so her dynamic content still worked
  • Apply the “Interest” field as a tag, which meant her audience would be automatically segmented based on what users actually cared about

Instead of building segments manually or guessing what people wanted, she could rely on accurate, structured data flowing straight from Airtable into Mailchimp.

The Turning Point: From Manual Chaos to Automated Flow

With the pieces in place, Julia followed the template’s structure and adapted it to her own setup. The steps were surprisingly straightforward once she understood how the nodes worked together.

How Julia Set Up the Automation in n8n

  1. She confirmed her Airtable base had the required fields: Name, Email, and Interest in a table called “Users”.
  2. In n8n, she connected her Airtable account and configured the Airtable node to read from that Users table and pull exactly those fields.
  3. She connected her Mailchimp account, then selected the target Mailchimp list (audience) and set the correct list ID inside the Mailchimp node.
  4. She adjusted the Cron schedule to run every morning at 8 a.m., right before her daily reports, so new subscribers were always included.
  5. Finally, she activated the workflow so the automatic syncing could begin.

The first time the workflow ran, she watched as new subscribers appeared in her Mailchimp audience without her lifting a finger. Their names were correctly mapped, their emails were accurate, and each one carried a tag based on their interest, ready for targeted campaigns.

Resolution: What Changed After the Automation Went Live

Within a week, Julia could feel the difference. Instead of spending time copying data, she was creating better campaigns and testing new segments. The Airtable to Mailchimp automation had quietly become a core part of her marketing stack.

Benefits Julia Saw From the n8n Workflow Template

  • Time-saving – The workflow automatically added users from Airtable to Mailchimp so she no longer wasted hours on manual data entry.
  • Accuracy – With n8n handling the transfer, human errors dropped. No more missing subscribers or mistyped emails.
  • Better segmentation – The Interest field became a powerful tag in Mailchimp, letting her send highly relevant content to each segment.
  • Scalability – As her database grew, the workflow kept up. She could easily add more fields or adapt the automation for new campaigns without rewriting everything.

Most importantly, her mailing list stayed fresh and up to date. New leads never sat forgotten in Airtable. They were welcomed, nurtured, and segmented from the moment they arrived.

How You Can Follow Julia’s Path

If you are managing signups in Airtable and sending campaigns with Mailchimp, you do not have to keep juggling spreadsheets and manual imports. The same n8n automation template that turned Julia’s Monday headache into a background process can do the same for you.

All it takes is:

  • A well structured Airtable base with Name, Email, and Interest fields
  • Your Airtable and Mailchimp accounts connected to n8n
  • A Cron schedule that matches how often you want your lists to sync
  • A few minutes to map fields and activate the workflow

Conclusion: Let Your Tools Do the Repetitive Work

Integrating Airtable with Mailchimp using n8n is more than a technical tweak. It is a shift in how you work. Instead of spending your time moving data from one place to another, you let automation keep your subscriber list accurate, segmented, and ready for action.

That is how Julia went from dreading her weekly list updates to focusing on what really mattered: building campaigns that convert.

Ready to boost your email marketing? Get started with Mailchimp today!

PDF to Blog Workflow with Automated SEO Content

Turn PDFs Into SEO-Ready Blog Posts (Without Losing Your Mind)

Imagine Never Copy-Pasting From PDFs Again

You know that feeling when you open a long PDF, sigh dramatically, and start copy-pasting chunks into your blog editor like a human OCR machine? Yeah, nobody enjoys that.

This n8n workflow template politely takes that painful job away from you. It grabs text from a PDF, feeds it to an AI model, formats everything as a structured, SEO-friendly blog post, then ships it straight into Ghost as a draft. You keep the control and editorial voice, the workflow does the boring bits.

If your content marketing stack includes PDFs, Ghost, and a burning desire to automate repetitive tasks, this workflow is about to become your new favorite coworker.

What This n8n PDF-to-Blog Workflow Actually Does

At a high level, the workflow takes a PDF and turns it into a polished, AI-written blog draft that is:

  • Structured with headings, paragraphs, and HTML tags
  • SEO-conscious, with a clean, concise title
  • Formatted as a proper article with intro, body, and conclusion
  • Ready to review as a draft in your Ghost CMS

Behind the scenes, it uses PDF text extraction, an AI language model, and n8n’s logic nodes to move your content from “static document” to “publishable blog post” with minimal manual effort.

Quick Overview Of The Workflow Steps

Here is the journey your PDF goes on, from dusty attachment to shiny blog draft:

  1. Upload PDF and extract readable text
  2. Send that text to an AI model to generate a blog post
  3. Parse the AI output to separate the title and content
  4. Run a conditional check to make sure the result is valid
  5. Publish the draft post to Ghost via the Ghost Admin API

Now let us walk through each step in more detail so you know exactly what is happening and where you can tweak things.

Step 1 – Upload Your PDF And Extract The Text

First, you provide the workflow with a PDF that contains your source content. This could be a report, whitepaper, article, or any other document you want to repurpose as a blog post.

n8n then uses a PDF extraction node that is built to pull out the readable text from the file. This is crucial, because AI models work with text, not with pretty PDF layouts. The node converts your static PDF into editable, analyzable text data that can be passed cleanly into the next step.

No more manual highlighting, copying, and fixing broken line breaks. The node quietly does the unglamorous work for you.

Step 2 – Let AI Turn That Text Into A Blog Post

Once the text is extracted, it is sent straight to an AI language model. This node is configured with a custom prompt that tells the AI exactly what kind of output you want: a structured, SEO-friendly blog post.

The AI responds with a JSON object that includes:

  • A short, SEO-optimized title
  • The full blog post content, formatted with HTML tags

The content is not just a wall of text. The AI structures the article into logical sections, making it easy to read, scan, and edit later inside your CMS.

What The AI Content Creation Node Is Set Up To Do

The AI node is carefully instructed so you get a usable blog post, not a random essay. Its main features include:

  • Generating an engaging title under 10 words to support SEO performance
  • Organizing the article using <h2> headings and <p> paragraphs
  • Including a clear introduction, multiple thematic sections, and a conclusion
  • Using <blockquote> elements when citing or referencing source material from the PDF
  • Maintaining a professional tone with smooth transitions so the post reads naturally

In short, the AI does the first full draft for you, complete with structure and formatting, so you can focus on strategy and editing instead of layout and retyping.

Step 3 – Cleanly Separate The Title And Content

The AI sends back a JSON response that includes both the title and the HTML-formatted blog body. To make that usable for publishing, the workflow runs a code node that:

  • Parses the JSON and extracts the title field
  • Extracts the content field that holds the HTML blog post
  • Cleans the HTML by removing any redundant or unwanted tags
  • Ensures what remains is just the intended blog content

This node also performs validation checks to confirm that both the title and content are present and non-empty. If something looks off, the workflow will not blindly try to publish a broken draft.

Step 4 – Conditional Check Before Publishing

Next, an If node steps in as the responsible adult in the room. It checks whether the extracted title and content are valid and not empty.

  • If the data looks good, the workflow continues to the publishing node.
  • If something is missing or invalid, the workflow routes to a “Do Nothing” node.

The “Do Nothing” node safely ends the workflow without throwing errors or trying to publish incomplete content. It is like a quiet safety net that prevents half-baked drafts from appearing in your CMS.

Step 5 – Publish A Draft Blog Post To Ghost

Once the content passes the validation check, the workflow sends it to Ghost using the Ghost Admin API. The post is created as a draft, not published immediately.

This gives you full control to:

  • Review the AI-generated article
  • Edit the tone, add images, or tweak formatting
  • Optimize internal links or add CTAs
  • Hit “Publish” only when you are happy with the final result

Ghost handles the content management part, while n8n and the template handle the heavy lifting that gets you from PDF to draft in a few automated steps.

Why This PDF-To-Blog Workflow Is Worth Using

If you deal with recurring reports, documentation, or long-form PDFs, this workflow can save you from a lot of repetitive busywork. Key benefits include:

  • Simplified content repurposing – Turn PDFs into structured blog posts without manually copying and reformatting.
  • Automated SEO-friendly content creation – Get titles and structured sections that are easier to optimize for search.
  • Less manual effort in digital publishing – Let automation handle extraction, drafting, and formatting so you can focus on strategy and editing.
  • Easy integration with existing CMS – Works smoothly with Ghost and can fit into broader n8n workflows across your content stack.

Instead of spending hours on mechanical tasks, you can spend minutes reviewing and polishing the drafts that land in your CMS.

How To Get Started With This n8n Template

Ready to retire your copy-paste routine and let automation help with content creation?

  1. Open the n8n template using the link below.
  2. Connect your PDF source and set up the PDF extraction node.
  3. Configure your AI credentials and customize the prompt if needed.
  4. Add your Ghost Admin API details so the workflow can create drafts.
  5. Run a test with a sample PDF and review the resulting draft in Ghost.

Once it is working, you can plug this into your regular content pipeline and start turning reports, whitepapers, and long-form PDFs into ready-to-edit blog posts.

Next Steps And Ideas

After you have this workflow running, you can:

  • Schedule regular PDF imports and automatic blog draft creation
  • Chain additional n8n nodes for tagging, categorizing, or notifying your team
  • Experiment with different AI prompts for varied tone or structure

Start converting those forgotten PDFs into fresh, SEO-optimized blog content today, and let automation handle the repetitive parts that no one will miss.

Building a Slack AI Agent Workflow with n8n

Introduction

Imagine dropping a question into a Slack channel and getting a smart, context-aware reply in seconds, without leaving Slack or copying things into another tool. That is exactly what this n8n Slack AI Agent workflow is all about.

In this guide, we will walk through how this workflow works, what each part does, and how you can set it up yourself in n8n. We will talk about filtering out noisy bot messages, keeping conversation memory, using external APIs for extra knowledge, and sending responses right back into Slack. Think of it as building your own opinionated, slightly sarcastic AI teammate that actually knows what is going on.

What This Slack AI Agent Workflow Actually Does

At a high level, this n8n workflow listens to messages coming from Slack, checks whether they are from a real user, passes valid messages to an AI agent, lets that agent pull in extra knowledge from tools like SerpAPI and Wikipedia, and then posts a tailored response back into the same Slack channel.

Here is what happens behind the scenes, step by step:

  • Slack sends message events to an n8n webhook.
  • The workflow filters out bot messages so it does not talk to itself or loop endlessly.
  • Real user messages are handed off to an AI Agent node.
  • The AI agent uses memory to keep track of past messages in that channel.
  • It can call tools like SerpAPI and Wikipedia to look things up.
  • The final answer is pushed back into Slack via a Slack node.

When You Would Want To Use This

You will probably love this setup if you:

  • Spend a lot of time in Slack and want answers where you already work.
  • Need an AI assistant that remembers the ongoing conversation instead of answering in isolation.
  • Want to give your bot a specific personality, such as Gilfoyle from Silicon Valley, so it is not just another bland chatbot.
  • Care about avoiding weird loops where bots respond to bots endlessly.

It is great for internal Q&A, team support, quick research, or just having a slightly grumpy genius in your Slack channels.

Key Components Of The n8n Workflow

Let us break down the main building blocks inside n8n and how they fit together.

1. Webhook Trigger – Listening To Slack Messages

Everything starts with a Webhook node. This node is the entry point for the workflow. Slack sends a POST request to this webhook every time a message event occurs in your workspace.

Important detail: Slack sends events for all kinds of messages, including those generated by bots. That is why the next step is all about filtering.

2. If Node – Filtering Out Bot Messages

To avoid chaos, the workflow uses an If node labeled “Is user message?”. This node checks the incoming Slack payload for a bot ID.

  • If a bot ID is present, the message is treated as a bot message and is sent to a No Operation node. That effectively ignores it and stops processing.
  • If there is no bot ID, the message is considered a user message and continues to the AI agent.

This simple check prevents recursive loops where your AI might start answering itself or other bots, which can quickly get messy.

3. AI Agent Node – The Brain Of The Workflow

The core of this setup is the AI Agent node. This is where the intelligence and personality live. The node receives the user’s message text and is configured with several important components:

  • System Message: The agent is instructed to behave like Gilfoyle from Silicon Valley. That means blunt, cynical, and very no-nonsense, with sharp and efficient answers. You still get useful information, but with a bit of character.
  • Chat Model: The AI Agent connects to an OpenAI Chat Model node, using gpt-4o-mini as the model. This model processes the prompt, combines it with context and tools, and generates human-like responses.
  • Memory: The agent uses a Simple Memory node. This memory is keyed by Slack channel IDs, so the conversation history is stored per channel. That way, when someone asks a follow-up question, the AI remembers what was said earlier and can respond with context.
  • Tools: The AI Agent is connected to external tools:
    • SerpAPI for web search, so it can pull in fresh, real-time information.
    • Wikipedia for encyclopedic knowledge and quick factual lookups.

    These tools let the agent go beyond what is in the prompt or memory and provide more accurate and up to date answers.

4. Slack Node – Sending The Reply Back

Once the AI Agent has generated a reply, the output is passed to a Slack node. This node is configured with your Slack credentials and posts the response back into the same Slack channel where the message originated.

The result is a smooth, conversational experience. The user types a message, the AI thinks, maybe looks some things up, and then replies directly in the thread or channel, just like a teammate would.

Why This Architecture Works So Well

There are a few reasons this particular setup is so effective for building a Slack AI agent with n8n.

  • Efficient filtering: By checking for bot IDs and routing those messages to a No Operation node, you avoid infinite loops and unnecessary processing. The workflow focuses only on real user input.
  • Context awareness: The Simple Memory node keeps track of previous messages per Slack channel. That means your AI agent can handle multi-turn conversations and follow-up questions without losing the thread.
  • Multi-tool intelligence: With SerpAPI and Wikipedia wired into the AI Agent, your Slack bot is not limited to canned responses. It can search the web and tap into encyclopedic knowledge when needed.
  • Personality built in: Using a Gilfoyle-style system message gives the bot a distinct voice. Interactions feel more engaging and less robotic, which can make people more likely to actually use it.

Step-by-Step: How To Set This Up In n8n

Ready to build this for your own workspace? Here is a straightforward outline of what you need to do.

1. Create And Configure Your Slack App

  • In Slack, create a new app for your workspace.
  • Enable event subscriptions so Slack can send message events to your n8n webhook URL.
  • Select the appropriate events, such as message events in channels or direct messages, depending on your use case.

2. Set Up The Webhook Node In n8n

  • Add a Webhook node to your n8n workflow.
  • Copy the generated webhook URL and paste it into your Slack app’s event subscription settings.
  • Configure the webhook to receive Slack message events and ensure the method is set to POST.

3. Add The If Node To Filter Bot Messages

  • Insert an If node after the Webhook node.
  • Configure it to check the incoming data for a bot ID field.
  • If a bot ID is present, route that branch to a No Operation node so nothing else happens.
  • If no bot ID is found, route the message to the AI Agent node.

4. Configure The AI Agent Node

  • Drop in an AI Agent node and connect it to the user message branch of the If node.
  • Set the System Message to define the bot’s personality, for example, behaving like Gilfoyle: blunt, cynical, and highly efficient.
  • Connect the AI Agent to an OpenAI Chat Model node and select gpt-4o-mini as the model.
  • Attach a Simple Memory node and configure it so that conversation history is stored using Slack channel IDs as keys.
  • Link the AI Agent to SerpAPI and Wikipedia nodes so it can call those tools for web search and reference data when needed.

5. Add The Slack Response Node

  • Place a Slack node after the AI Agent node.
  • Configure it with your Slack credentials or OAuth token.
  • Set it to post the AI’s response back into the correct Slack channel, using the channel information from the original event.
  • Optionally, reply in a thread if you want to keep conversations tidy.

6. Test, Refine, And Personalize

  • Send a few test messages in Slack and watch the workflow run in n8n.
  • Adjust the system prompt if you want the AI to be more or less sarcastic, more formal, or tailored to your team culture.
  • Tweak AI parameters or tool settings if you want shorter, longer, or more detailed answers.

Why This Makes Your Life Easier

Once this is running, you no longer have to switch tools, copy questions into separate AI apps, or explain the same context over and over. Your AI agent lives inside Slack, remembers what was said, and can look things up when needed.

It can act as a smart assistant, an automated responder for common internal questions, or a team bot with a bit of attitude. You get automation, context, and personality, all in one workflow.

Conclusion

This n8n workflow template is a practical example of how to connect Slack with an AI agent that:

  • Filters out bot messages to avoid loops.
  • Uses memory to keep conversations coherent across multiple messages.
  • Calls external tools like SerpAPI and Wikipedia for richer, more accurate answers.
  • Responds with a distinct personality instead of sounding generic.

If you have been wanting a Slack bot that feels more like a smart coworker than a basic script, this architecture gives you a solid foundation to build on.

Try The Template Yourself

Ready to spin this up in your own workspace? You do not have to start from scratch.

Use the existing n8n workflow template, then tweak the AI’s personality, swap tools in or out, and adapt it to your team’s needs. Whether you want a friendly assistant, a brutally honest DevOps guru, or something in between, you can shape it to match your style.

Efficient E-commerce Order Management Automation

Efficient E-commerce Order Management Automation

Why Automate Your E-commerce Orders in n8n?

If you run an online store, you already know how many tiny steps live inside a single order. A customer hits “buy”, and suddenly you are juggling payment checks, inventory, shipping, and status updates. Miss one step and you risk delays, angry emails, or manual cleanup.

This is exactly where an automated n8n workflow template shines. It takes that entire order journey – from the moment an order comes in to the point where tracking details are confirmed – and handles it for you in a clean, reliable flow.

Instead of manually checking payments or updating systems, this template keeps everything in sync behind the scenes so you can focus on growing your store, not babysitting orders.

What This n8n Order Management Template Actually Does

In simple terms, this workflow listens for new orders, creates an order record in your backend (like Bubble.io), checks payment and inventory in parallel, and if everything looks good, triggers shipment and updates the order with tracking details.

Here is the high-level flow:

  • Receive a new order event through a webhook
  • Create a persistent order record in your backend
  • Run payment processing and inventory checks at the same time
  • Validate both results with IF nodes
  • Generate a shipment tracking number when all checks pass
  • Update the order with payment status, fulfillment status, and tracking info
  • Send a final confirmation response back to the caller

Everything is handled by n8n, using a series of connected nodes that you can customize to your own tools and APIs.

When Should You Use This Template?

This order automation workflow is perfect if you:

  • Sell through a website or app and want orders processed automatically
  • Use services like Bubble.io or a similar backend to store order data
  • Rely on a payment gateway API and a separate inventory system
  • Want to avoid manually verifying payments or stock before shipping
  • Need a scalable order management process that can handle more volume without extra staff

If any of that sounds familiar, this n8n template will save you time, reduce mistakes, and give your customers faster, clearer updates.

Step-by-Step: How the Workflow Runs in n8n

1. Webhook: Catching the New Order Event

Everything starts with a webhook node. This node listens for new order events from your website or app. Whenever a customer places an order, that system sends the order data to this webhook URL.

The webhook captures all the essentials, such as:

  • Order ID
  • Customer name
  • Items ordered
  • Total amount
  • Payment status (usually set to pending at this point)

Once the webhook receives this payload, the workflow kicks off automatically. No manual clicks, no extra steps.

2. Creating the Order Record in Your Backend

Next, the workflow takes that incoming order data and sends it to your backend system. In this template, it is designed to work with a Bubble.io application, but the same idea works with similar backends too.

n8n uses an HTTP or app-specific node to:

  • Create a new order record in your database
  • Store all relevant details for future tracking and reporting

This gives you a persistent, central record of the order that everything else can reference, instead of relying only on the initial request.

3. Running Payment and Inventory Checks in Parallel

Once the order record exists, the workflow branches into two paths that run at the same time. This is one of the big efficiency wins of this template.

  • Payment gateway API call

    The workflow sends the payment details to your external payment gateway. This could be any payment provider that exposes an API.

    The goal here is to process the transaction and get a clear success or failure response.

  • Inventory availability check

    At the same time, another node calls your inventory service to confirm that all ordered items are in stock.

    This step helps you avoid processing payments for items you cannot actually ship.

By running these checks concurrently instead of one after another, you cut down on total processing time and make your order flow feel much snappier.

4. Validating Payment and Stock With IF Nodes

Once both APIs respond, the workflow uses two IF nodes to validate what came back.

  • Payment success check

    This IF node looks at the payment gateway response and checks whether the payment was successful. If the status indicates failure or an error, the workflow:

    • Stops further processing
    • Returns a payment error message to the original caller
  • Inventory availability check

    The second IF node verifies that all ordered items are in stock. If the inventory service reports insufficient stock, the workflow:

    • Halts the process
    • Sends back an inventory error response

Only when both checks pass does the order move on to shipping. This double validation is what keeps your system accurate and your customers happy.

5. Merging Results and Requesting Shipment

When everything looks good, the workflow merges the successful payment and inventory results. With both pieces of information confirmed, it is safe to proceed to fulfillment.

At this point, n8n calls your shipping provider to generate a tracking number. That might be via a shipping API or a logistics platform you already use.

The response usually includes:

  • A tracking number
  • Any additional shipment details provided by the carrier

This tracking info becomes part of your order record so you and your customer can follow the shipment.

6. Updating the Order and Sending Final Confirmation

With payment confirmed, stock verified, and tracking created, the workflow updates the original order record in your backend.

Typical updates include:

  • Setting the payment status to paid
  • Marking the fulfillment status as processing
  • Saving the tracking number from the shipping provider

After this update, the workflow retrieves the fresh version of the order data and sends a final success response back to the original caller. That can then be used to:

  • Show an order confirmation screen
  • Trigger a confirmation email or notification
  • Update your internal dashboards

The whole journey from “order placed” to “order confirmed with tracking” is handled automatically by n8n.

Why This n8n Automation Makes Your Life Easier

Faster Processing With Parallel Calls

Because payment and inventory checks run at the same time, you are not waiting on one to finish before starting the other. That parallel processing cuts down on overall order handling time and makes your e-commerce flow feel more responsive.

Fewer Mistakes, More Reliable Orders

The workflow uses multiple validation steps so orders only move forward when payment is successful and stock is available. This reduces:

  • Accidental shipments without payment
  • Orders confirmed for items that are out of stock
  • Manual corrections and follow-up messages

Happier Customers With Clear Status and Tracking

Customers love quick confirmations and tracking links. Since this template updates payment status, fulfillment status, and tracking automatically, you can send accurate information right away, which builds trust and reduces support tickets.

Scales Easily As Your Store Grows

Whether you are handling a handful of orders or hundreds per day, the same automated flow works. Because the process is handled by n8n with minimal manual intervention, you can scale up without immediately needing extra staff to manage orders.

Ready To Try This n8n Order Management Template?

Automating your e-commerce order management flow is one of those upgrades that quickly pays off. You get fewer errors, faster responses, and a smoother experience for both you and your customers.

If you are using n8n or thinking about it, this template gives you a solid, production-ready starting point that you can tweak for your own stack, APIs, and business rules.

Want to see the actual workflow and start using it?