Build a Rental Price Estimator with n8n & LangChain
Imagine never having to guess rental prices again or juggle spreadsheets and half-baked comps from three different tabs. With this n8n workflow template, you can spin up a rental price estimator that pulls in comparable listings, reasons about them with an LLM, and logs everything neatly for you.
In this guide, we will walk through how the template works, when to use it, and how to set it up step by step. Think of it as a friendly blueprint for automating your rental pricing using:
- n8n for workflow orchestration
- LangChain components with Cohere embeddings and Anthropic chat
- Supabase as a vector store
- Google Sheets for easy logging and analysis
If you work with rental properties, this setup can quickly become your go-to pricing assistant.
What this rental price estimator actually does
At a high level, this n8n workflow takes in property details, finds relevant comparable listings, then asks an LLM to suggest a fair rental price, complete with reasoning and a confidence score.
Under the hood, the template does all of this in one flow:
- Accepts property data through a webhook
- Splits long descriptions into chunks
- Generates embeddings with Cohere
- Stores and queries vectors in Supabase
- Uses a LangChain agent with Anthropic chat to reason about comps
- Maintains short-term memory across related queries
- Logs the final recommendation to Google Sheets
The result: a repeatable, auditable system that turns raw property data into a clear rental price recommendation.
When you would use this workflow
This template is ideal if you:
- Manage multiple rentals and need consistent pricing suggestions
- Want to standardize how your team evaluates comps
- Use or plan to use vector search and LLMs in your pricing process
- Like the idea of logging every recommendation for later review
Instead of manually hunting for comparables and eyeballing prices, you can send a simple JSON payload to a webhook and let the workflow do the heavy lifting.
Why this architecture works so well
This setup brings together lightweight automation with modern AI building blocks. Here is why it is worth using this specific pattern:
- Fast ingestion: A webhook receives property data instantly, and a text splitter breaks up long descriptions so they are easier to embed and search.
- Smart search: Cohere embeddings stored in Supabase power semantic search, so you are not just matching on keywords but on meaning.
- LLM reasoning: Anthropic (or another LLM) acts as an agent that reads the comparables, adjusts for differences, and recommends a price.
- Easy logging: Google Sheets acts as a simple analytics and audit layer, so you can track how prices change over time.
- Room to grow: You can plug in more data sources, analytics, or notifications without rethinking the whole design.
In short, you get a context-aware rental price recommender that is both practical and extensible.
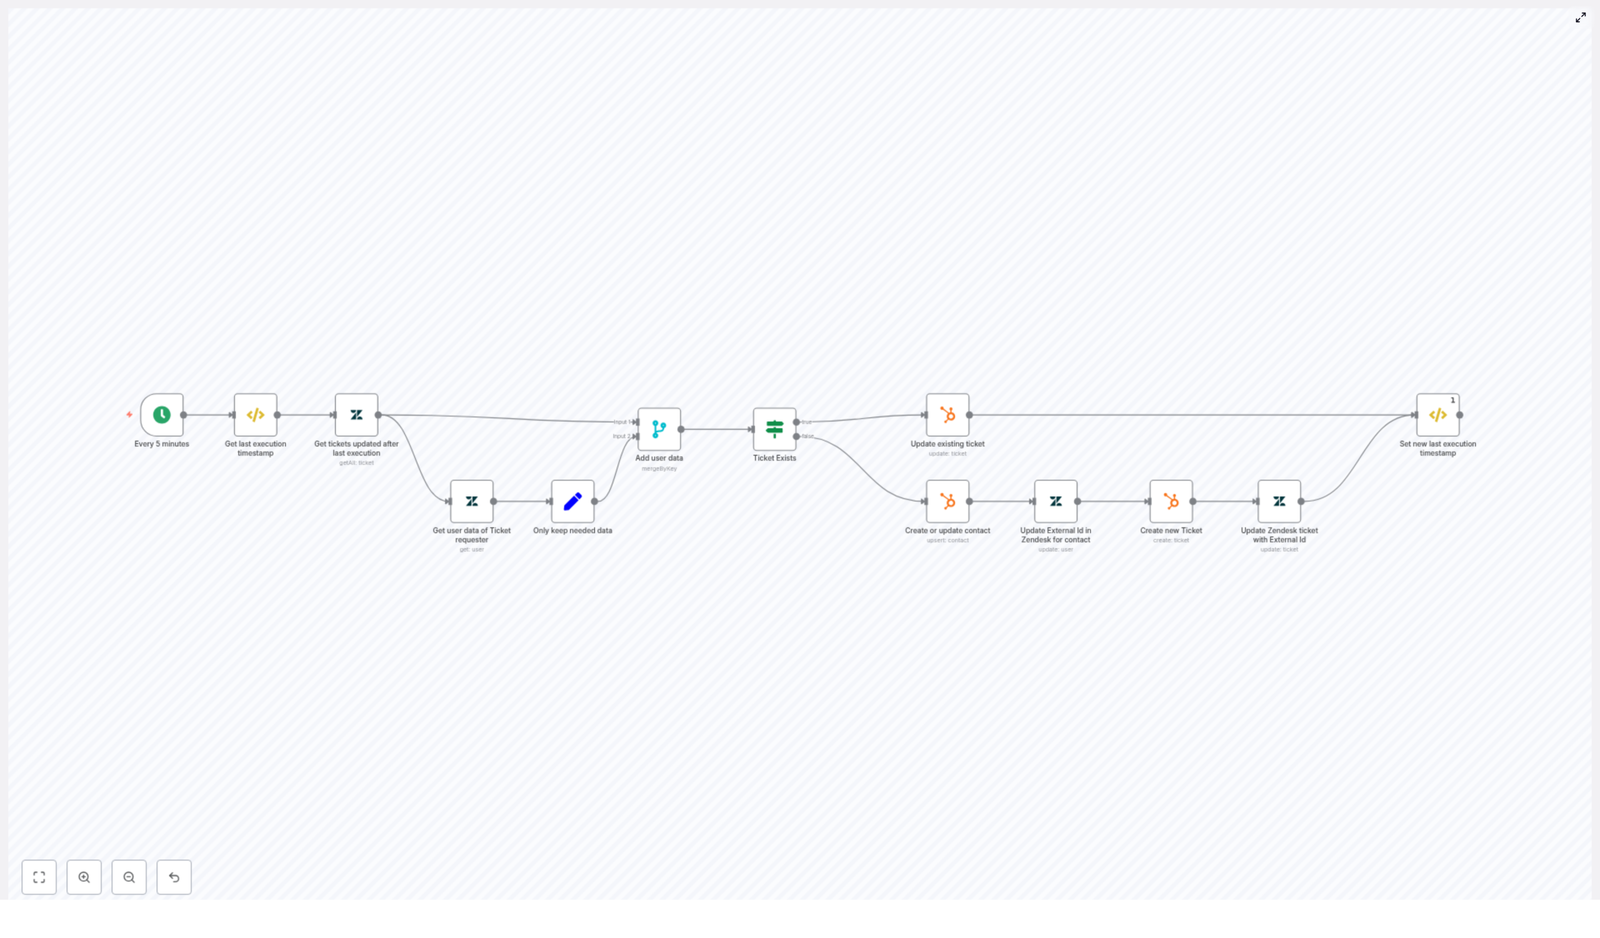
How the workflow is structured
Let us look at the main pieces of the n8n template and what each one does.
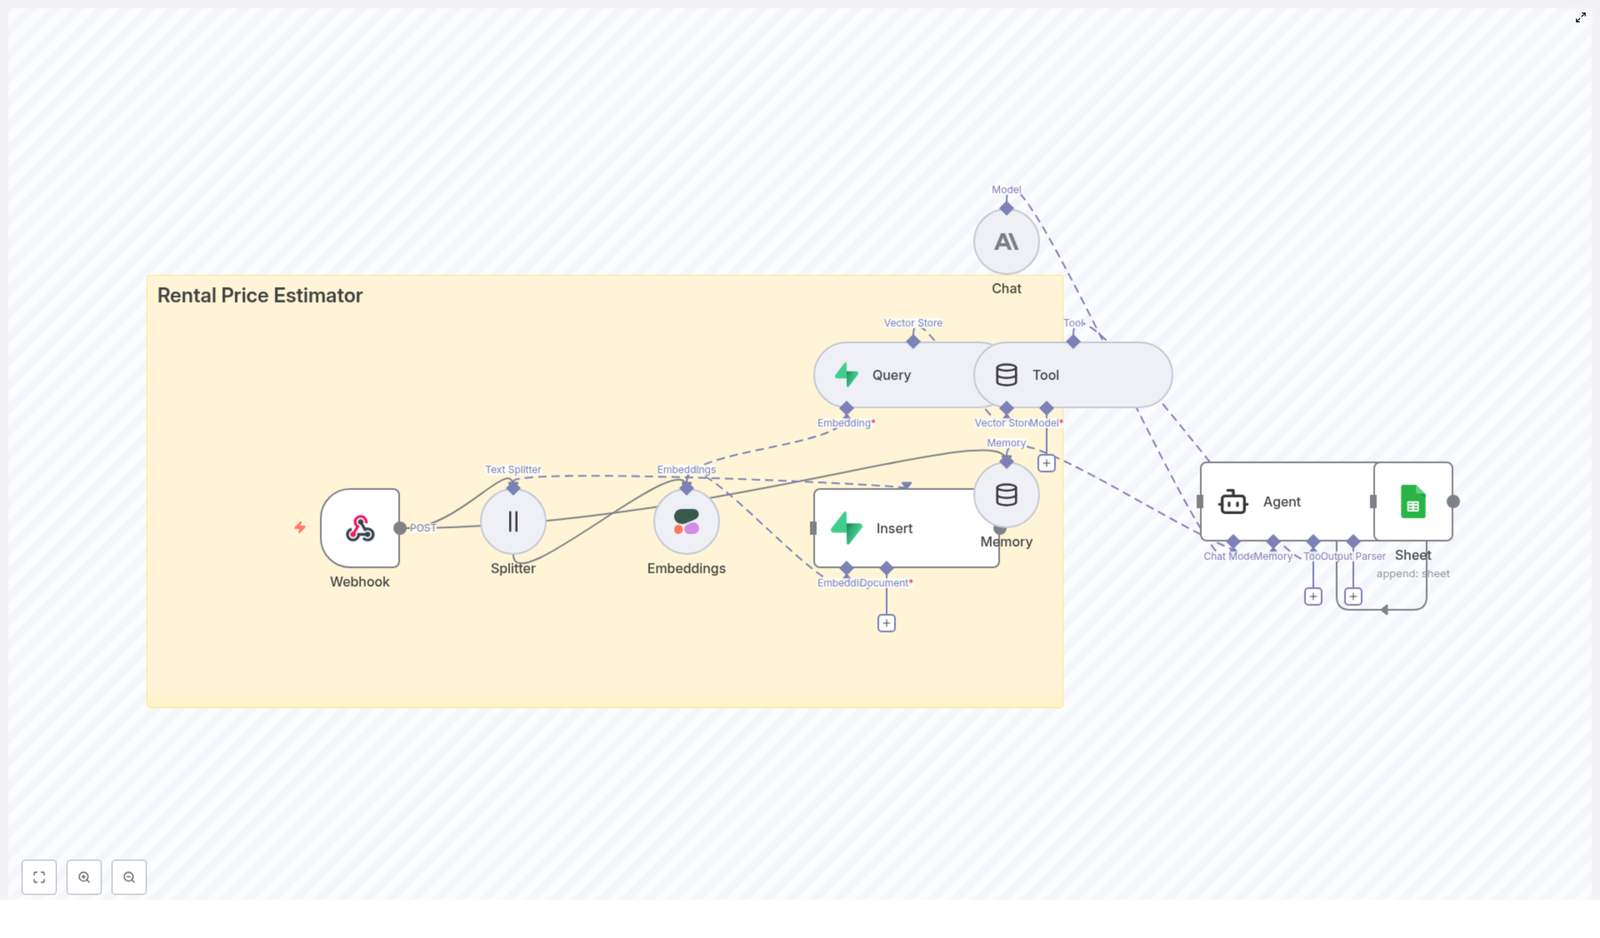
Core components
- Webhook
Receives property data such as address, bedrooms, bathrooms, square footage, amenities, and market notes. - Text Splitter
Breaks long descriptions into chunks so they can be embedded more effectively. The template uses a chunk size of400characters with40characters overlap. - Embeddings (Cohere)
Converts each text chunk into a vector representation using Cohere embeddings. - Supabase Insert
Stores vectors in a Supabase vector table namedrental_price_estimatoralong with helpful metadata like address and square footage. - Supabase Query
When you want to estimate a price, this node retrieves the most similar vectors, effectively pulling in relevant comparables and rules. - Tool + Agent (LangChain)
Exposes the vector results to an agent that uses Anthropic chat to synthesize a recommended price, a range, reasoning, and a confidence rating. - Memory
Keeps a short chat-memory window so related questions or follow-ups can reuse context. - Google Sheets
Logs the original input and the final recommendation for auditing, trend analysis, and debugging.
Step 1: Deploy the n8n workflow
First, import the provided template into your n8n instance. Once it is in your workspace, you will need to connect a few services so everything runs smoothly.
Make sure you have valid credentials for:
- Cohere API key for generating embeddings
- Supabase URL and service role key for creating and querying the vector index
- Anthropic (or another LLM provider) API key for the agent or chat node
- Google Sheets OAuth credentials for appending logs to your spreadsheet
Once those connections are set, the workflow can handle the full loop from input to recommendation.
Step 2: Configure the webhook input
The webhook is your entry point. This is where you send property details for pricing.
Configure the webhook node with:
- Path: for example,
/rental_price_estimator - Method:
POST
The webhook should accept JSON payloads like this:
{  "address": "123 Main St",  "bedrooms": 2,  "bathrooms": 1,  "sqft": 850,  "description": "Bright top-floor unit near transit; updated kitchen; no elevator",  "market_notes": "recent comps show rising demand in the neighborhood"
}
You can adjust the schema to match your own systems, but keep these fields or equivalents so the agent has enough context to work with.
Step 3: Split text and create embeddings
Property descriptions, inspection notes, or market reports can get long. Instead of embedding one huge block of text, the workflow splits them into smaller pieces for better semantic search.
The default configuration in the template uses:
- Chunk size:
400characters - Overlap:
40characters
You can tune these values. For very detailed descriptions or longer documents, you might increase the chunk size or adjust the overlap for more context in each chunk.
After splitting, the Cohere node generates embeddings for each chunk. Use a stable Cohere embedding model so that vectors remain consistent over time, especially if you plan to re-run queries against historical data.
Step 4: Store and query vectors with Supabase
Next, those embeddings are stored in a Supabase vector table. The template expects a table (or index) called rental_price_estimator.
Indexing data
When inserting vectors into Supabase, include useful metadata for each record, such as:
- Address
- Number of bedrooms
- Square footage
- Date or timestamp
- A short summary of the listing or notes
This metadata is very handy later when you want to filter comparables by neighborhood, size, or recency.
Querying comparables
When you request a price estimate, the Supabase query node pulls back the most similar vectors. A common pattern is to fetch the top N results, for example the top 5 comparables.
To improve the quality of matches, combine:
- Semantic distance from the embeddings
- Metadata filters, such as:
- Same or nearby neighborhood
- Square footage within about ±15 percent
- Recent dates, such as within the last 90 days
This gives the agent a focused set of comparables that are actually relevant to the property you are pricing.
Step 5: Let the agent reason about the price
Once you have a set of comparables, it is time for the LLM to do what it does best: reason over the data and produce a clear recommendation.
The LangChain Agent node receives:
- The formatted input property details
- The top vector results from Supabase (comps, rules, notes)
From there, prompt engineering is key. You want the agent to follow a structured thought process so that its output is both useful and consistent.
What your prompt should ask for
In your prompt template, guide the agent to:
- Compare the input property to the retrieved comparables
- Adjust for differences in size, condition, and amenities
- Suggest a rental price range and a single recommended price
- Explain the reasoning in a short, human-readable way
- Return a confidence level such as low, medium, or high
Prompt example
Given the input property and the following comparable listings, suggest a fair monthly rental price range and a recommended price. Show your reasoning and confidence.

Input: {address}, {bedrooms}BR, {bathrooms}BA, {sqft} sqft

Comparables:
1) {comp1_summary} - {comp1_rent}
2) {comp2_summary} - {comp2_rent}
...

Adjust for size, condition, and market notes.
You can iterate on this prompt over time to better match your local market rules or business preferences.
Memory, logging, and monitoring
Using memory for context
The workflow includes a short chat-memory window so the agent can maintain context across related queries. This is useful if you run a series of questions about the same property or ask follow-ups on the initial recommendation.
Logging to Google Sheets
For transparency and analysis, the final step is logging. The Google Sheets node records:
- The original input payload
- The recommended price and price range
- The confidence level
- A timestamp or date
This gives you an easy way to:
- Audit past recommendations
- Track model or market drift over time
- Spot patterns and manually correct outliers
If you prefer more advanced monitoring, you can also send key metrics to a dashboard tool like Grafana.
Sample output format
Here is an example of what the final output from the agent might look like:
{  "recommended_price": 2100,  "price_range": "2000-2200",  "confidence": "high",  "rationale": "Two nearby comparables at similar size are renting for $2,050 and $2,150. Adjusting for updated kitchen adds +$50."
}
This is easy to log, easy to read, and easy to integrate with other systems.
Best practices for accurate rental estimates
To get reliable results, a bit of data hygiene and tuning goes a long way.
- Normalize your data
Make sure units are consistent. Use the same floor-area units, bedroom counts, and amenity labels so you are comparing like with like. - Favor recent comparables
Include transaction dates in your metadata and prioritize comps from the last 90 days where possible, unless the market is very thin. - Watch for embedding drift
If you change embedding models in Cohere, plan to reindex critical data so semantic search remains accurate. - Use confidence wisely
When the agent reports low confidence, route those cases to a human for review rather than acting automatically. - Validate inputs
Add basic validation and rate limiting to your webhook to prevent garbage data or abuse from skewing your vector store.
Ideas for extending your rental price estimator
Once the core workflow is running, you can start to get creative. Here are a few directions to explore:
- Automated market updates
Ingest market data from CSV files or APIs (for example from an MLS) to keep your Supabase vector store in sync with current conditions. - Notifications and alerts
Connect messaging tools to notify property managers or owners whenever a new recommendation is generated. - A/B testing pricing strategies
Experiment with different prompts or heuristics to optimize for occupancy, revenue, or time on market. - REST integration
Expose a REST endpoint that returns machine-readable JSON with price, range, and rationale. Perfect for integrating with listing sites, CRMs, or internal tools.
Security and compliance considerations
Since you may be dealing with property owner information or sensitive data, it is important to treat security as a first-class concern.
- Secure all credentials for Cohere, Supabase, Anthropic, and Google Sheets.
- Use HTTPS for your webhook endpoints.
- Redact or avoid storing personally identifiable information in long-term logs where it is not strictly needed.
- For regulated markets, add a manual review queue for:
- Recommendations above certain thresholds
- Cases where the agent reports low confidence
This lets you enjoy the benefits of automation while staying compliant and responsible.
Putting it all together: how to get started
So how do you go from reading about this to actually using it in your pricing workflow?
- Import the “Rental Price Estimator” n8n template into your instance.
- Connect your credentials for Cohere, Supabase, Anthropic, and Google Sheets.
- Configure the webhook at a path like
/rental_price_estimator. - Send a few test POST requests with sample property data.
- Review the results in Google Sheets and compare them to your own market knowledge.
- Iterate on:
- Prompt templates
- Supabase filters and metadata
- Chunk sizes and overlap in the text splitter
After a few iterations, you will have a pricing assistant that feels tailored to your market and your way of working.
Ready to try it?
If you are looking to speed up and standardize rental pricing for your portfolio, this n8n template gives you a strong starting point. Import it, connect your tools, and start experimenting with real listings.
Need help adapting the estimator to your specific market rules or integrating it into your CRM or listing pipeline? You can always reach out for a consultation or request a custom workflow build.
Get started now: Import the “Rental Price Estimator” n8n template, fire a few test